
In this tutorial I’ll show you how to set up SSH key authentication on Ubuntu 22.04 to secure access to your server. We will use the PuTTY SSH client to manage the keys and connect to your server. PuTTY is a free, open-source application for connecting to hosts using SSH or Telnet, and has many features and options.
Contents
- Prerequisites
- Create Key Pair
- Authorized Keys
- Copy Private Key
- Connect Using SSH Key Pair
- Disable Password Authentication
- Troubleshooting
- Conclusion
- See Also
- Further Reading
Prerequisites
- You will need either a cloud server, local PC, or Raspberry Pi with Ubuntu 22.04 installed, with a non-root user and firewall configured (See Initial Server Set Up Guide and How to install Ubuntu Server Edition on Raspberry Pi)
- Download and install the PuTTY SSH client (for Windows, choose either 32-bit or 64-bit x86)
Create Key Pair
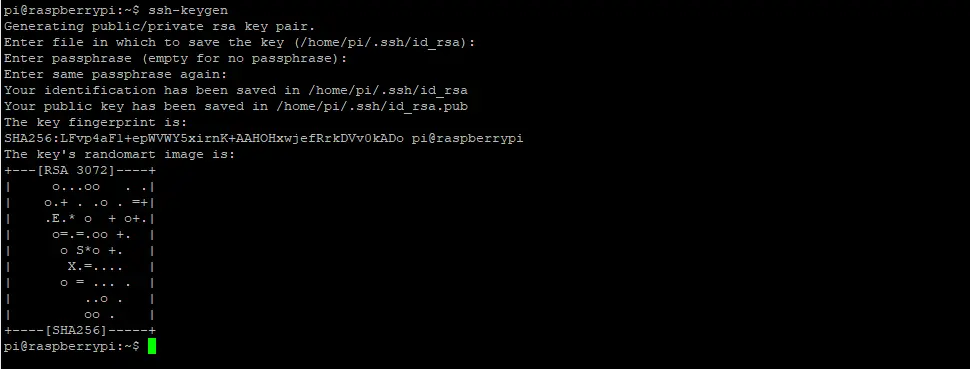
Most Linux distros (including Ubuntu) can generate a key-pair for you using the ssh-keygen command, so let’s go ahead and create them:
ssh-keygenBy default, ssh-keygen will create a 3072-bit RSA key-pair, which is fine in terms of security, but if you want to go a step further, use the -b 4096 flag to create a 4096-bit key as follows:
ssh-keygen -b 4096You will then be asked a series of questions. I suggest you answer as follows:
- Enter file in which to save the key – Leave this at default
/home/username/.ssh/id_rsaand press ENTER - Enter passphrase (empty for no passphrase): Enter a strong password for extra security (optional but highly recommended)
- Enter same passphrase again: Enter password again to confirm
You should now receive an on-screen confirmation that your key-pair has been created and saved in your users home directory.
Authorized Keys
Before we can begin using our RSA keys for authentication, we need to copy the public key to authorized_keys. Let’s change directories to your users home directory (replace username with your username):
cd /home/username/.sshUse the dir command to see the contents of the current hidden folder. You should see three files: authorized_keys where public keys are stored and authorized for use, the private key file id_rsa, and the public key id_rsa.pub:
dir
Let’s copy the public key to authorized_keys:
cp id_rsa.pub ./authorized_keysCopy Private Key
Let’s copy/download the private key so we can convert to a PuTTY .ppk file. Use the following command to display your private key on the screen, then highlight (PuTTY automatically copies to clipboard when you highlight text):
cat ~/.ssh/id_rsa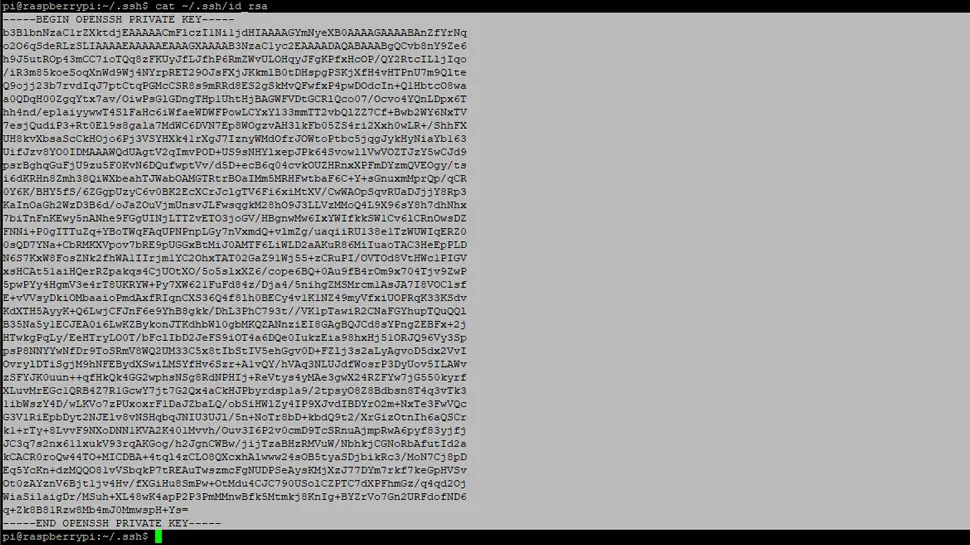
Create a new .txt file on your PC and name it id_rsa.txt, save it in a secure place, then paste the RSA key into it.
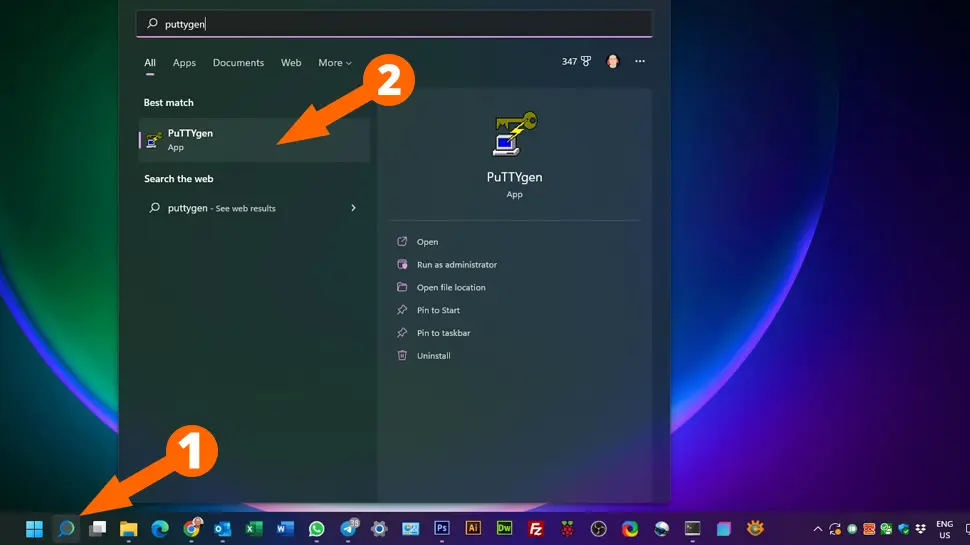
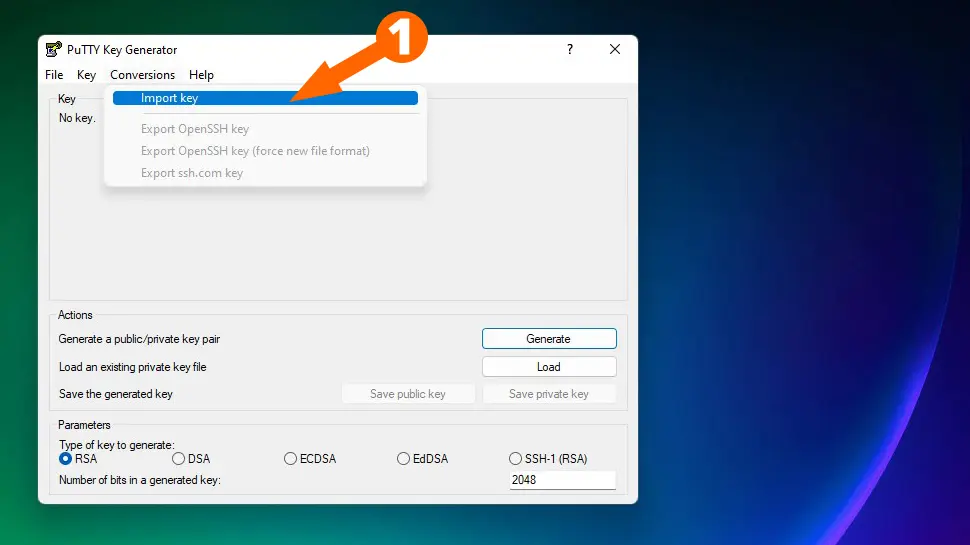
Click the search icon on your taskbar and search for “puttygen”, then click the PuTTYgen app icon:
Click Conversions -> Import Key from the top menu and choose your id_rsa.txt file. PuTTYgen will ask you to enter the passphrase you used when you created the key-pair, so go ahead and enter it.
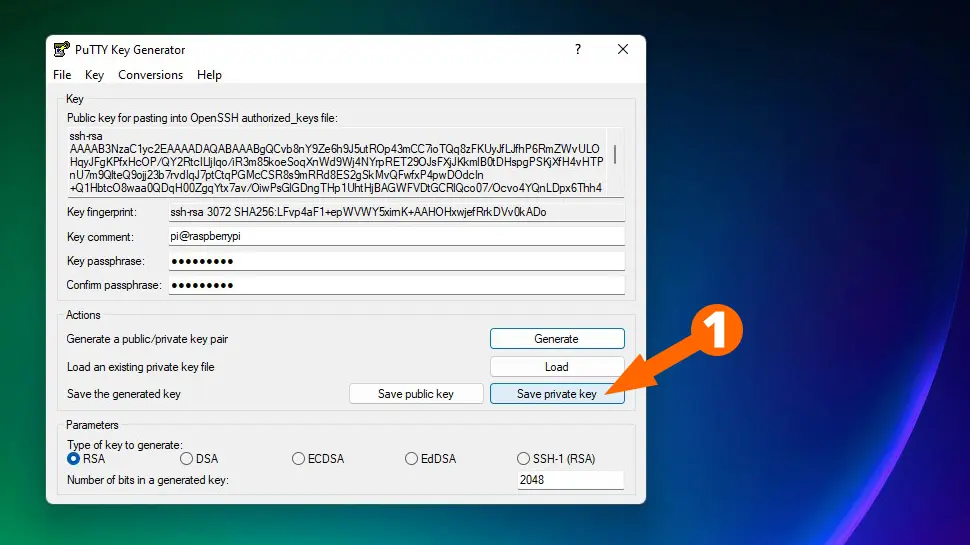
Click Save private key, name your file id_rsa.ppk and choose a secure location to save it.
Connect Using SSH Key Pair
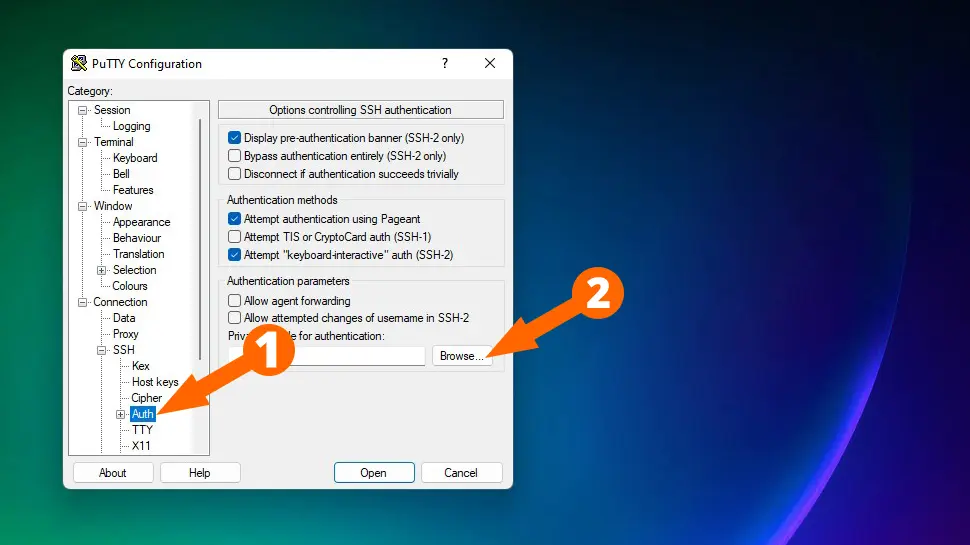
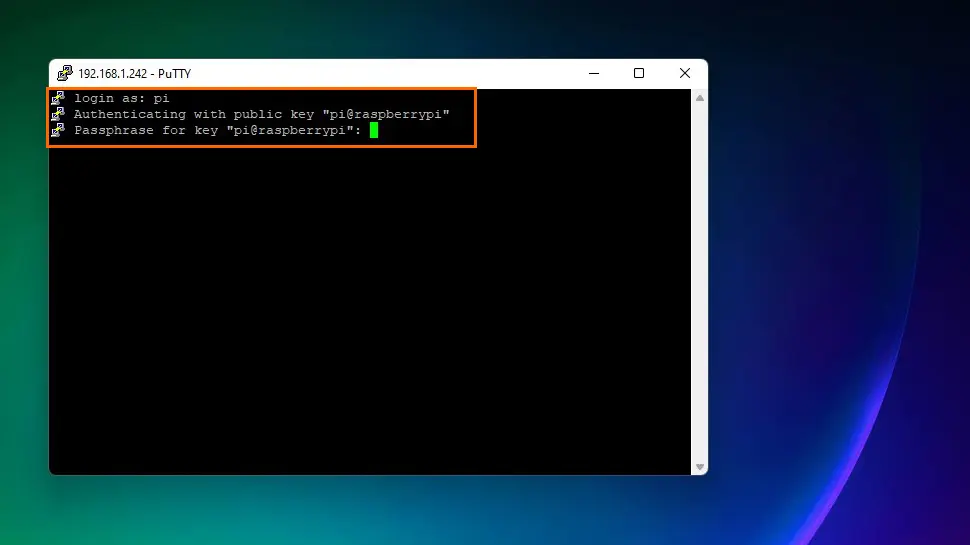
Now it’s time to test your new key-pair and make sure you can login to your server. Open PuTTY and enter the IP address/hostname of your server into the Host name or IP address field. On the left-side menu, select Connection -> SSH -> Auth, then click the Browse button under the Private keys for authentication heading, and select your id_rsa.ppk file:
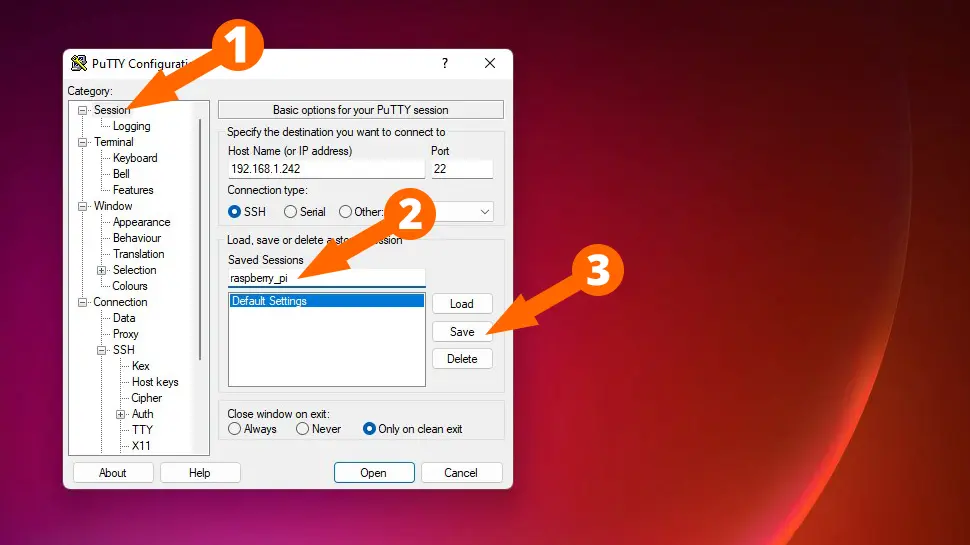
If you want to save this session so that you don’t have to repeat this process, click the Session heading, then enter a name inside the Saved Sessions field, then click Save:
Finally, click the Open button bottom-right to begin the SSH session. Ubuntu will ask you your username first, then the passphrase you used when you created the key-pair:
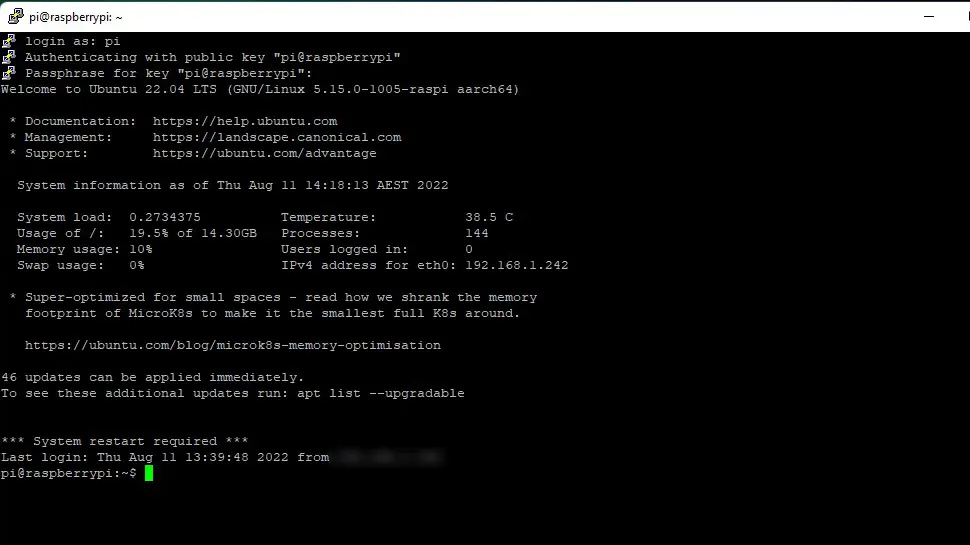
You should see the Ubuntu Welcome message along with some server statistics:
Once you have successfully logged in (and saved your private key), you need to delete the private key from your server as it’s a security risk (replace username with your username):
sudo rm -rf /home/username/.ssh/id_rsaDisable Password Authentication
Now that you have key-based authentication working, you should disable password authentication for SSH to stop brute-force attacks, but note: You must repeat this entire guide for root user, otherwise you will not be able to login as root! Once you have key-based authentication working for root user and your sudo user, you can safely disable password authentication for SSH.
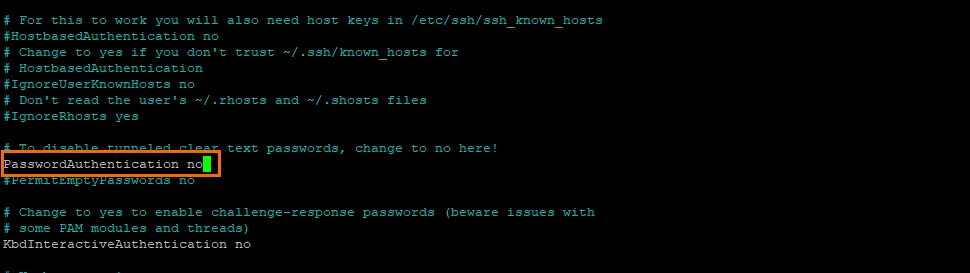
Open the sshd_config file:
sudo nano /etc/ssh/sshd_configChange PasswordAuthentication yes to PasswordAuthentication no.
Then save ctrl + o, ENTER and exit nano ctrl + x.
You can safely logout and log back in using your SSH keys profile in PuTTY.
Troubleshooting
Sometimes permissions on the .ssh directory need to be changed in order for key authentication to work. Go ahead and change ownership of your users home directory (replace username with your users name):
sudo chown -R username:username /home/username/.sshConclusion
Your Ubuntu 22.04 server is more secure now that you have SSH key authentication set up. If you ran into any issues, look at the troubleshooting section above, make a comment, or contact me on socials/email.
See Also
- Initial Server Setup with Ubuntu 22.04
- Install Ubuntu 22.04 Server Edition on Raspberry Pi
- The Ultimate Web Server on Ubuntu 22.04
Comments
There are currently no comments on this article.
Comment