
Today I’ll show you how to host a website on a Raspberry Pi using your own domain name, an SSL certificate, all on your home/work network. We will use a dynamic DNS service to update your IP address automatically so the Internet knows where your website is.
This is quite a long article and can be complex in some areas, so please set aside some time to complete it.
Contents
- Prerequisites
- Install LAMP server packages
- Configure Apache Virtual Hosts
- Installing Certbot Package
- Check your ISP for Blocked Ports
- Set Up Dynu
- Edit DNS Records
- Forward Ports & Configure Dynamic DNS
- Install an SSL Certificate
- Verify Certbot is on Autorenewal
- Troubleshooting
- Conclusion
- See Also
- Further Reading
Prerequisites
- I recommend either a Raspberry Pi 3B+, Raspberry Pi 4, or Raspberry Pi 5 with as much RAM as you can afford (I’m using a RPi 4 with 4GB RAM in this guide). You’ll need a good quality micro-USB power supply (RPi 4 Power Supply, RPi 3 Power Supply, or Raspberry Pi 5 45 watt Power Supply).
- Your Pi must have Ubuntu 22.04 Server Edition installed and configured (See my guide: Install Ubuntu 22.04 Server Edition on Raspberry Pi)
- You’ll need a domain name if you want to use a Let’s Encrypt SSL certificate. Buy one for $0.99 cents from Namecheap
Install LAMP server packages
We’re going to setup a standard LAMP (Linux, Apache, MySQL, PHP) server to host your website, and use Apache Virtual Hosts so we can generate a valid SSL certificate with Let’s Encrypt CA. LAMP servers are by far the most popular web hosting platform and runs perfectly on Ubuntu.
Install Apache and Configure Firewall
Before we begin installing packages, let’s update Ubuntu. We’ll run apt to update the cache, then upgrade packages:
sudo apt update && sudo apt upgrade -yAnd just to be on the safe side, let’s reboot:
sudo rebootOnce your Pi reboots, login again and install the Apache web server package:
sudo apt install apache2 -yOnce Apache is installed, let’s allow it through the UFW firewall (Ports 80 and 443) as well as OpenSSH. Let’s see what options we have:
sudo ufw app list
Each profile/option has a different meaning:
- To allow only port 80 (unsecure) use “Apache”.
- To allow only port 443 (secure SSL/HTTPS) use “Apache Secure”.
- To allow both port 80 and port 443 use “Apache Full” which is the option we will use:
Let’s allow Apache on both port 443 and port 80:
sudo ufw allow in "Apache Full"Then we allow OpenSSH so you can login with an SSH client after the firewall is enabled:
sudo ufw allow OpenSSHNow we enable the UFW firewall:
sudo ufw enableLet’s check the status of UFW firewall:
sudo ufw status
If you have the above result, you’re good to go.
Enable mod_rewrite & mod_ssl
Let’s enable some Apache modules that we’ll need later. mod_rewrite enables Apache to rewrite URLs and is generally required by most content management systems like WordPress. mod_ssl is required for running the secure HTTPS version of your website. Let’s enable them and restart Apache:
sudo a2enmod rewrite sslsudo systemctl restart apache2Install MySQL
Let’s install the MySQL software package for database creation and management:
sudo apt install mysql-server -yAfter MySQL has finished installing, we need to set the root password to avoid the following error during the mysql_secure_installation script:
Failed! Error: SET PASSWORD has no significance for user ‘root’@‘localhost’ as the authentication
method used doesn’t store authentication data in the MySQL server. Please consider using
ALTER USER instead if you want to change authentication parameters.
login to MySQL without a password (just hit ENTER at password prompt):
sudo mysql -uroot -pThen we set the MySQL root password (replace mynewpassword with your chosen password):
ALTER USER 'root'@'localhost' IDENTIFIED WITH mysql_native_password by 'mynewpassword';Flush privileges and exit MySQL:
FLUSH PRIVILEGES;EXIT;Now we can run the installation security script to secure MySQL with this command:
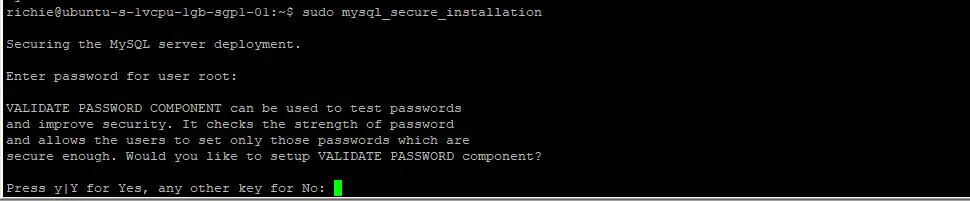
sudo mysql_secure_installationYou will presented with the Validate Password Component first. This component can enforce strong passwords for all MySQL users. I usually choose to disable this in testing mode, but if you’re planning on using your server for a production environment, definitely enable it. If you do enable it, you’ll need to choose from three different levels of password complexity: low, medium and strong.
I suggest answering the questions as follows:
- VALIDATE PASSWORD COMPONENT – N or Y
- Change the password for root ? – N
- Remove anonymous users? – Y
- Disallow root login remotely? – Y
- Remove test database and access to it? – Y
- Reload privilege tables now? – Y
Install PHP
Let’s install the PHP package with only the required modules (I will give you some options for common packages further below). We install PHP using the apt package manager again:
sudo apt install php libapache2-mod-php php-mysql -yLet’s make sure PHP was installed:
php -vYou should see something similar to this:

Optional PHP Packages
There a hundreds of PHP packages available. These are packages I recommend you install:
sudo apt install -y php-{common,mail,mysql,xml,xmlrpc,curl,gd,imagick,cli,dev,imap,mbstring,opcache,soap,zip,intl}Configure Apache Virtual Hosts
Let’s create the website directory inside /var/www/:
sudo mkdir /var/www/ricbre.comThen change ownership of the folder to www-data user and group:
sudo chown -R www-data:www-data /var/www/ricbre.comChange the default group so that all files and folders will belong to www-data regardless of which user created them:
sudo chmod g+s /var/www/ricbre.comLet’s also add user pi to the www-data group:
sudo usermod -a -G www-data piNow we create a new Virtual Host file using nano to hold all the configuration data:
sudo nano /etc/apache2/sites-available/ricbre.com.confInside this new file, copy and paste the following configuration data replacing ricbre.com with your own domain name:
<VirtualHost *:80>
	<Directory /var/www/ricbre.com>
        Options Indexes FollowSymLinks
        AllowOverride All
        Require all granted
	</Directory>
    ServerName ricbre.com
    ServerAlias www.ricbre.com
    ServerAdmin webmaster@localhost
    DocumentRoot /var/www/ricbre.com
    ErrorLog ${APACHE_LOG_DIR}/error.log
    CustomLog ${APACHE_LOG_DIR}/access.log combined

</VirtualHost>
Then save ctrl + o, ENTER and exit nano ctrl + x.
Next, we enable your new website:
sudo a2ensite ricbre.comThen we disable the default Apache site so it doesn’t override your new site:
sudo a2dissite 000-defaultLet’s confirm that your new website’s configuration is working (you should see the message syntax OK):
sudo apache2ctl configtest
To enable the changes we need to restart Apache:
sudo systemctl restart apache2Installing Certbot Package
Certbot is a Let’s Encrypt package that will automatically update and install valid, in-date SSL certificates for your website. Let’s install Cerbot and a Python package that enables Certbot to configure Apache directives:
sudo apt install certbot python3-certbot-apache -yLater in this article, we will install an SSL certificate using Certbot, but first, we need to configure your router, Dynu and possibly your ISP settings.
Check your ISP for Blocked Ports
Many ISP (Internet Service Providers) block certain ports for incoming traffic, and frequently they include both ports 80 and 443. We need those ports to be open for inbound traffic for your website to work. Head over to your ISP account and look for Safety Settings or Port Blocking, and unblock those ports, but note: If you are only trying this for fun, be sure to enable port blocking after you’ve finished as it does leave you more open to being hacked.
Set Up Dynu
The best free dynamic DNS service I recommend is Dynu who let you host your own domain name at no extra cost (most others charge extra for this service). Go ahead and create a free account, then follow the instructions below:
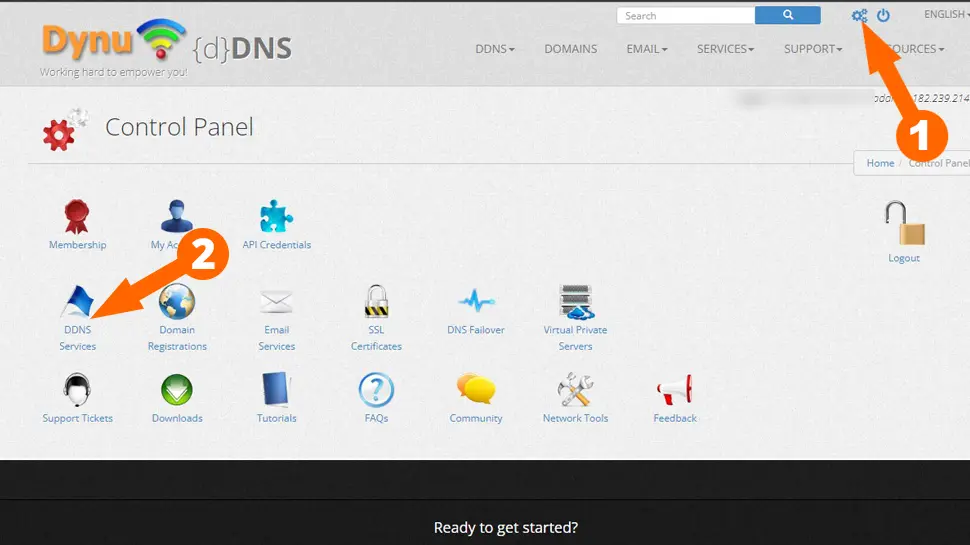
- Login to Dynu and go to Control Panel (Gears icon, top-right), then click DDNS Services
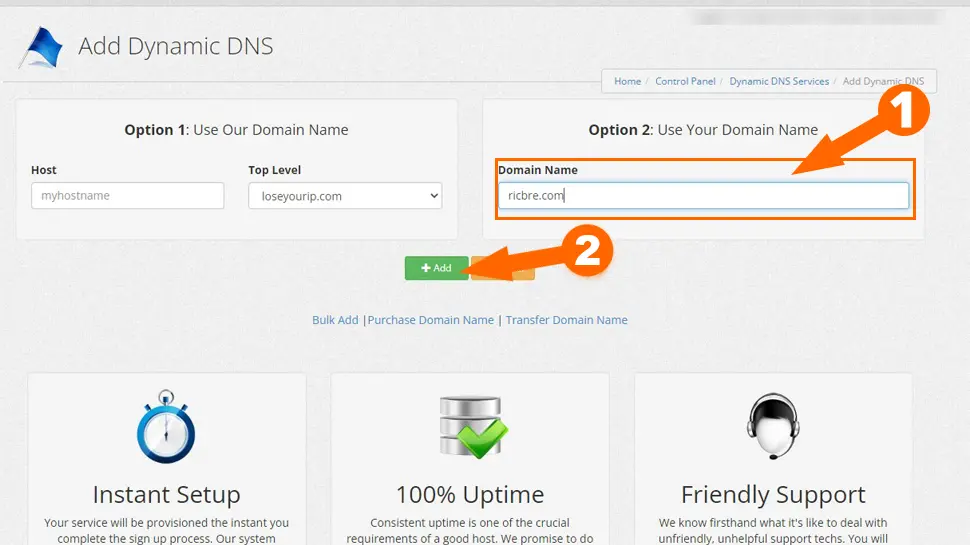
- Under Option 2 enter your domain name and click Add
- Leave everything at defaults and click Save
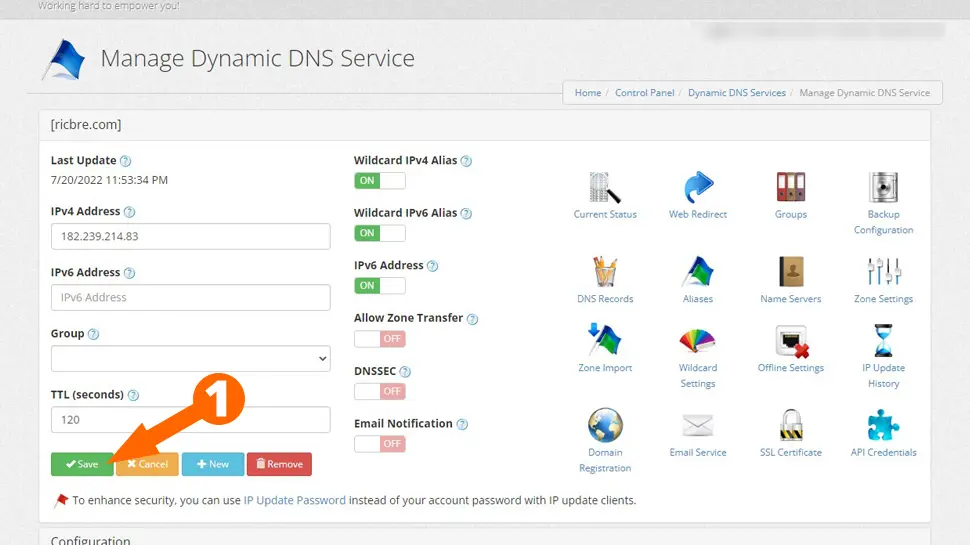
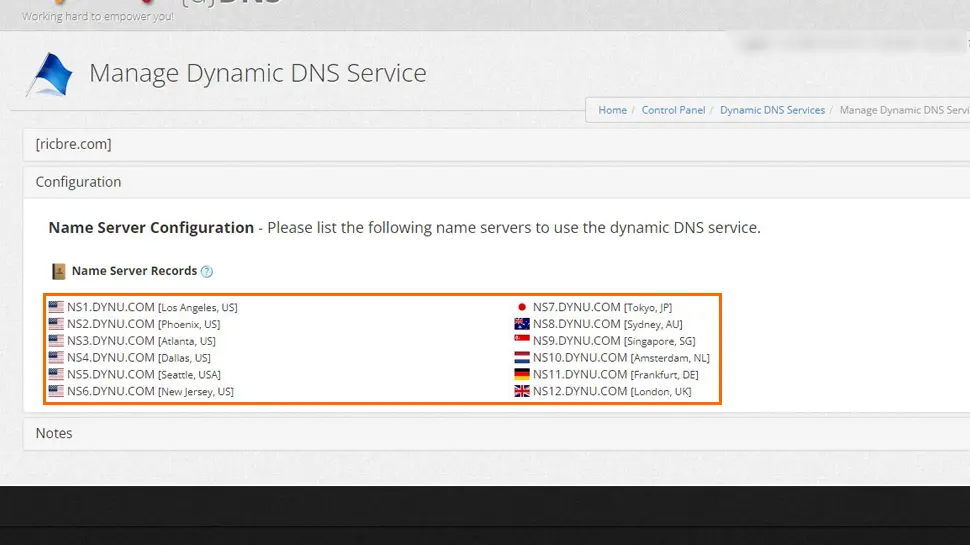
- Choose three Dynu DNS servers (doesn’t really matter which ones) and note them down
Edit DNS Records
You need to login to your domain name registrar and edit the DNS records. For this article, I am using GoDaddy.
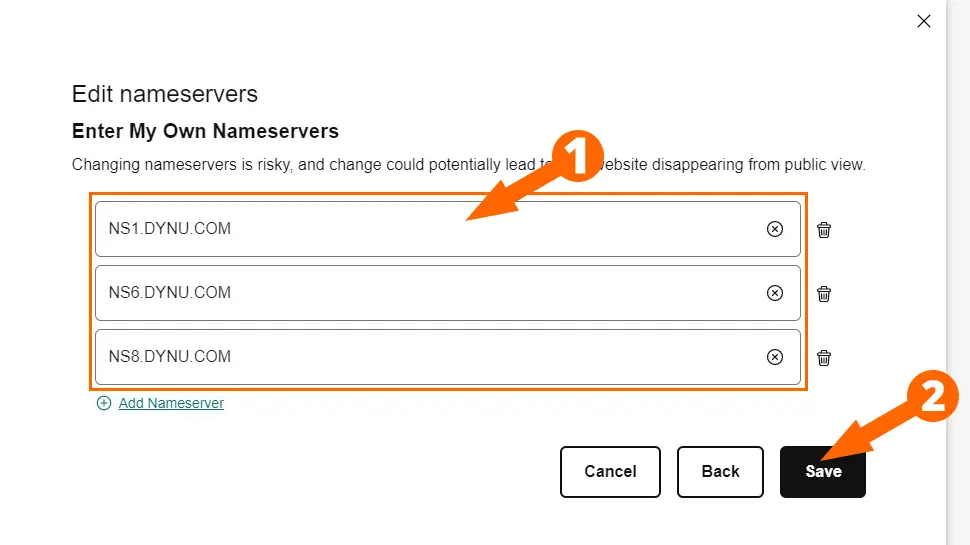
- Go to DNS settings and click Edit Nameservers
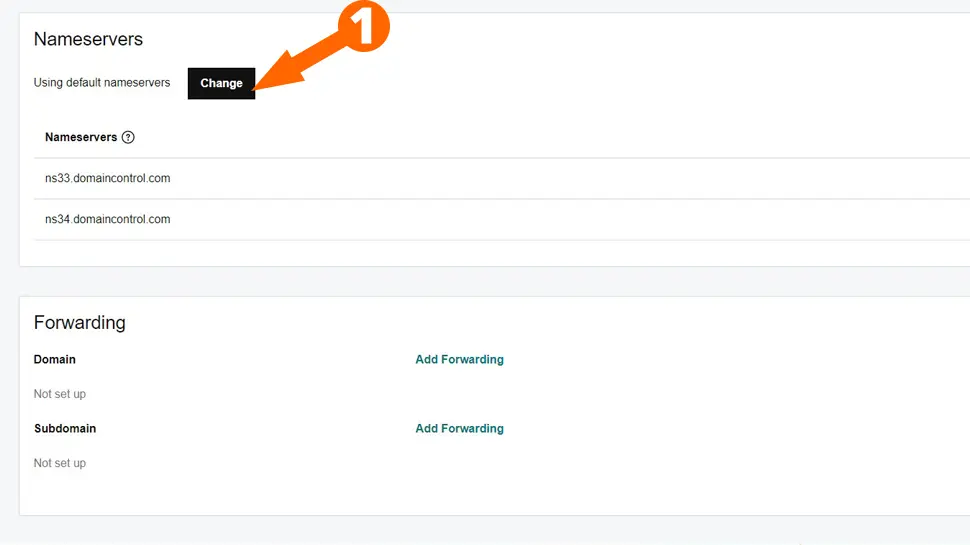
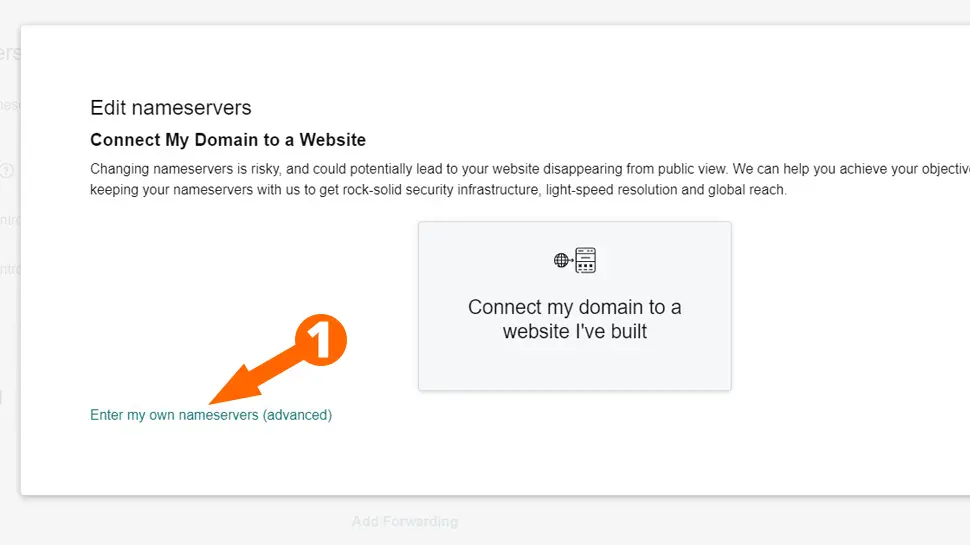
- Click Edit my own nameservers
- Enter three Dynu nameservers and click Save
- Check Yes, I Consent… and click Continue
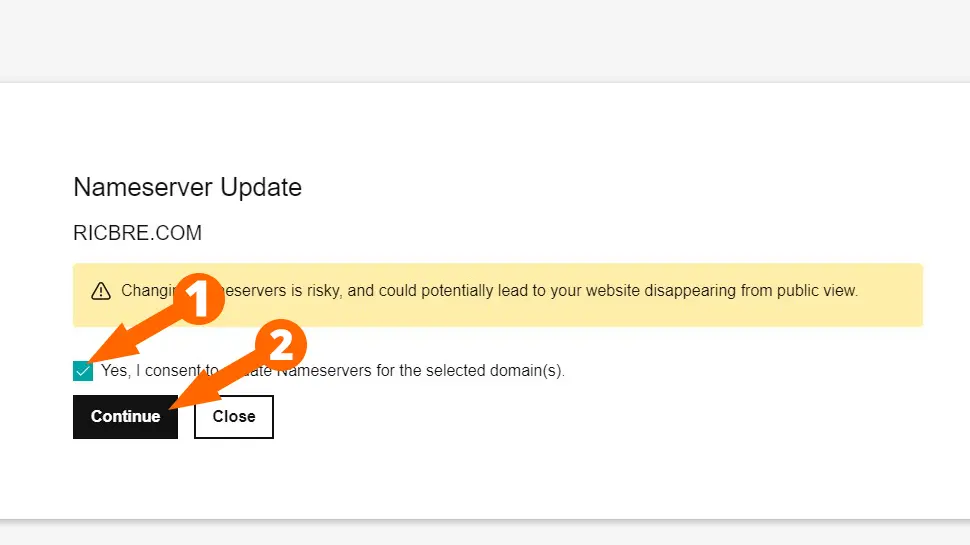
- Please Note: It can take up to 24 hours to DNS records to propagate.
Forward Ports & Configure Dynamic DNS
You need to login to your modem/router and forward ports 80 and 443 to your Raspberry Pi. Head over to PortForward and look for your router model, then follow the instructions to forward ports 80 and 443. Make sure your Raspberry Pi is connected to your router. If your router isn’t listed, follow the instructions below:
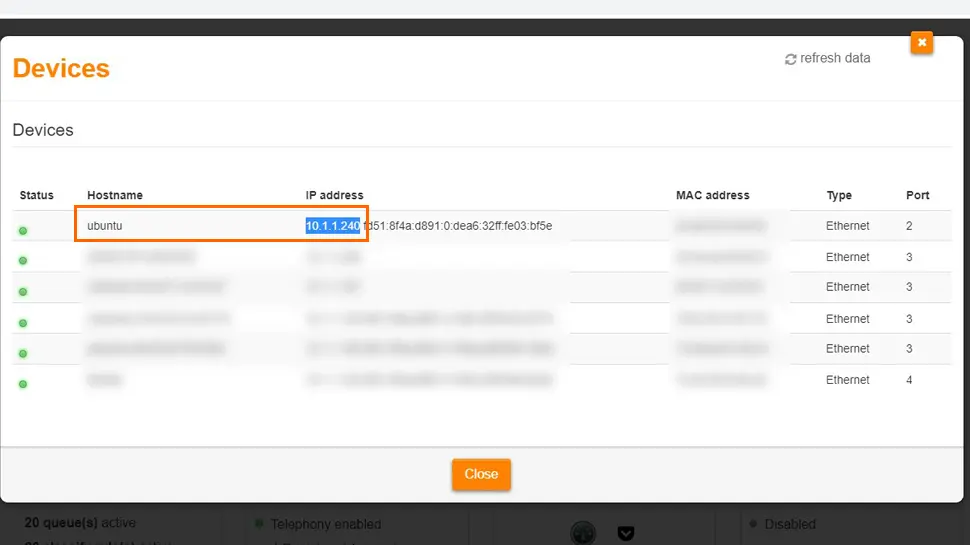
- We need to find your Pi’s IP address. Inside your router, look for Devices or DHCP Leases

- Copy your RPi’s IP address to clipboard
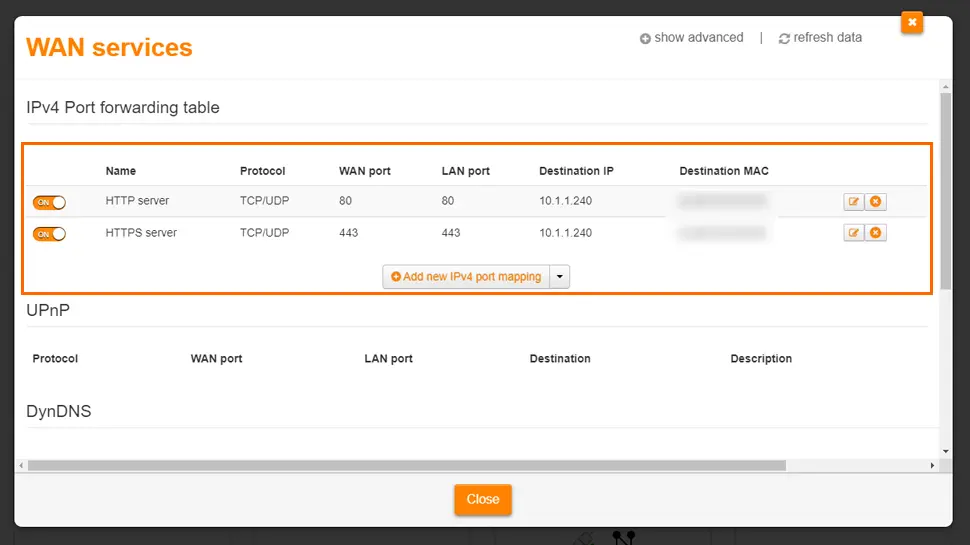
- Look for WAN Services or Port Forwarding
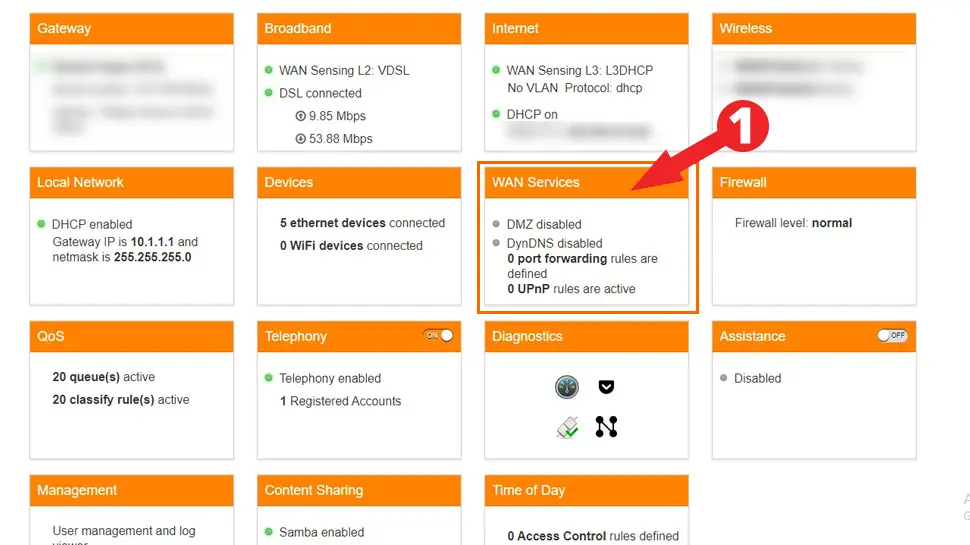
- You will need to forward ports 80 and 443 to your Raspberry Pi. Each router is slightly different, but I’ll give you as much help as I can. Some routers also have presets so be sure to look for them, otherwise these are the settings:
- Port Forward 80
- Name – HTTP Server
- Protocol – TCP/UDP
- WAN Port – 80
- LAN Port – 80
- Destination IP – [your raspberry pi’s IP address, i.e. 10.1.1.240]
- Destination MAC – [your raspberry pi’s MAC address]
- Port Forward 443
- Name – HTTPS Server
- Protocol – TCP/UDP
- WAN Port – 443
- LAN Port – 443
- Destination IP – [your raspberry pi’s IP address, i.e. 10.1.1.240]
- Destination MAC – [your raspberry pi’s MAC address]
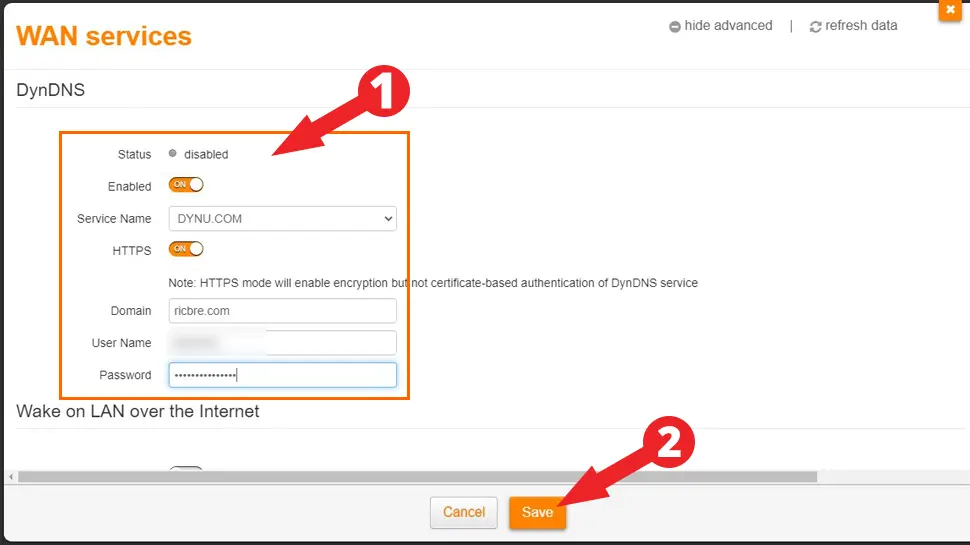
- Look for DynDNS or Dynamic DNS service and enable it. If you have an option to enable HTTPS, enable it. Enter your domain name and Dynu credentials, then click Save. Note: If your router doesn’t support DynDNS, download Dynu’s IP update tool instead.
Create a Test HTML Page
Let’s create a new HTML document inside your websites root folder:
sudo nano /var/www/ricbre.com/index.htmlThen paste the following code inside the new document:
<html>
<head>
<title>Welcome to RicBre</title>
</head>
<body>
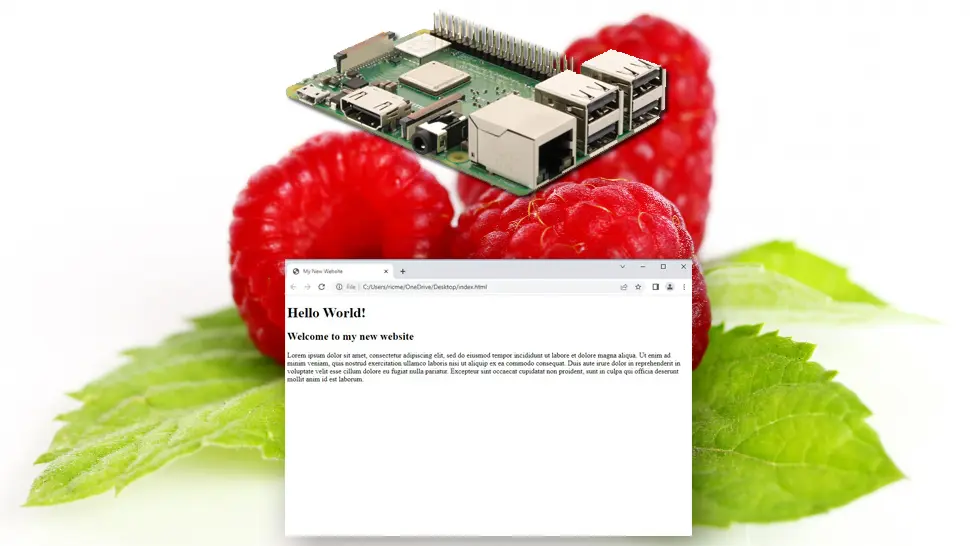
<h1>Hello World!</h1>
<p>Welcome to my new website <strong>ricbre.com</strong>.</p>
</body>
</html>
Then save ctrl + o, ENTER and exit nano ctrl + x..
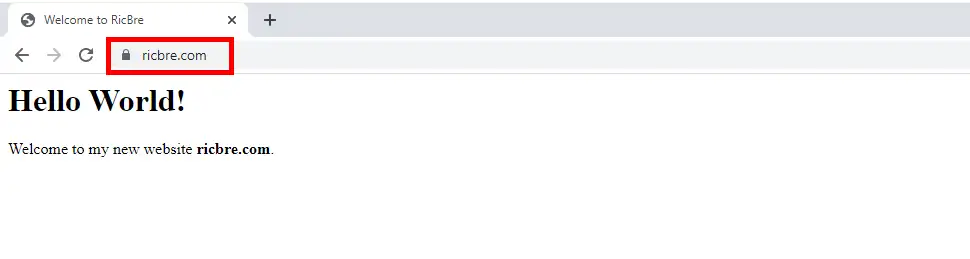
Open your web browser and enter your domain name address using HTTP (not HTTPS) otherwise you’ll get an err_connection_refused error:
http://www.ricbre.com/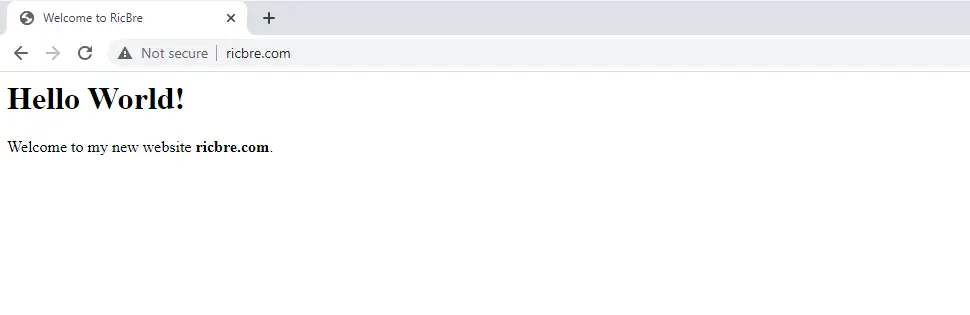
If your web browser timed out or you got an error other than err_connection_refused, head to the troubleshooting section
Install an SSL Certificate
Now let’s install a fresh SSL certificate for your website. Initiate the Certbot package as follows:
sudo certbot --apacheCerbot will then ask you a series of questions as follows (replace my info for your own):
- Enter email address (used for urgent renewal and security notices) – me@mywebsite.com
- Please read the Terms of Service – Y
- Will you share your email address? – Y or N
- Which names would you like to activate HTTPS for? – ENTER for all
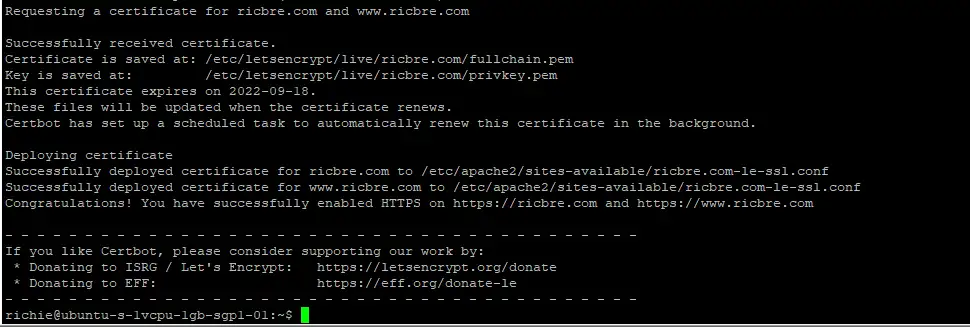
Certbot will then request SSL certificates for your domain name(s) listed. You should receive confirmation as follows (my domains is ricbre.com and www.ricbre.com) If you get an error, look at the troubleshooting section:
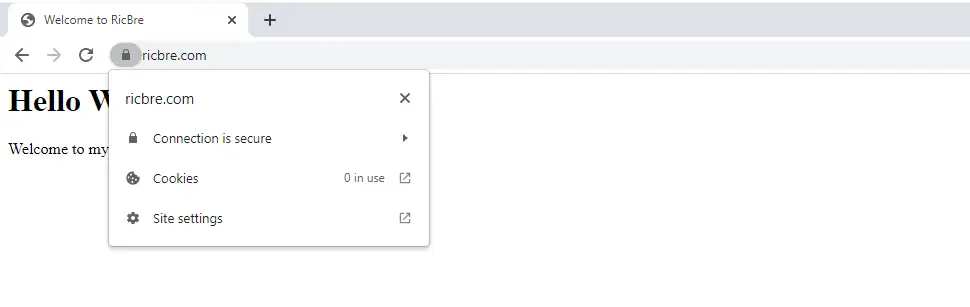
Open a new tab in your web browser and enter your domain name (in my case it’s ricbre.com). You should now see your website as HTTPS with the secure lock:
Click on the lock to see security status:
Verify Certbot is on Autorenewal
We need to make sure Certbot will auto-renew your SSL certificates every 90 days. For this we use the certbot.timer to check:
sudo systemctl status certbot.timerYou should see something similar to the following:

We can test the autorenewal process but doing a dry run:
sudo certbot renew --dry-runThe result should be as follows (replace domain names with your domain names):
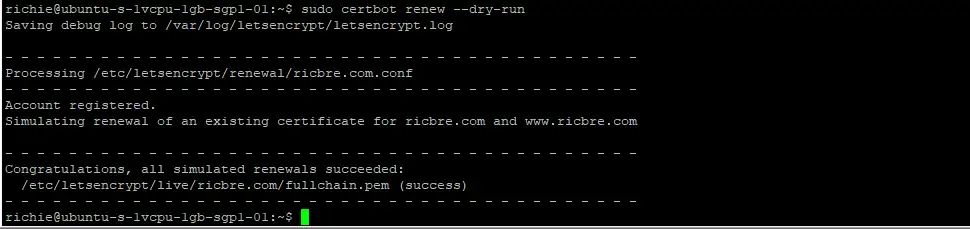
Troubleshooting
The most common errors will be with the Certbot package and blocked ports, or ports not forwarded correctly. If you get the following error after trying to install an SSL certificate, your ISP is likely still blocking ports, or your router/modem firewall is not configured properly to forward ports 80 and 443:
Timeout during connect (likely firewall problem)
Hint: The Certificate Authority failed to verify the temporary Apache configuration changes made by Certbot.
Ensure that the listed domains point to this Apache server and that it is accessible from the internet
Head over to this port forwarding checker and test ports 80 and 443.
This error can also result due to DNS records that have not fully propagated yet. It can take up to 24 hours for DNS to propagate the Internet, but usually about 4 hours. If you’ve only recently updated them, wait a few hours before trying to access your website or running Certbot.
Conclusion
You should now have a Raspberry Pi web server with SSL certificate running on your home/work network. If you had any issues, let me know in the comments or socials/email.
See Also
- Install Ubuntu 22.04 Server Edition on Raspberry Pi
- Raspberry Pi LAMP Server – Complete Guide
- Build a Raspberry Pi NAS Server
- How to Install and Configure Raspberry Pi OS
Comments
There are currently no comments on this article.
Comment