

In this tutorial, I’ll show you how to turn a Raspberry Pi into a video wall for digital signage with the Info-Beamer operating system. There are many other options you can explore with Info-Beamer too, like live streaming, scheduled video player, reception screen, full-screen web browser, Kiosk, photo booth, Twitter feed, and more.
The Info-Beamer web portal acts as a central hub to fully control as many devices you want, organize and apply content to the devices, add or edit packages, and so on. All you need to connect to your Raspberry Pi is a screen, no keyboard or mouse necessary.
Contents
- Prerequisites
- Install Info-Beamer OS
- Register Device
- Add Package
- Check Statistics
- Map Screen
- Conclusion
- See Also
- Further Reading
Prerequisites
- You’ll need a RPi-3, RPi-4, RPi-400, with a minimum 8GB microSD card
- A free account from Info-Beamer: Sign Up here
- A suitable monitor to display your product or service. I recommend a 4K monitor for Raspberry Pi 4, or a 1080p monitor for any other Raspberry Pi version.
Install Info-Beamer OS
Let’s install the Info-Beamer OS onto your SDHC card.
- Download and install Raspberry Pi Imager
- Insert your SDHC card into your computer and open the Raspberry Pi Imager app
- Click the CHOOSE OS button
- Click Other specific-purpose OS -> Digital signage -> Info-Beamer Digital Signage -> Info-Beamer OS
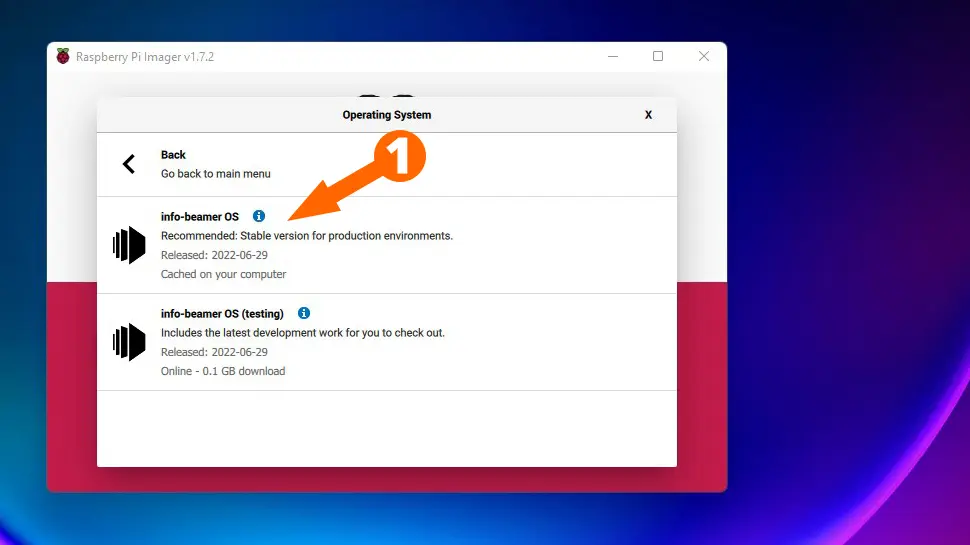
- Click the CHOOSE STORAGE button and select your SDHC card
- Click the WRITE button, then YES to confirm
Once the Raspberry Pi Imager has finished writing to the SDHC card, insert the card into your Pi, plugin a monitor, and power on.
Register Device
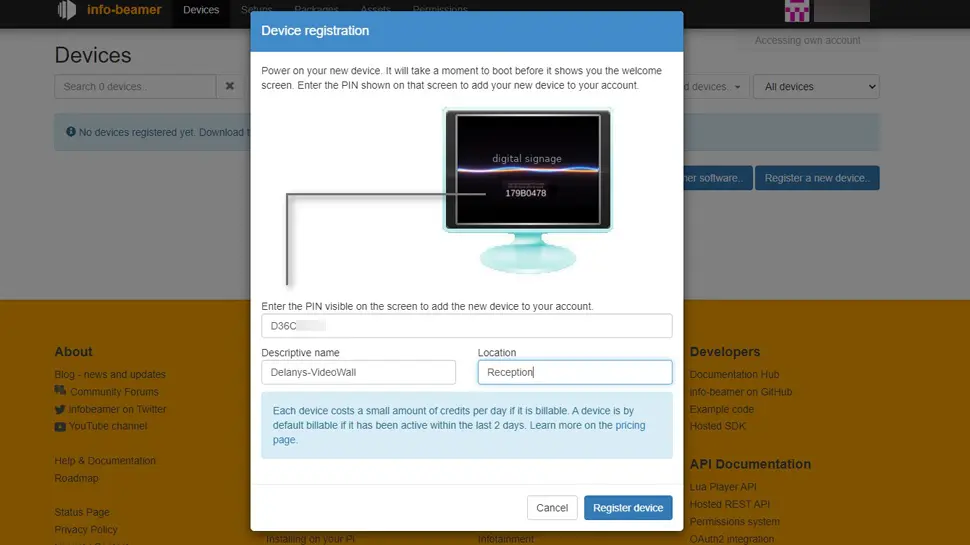
You Raspberry Pi should now be booted up and displaying the Info-Beamer device code similar to the image below:
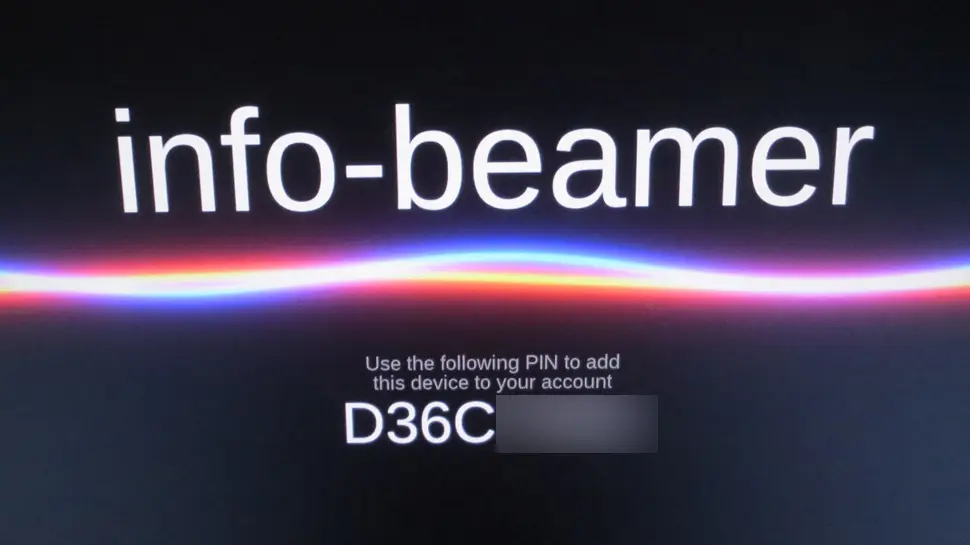
Write down the code and open your web browser, then login to the Info-Beamer website. Click on the Devices icon, then click the Register a new device button. Enter the code, give your device a descriptive name, and optionally a location:
Add Package
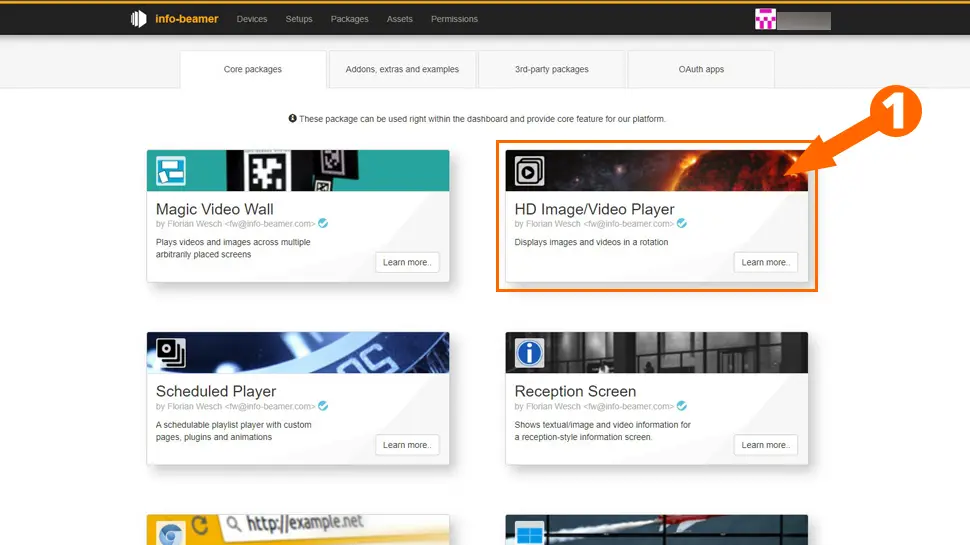
On the Info-Beamer website, click Packages from the top menu, then click Add package -> Import from store:
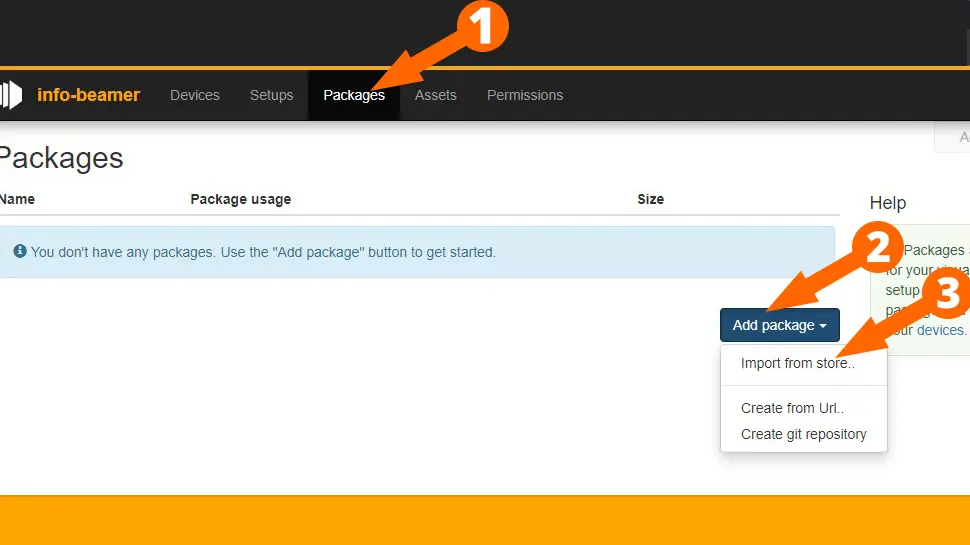
Here you will find many different packages to choose from. I will be installing the HD Image/Video Player package for a basic video wall/player. Once you’ve decided on a package:
- Click the Learn more button
- On the next screen, click Import Package
- Now scroll down and click Create Setup, then give your new setup a name, then click Create
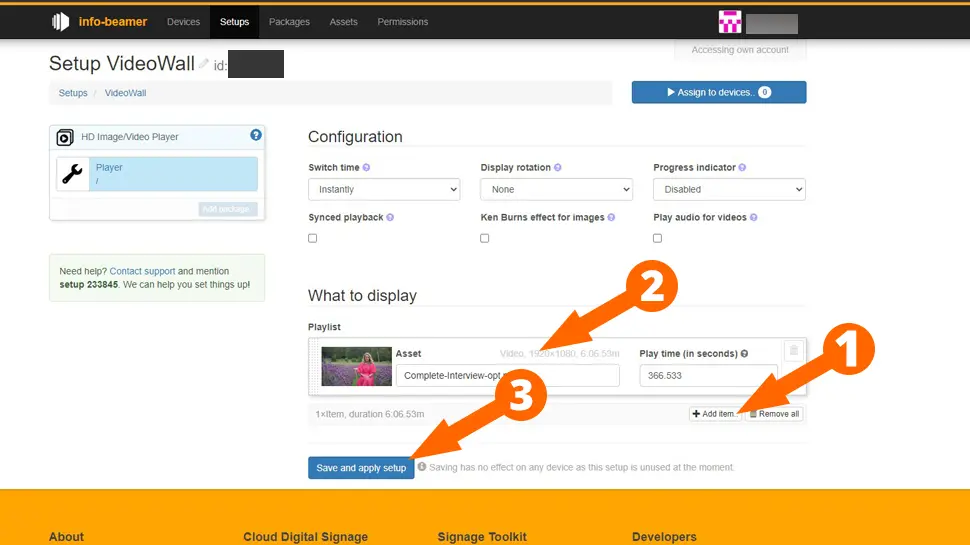
At this stage, depending on the package you chose, the options will vary. For my video wall, I want to display a single video, so I will click the Add Item button and add a HD video, then click Save and apply setup:
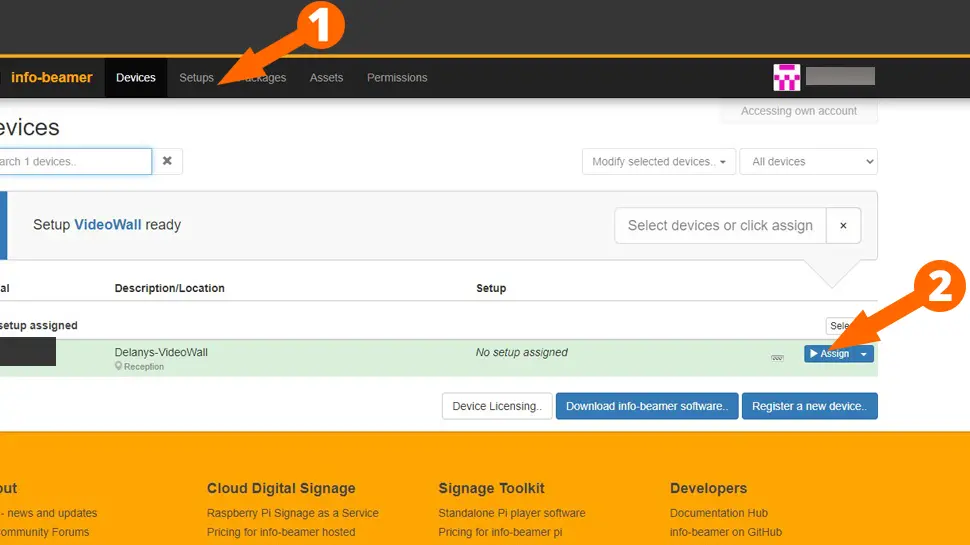
Assign Set Up to Device
Click on Setups from the main menu, then click Assign beside your setup. On the next page, click Assign again to assign your new setup to your registered device:
You video wall is now configured and should be displaying the content you added earlier (large videos may take a few minutes to display, depending on your internet connection speed).
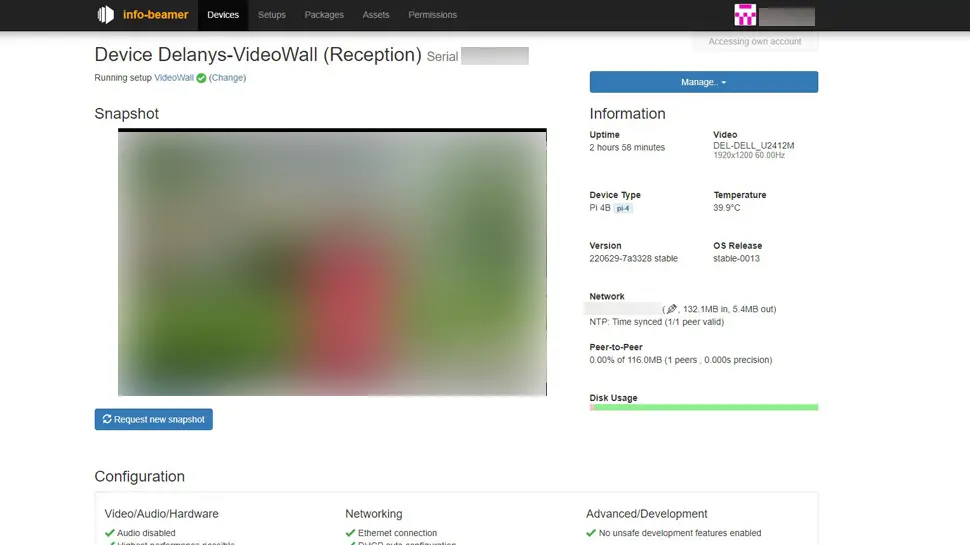
Check Statistics
To see all the information about your device and setup, click on Devices from the main menu, then click on the serial number of your device (left-side). Info-Beamer will display all the information about your setup:
Map Screen
Depending on the package you chose (for instance, Magic Video Wall), you may need to map your display. Go to Setups and look for the Map Screen and click it on. Go to your device and take a picture of the QR code on your devices screen, then upload the image to Info-Beamer.

Conclusion
There is a good business case for this tutorial. You could easily begin servicing restaurants, real-estate agents etc. with good content, and the initial cost is minimal. You could control all these devices from home, and only need a field trip for hardware issues. Digital Signage is also quite expensive as it’s a niche area, so you could do quite well. I hope you enjoyed this tutorial.
See Also
- Build a Raspberry Pi Wireless Access Point
- Host a Website on a Raspberry Pi
- Raspberry Pi LAMP Server – Complete Guide
Comments
There are currently no comments on this article.
Comment