
Today I’ll show you how to build a Raspberry Pi 3/4 NAS server using either a USB flash drive or external SSD/M.2 drive and OpenMediaVault. This is an intermediate guide and supersedes my previous guide “Build a Raspberry Pi RAID NAS server” which has been retired. If you want to learn how to build RAID arrays (including on Raspberry Pi), I have created a dedicated page Linux RAID Arrays using mdadm.
Contents
- Hardware
- Initial Setup
- Update & Install OpenMediaVault
- Test Transfer Speed
- Conclusion
- See Also
- Further Reading
Hardware
Raspberry Pi Motherboard
I recommend either a Raspberry Pi 3 or Raspberry Pi 4 with as much RAM as you can afford (I’m using a RPi 4 with 4GB RAM in this guide). You’ll need a good quality micro-USB power supply (RPi 4 Power Supply or RPi 3 Power Supply).
USB SATA/M.2 Drive (Recommended)
I recommend using USB3.0 external case with an SSD or M.2 drive and case (or you can buy them assembled).
USB Flash Drive
You can buy USB2.0 flash drives for this guide if you’re using a Pi 3, or USB3.0 drives if you’re using a Raspberry Pi 4 (which has 2 USB3.0 ports). Stick with known brands like SanDisk, Kingston, Samsung etc.
Raspberry Pi Case
There are a lot of options when it comes to a case for your NAS (or you can choose not to use a case). Best to choose one that has a slot for an SSD/M.2 drive. Here are a few:
Initial Setup
Follow my guide How to install and configure Raspberry Pi OS with the following settings:
- Choose “Raspberry Pi OS (Lite) 64bit”
- Set your “Hostname” to something cool like “RASNAS”
- Enable SSH
- Keep username as “pi”
- Don’t enable Wi-Fi
Update & Install OpenMediaVault
Once you’ve installed RPi OS, insert the SD card and boot up your pi without the external drive attached. We need to find your Pi’s IP address, and we can do this two different ways:
- Login to your router, go to DHCP leases and look for your Pi’s hostname (i.e. RASNAS) then write down the IP address.
- If you have a screen and keyboard attached, enter the
ip addresscommand and look at theeth0IP address, write it down.
Now you can login using an SSH client like PuTTY, then update the system:
sudo apt update && sudo apt upgrade -yThen reboot:
sudo rebootLogin to your Pi again, then install OpenMediaVault (OMV) but note: that is can take up to 15 minutes to finish installing (it will automatically reboot, see screenshot below):
wget -O - https://github.com/OpenMediaVault-Plugin-Developers/installScript/raw/master/install | sudo bash
Once your Pi has finished rebooting, attach your USB drive to either USB3.0 (blue) or USB2.0 port (black).
Login and Initial Set Up
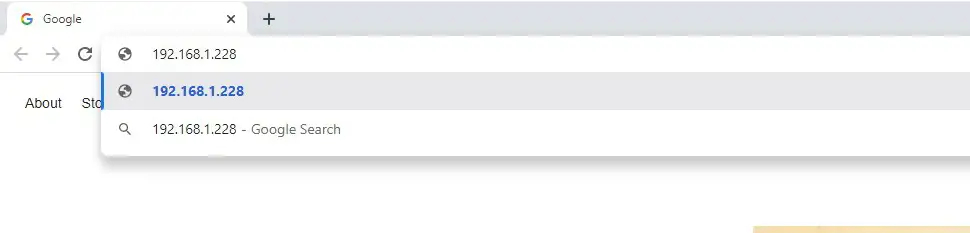
There is a possibility your Pi’s IP address may have changed after installing OMV, so go through the same process as before to find it. Once you have that info, login to OpenMediaVault by opening a new tab in your browser, and enter the IP address.
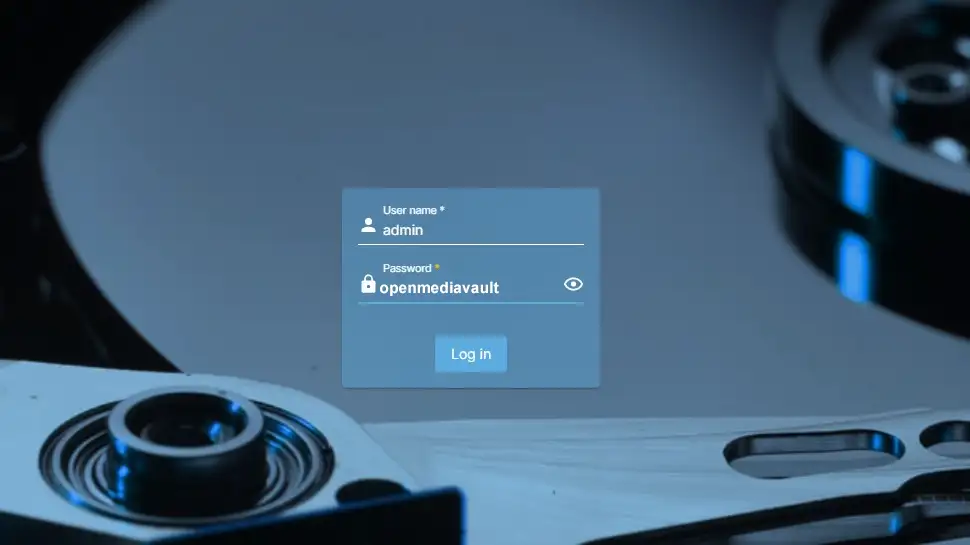
Once you reach the login screen, enter username admin and password openmediavault:
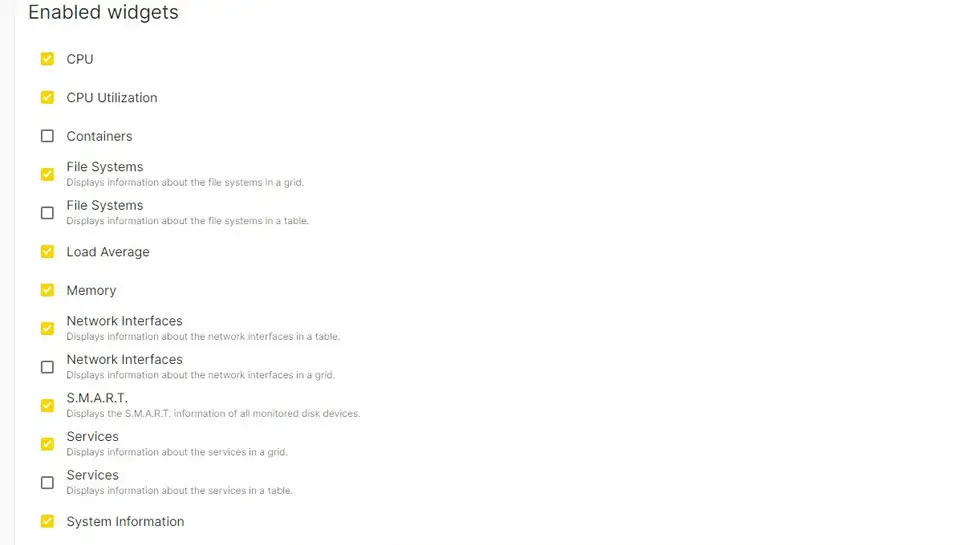
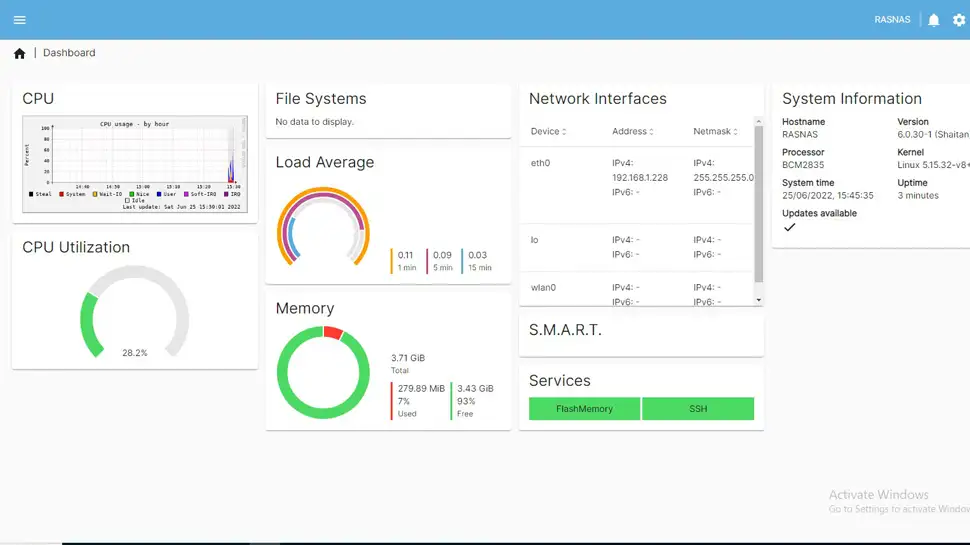
You will be prompted to setup your dashboard. Click the Settings link. I recommend you enable the following widgets:
You will be redirected to your dashboard.
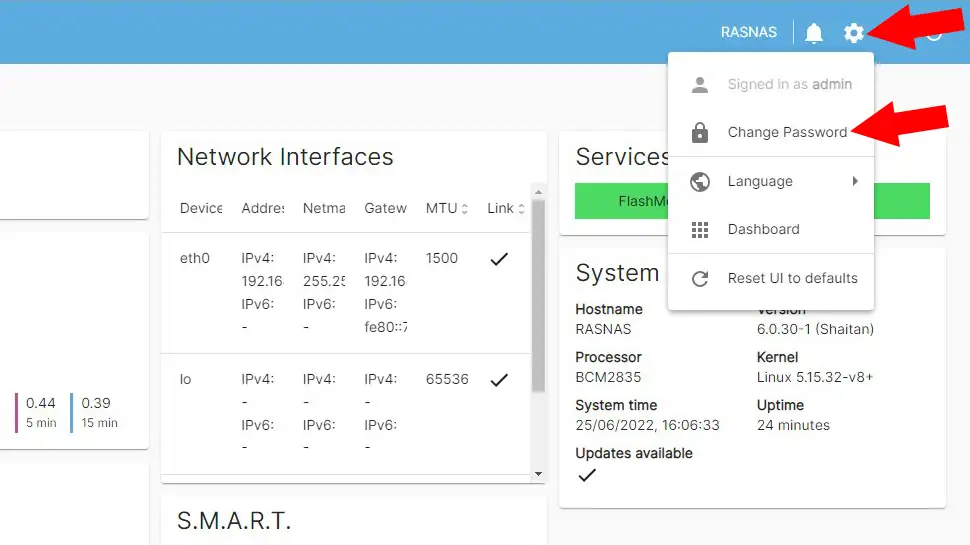
Click the “Gear” icon top-right of your screen, then click “Change Password” and enter a new password, click “Save”
Configure Disk
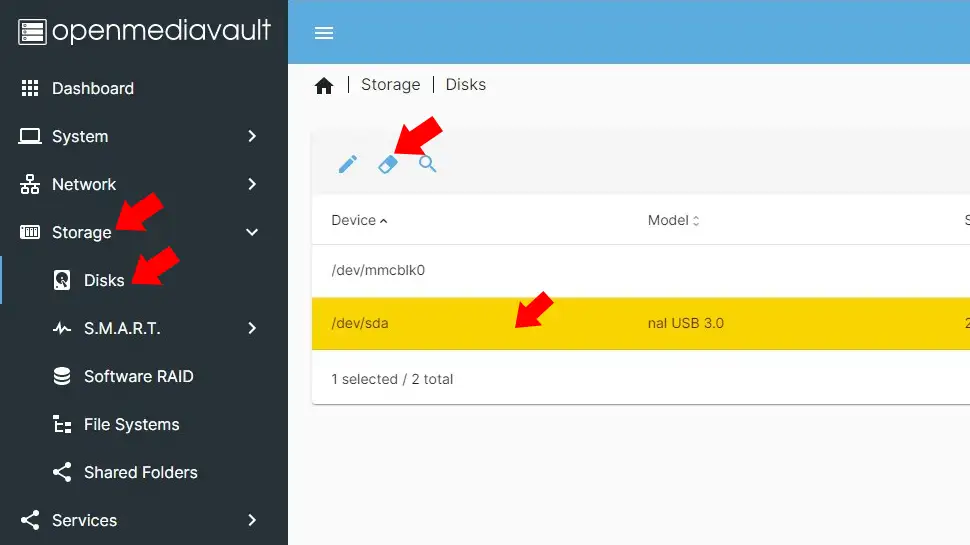
NOTE: The following process will completely destroy all data on the hard drive. Click “Storage” -> “Disks” and select your hard disk (usually /dev/sda). Click the “Wipe” icon, check “Confirm” and click “Yes”, then choose “Quick” for format option:
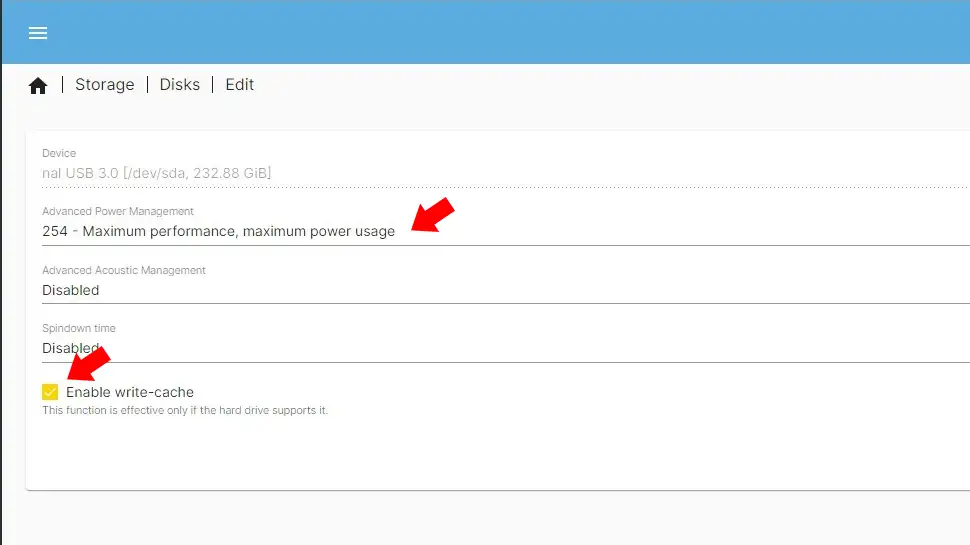
Next, select your disk again and click the “Edit” icon.
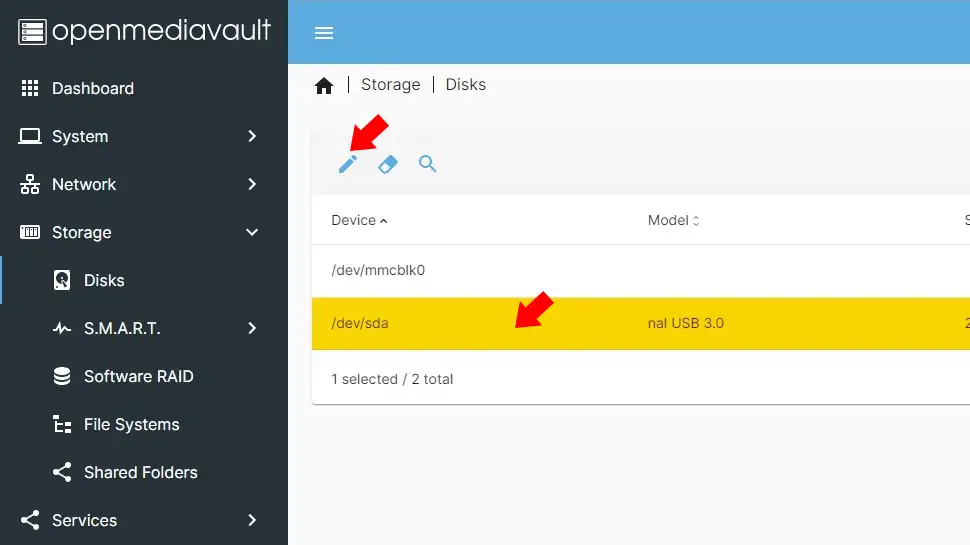
Under “Advanced Power Management” choose the “Maximum performance, maximum power usage” option, check “Enable write-cache” option, then click “Save”:
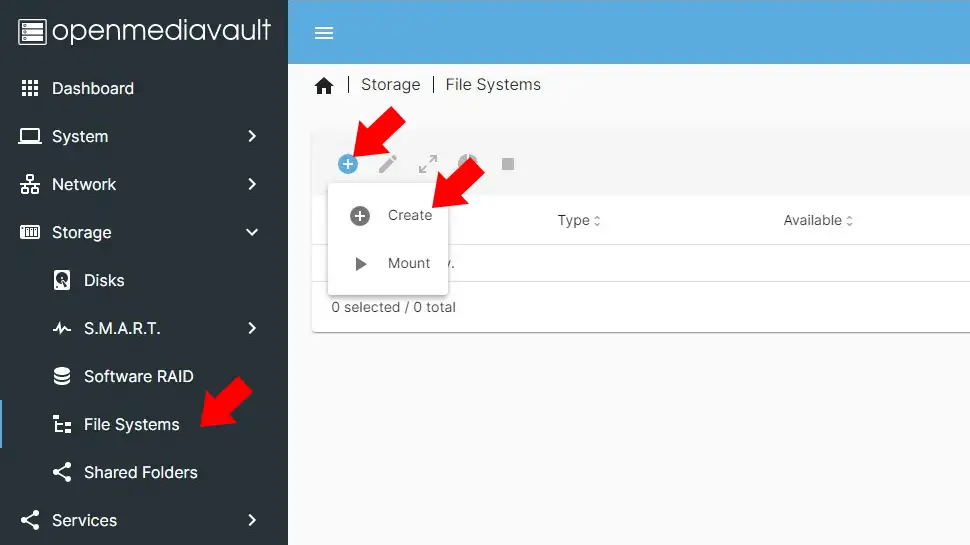
Create and Mount File System
Click “File Systems” -> plus “+” icon -> “Create”:
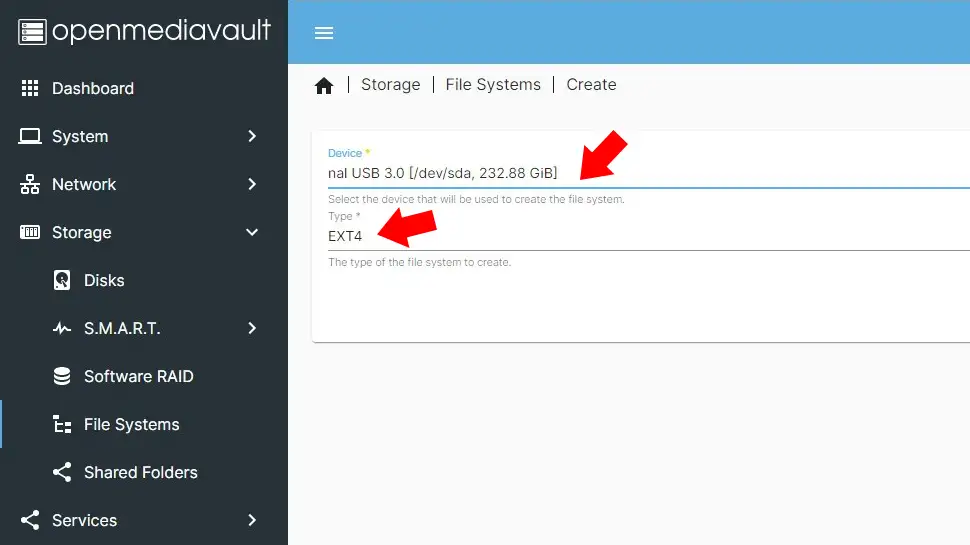
Choose your device/disk and select “EXT4” for file system type:
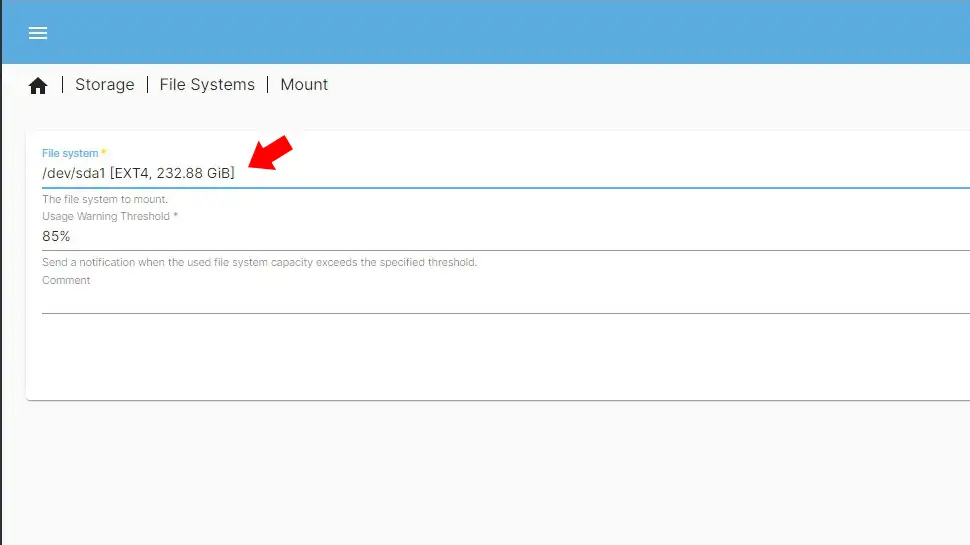
Staying on “File Systems”, Click plus “+” icon, then “Mount”
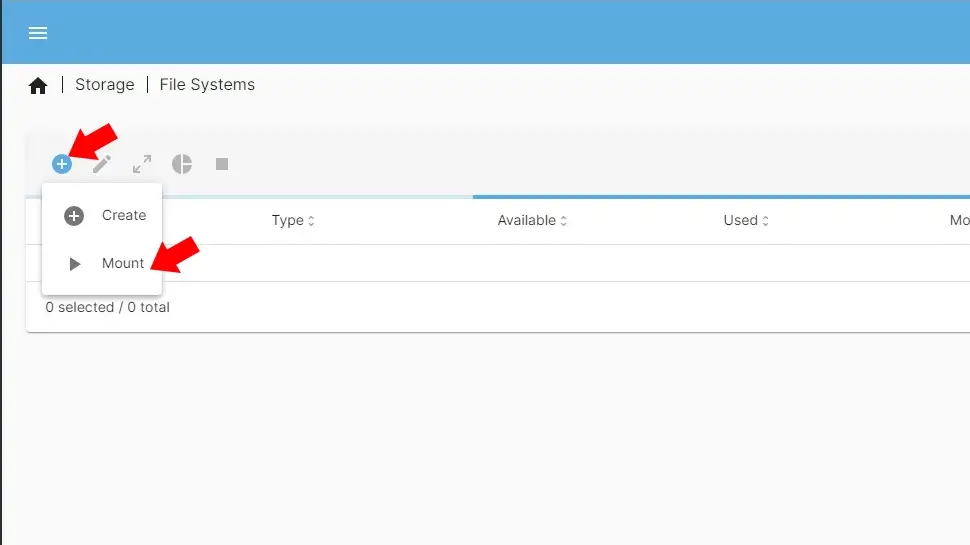
Choose your file system and click “Mount”. You will need to apply and confirm changes:
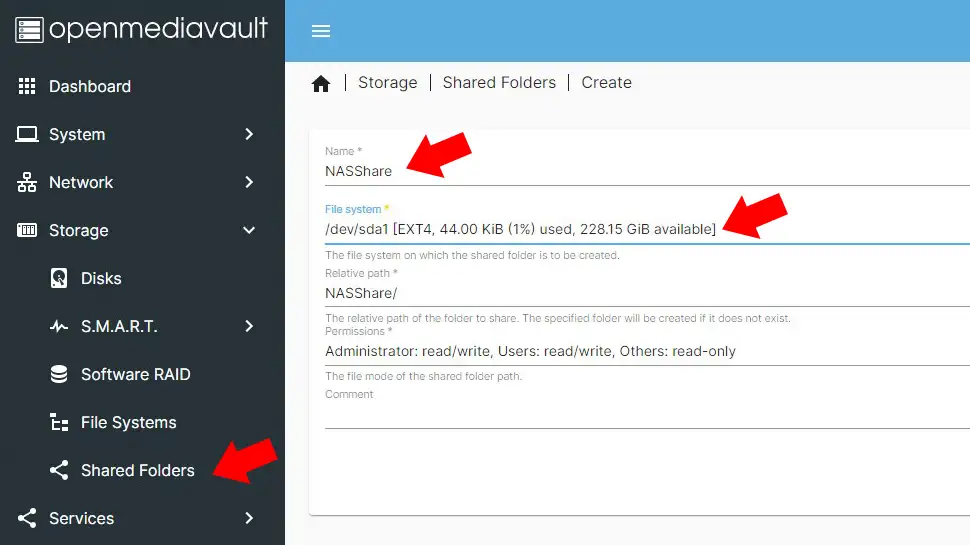
Configure Shared Folder
Click “Shared Folders” then click the plus “+” icon. Give your shared folder a name (i.e. NASShare) and select your file system. Leave other settings at defaults and click “Save”. You will need to apply and confirm changes:
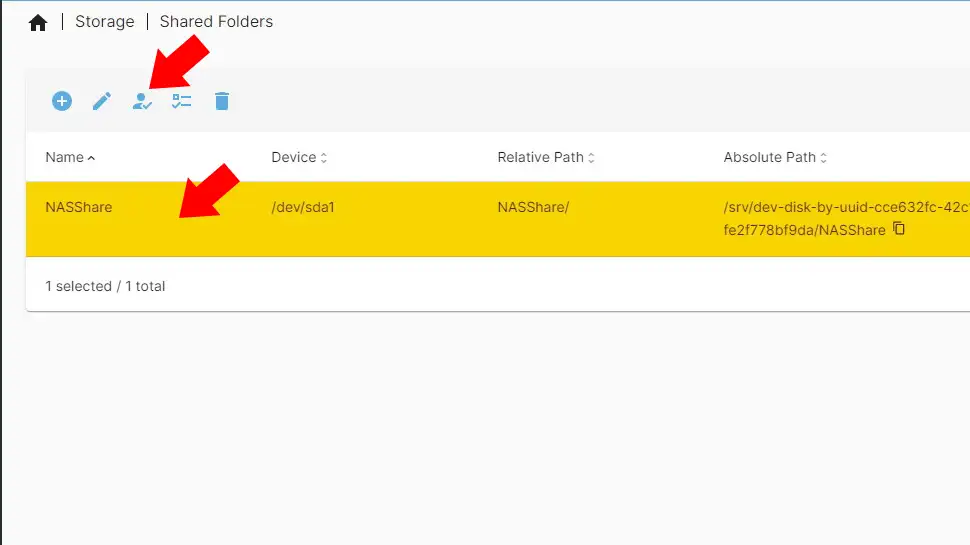
Click “Shared Folders” and select your shared folder. Click the “Edit Privileges” icon:
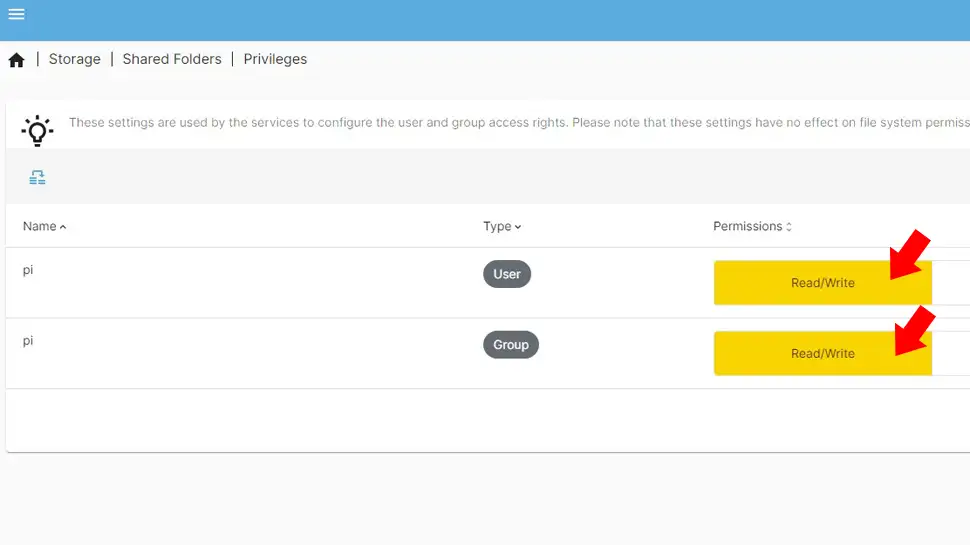
Select “Read/Write” for user “pi” and group “pi” and click “Save”. You will need to apply and confirm changes:
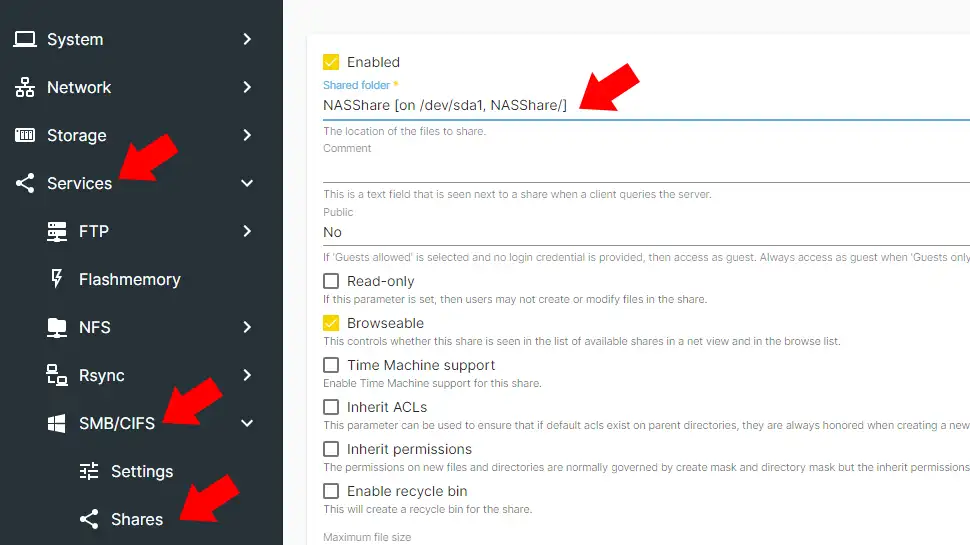
Configure SAMBA/CIFS
Click “Services” -> “SMB/CIFS” -> “Shares”, then choose your NAS share folder and click “Save”. You will need to apply and confirm changes:
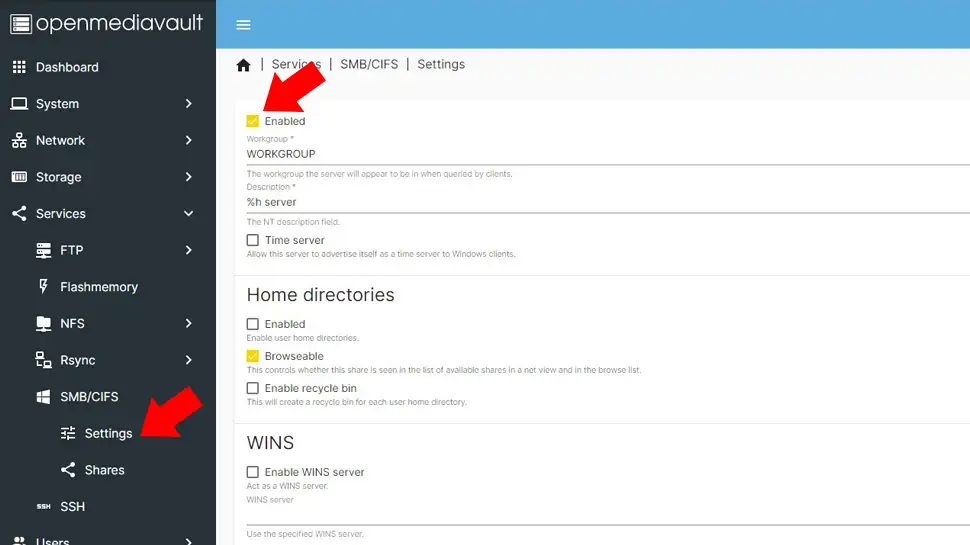
Click “SMB/CIFS” -> “Settings” and check the “Enabled” checkbox, then click “Save”. You will need to apply and confirm changes:
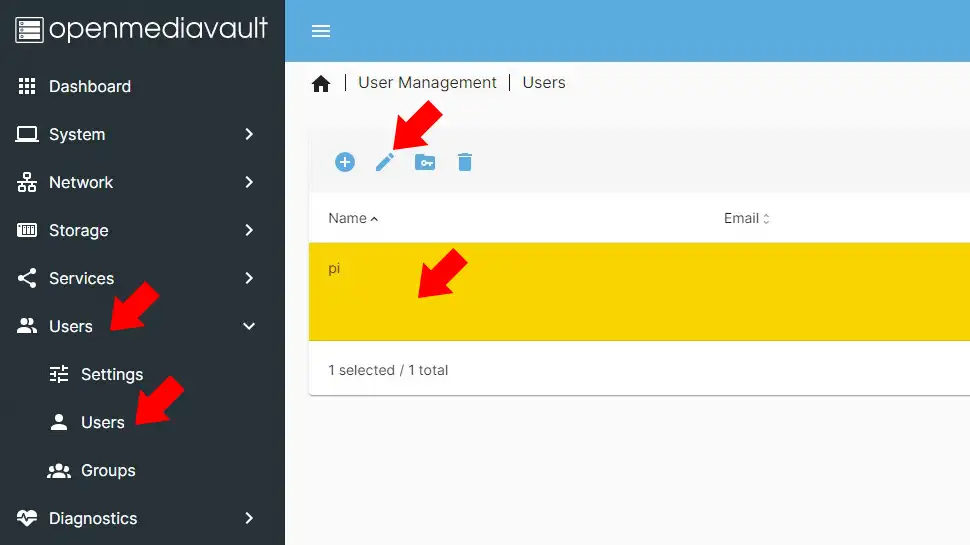
Create User Password
Click “Users” then “Users” again, select user “pi” then click the “Edit” icon:
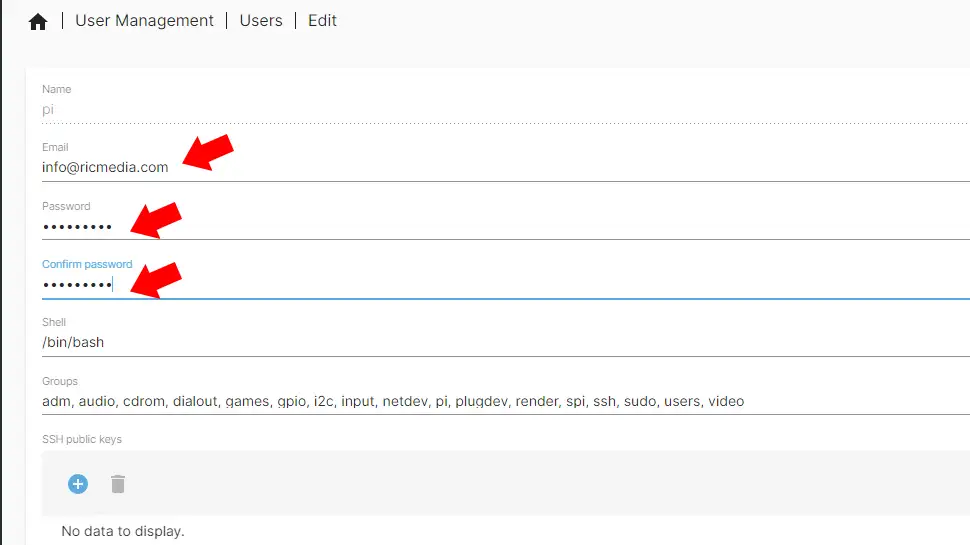
Enter your email address (optional), then enter a strong password and confirm, click “Save”. You will need to apply and confirm changes:
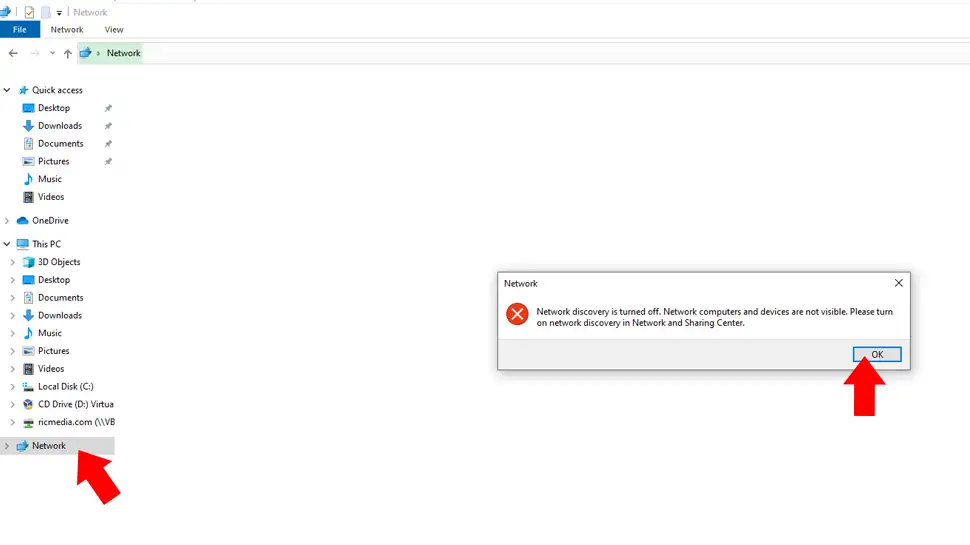
Configure Windows Network Discovery
On your Windows PC, open File Explorer, then click “Network”. If you get a warning that “Network discovery is turned off” click “OK”. If you didn’t get any warning, skip the next two steps:
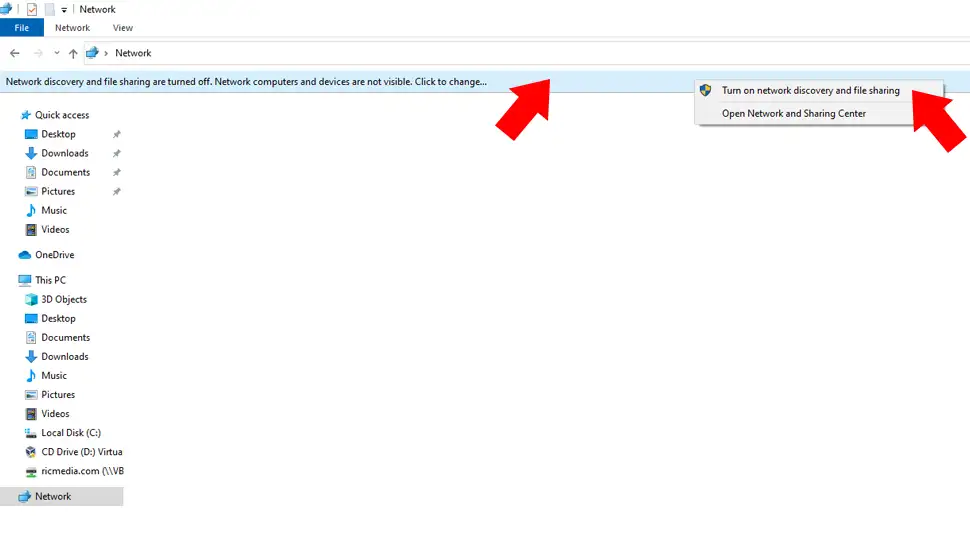
Click the yellow warning toolbar, then click “Turn on network discovery and file sharing”:
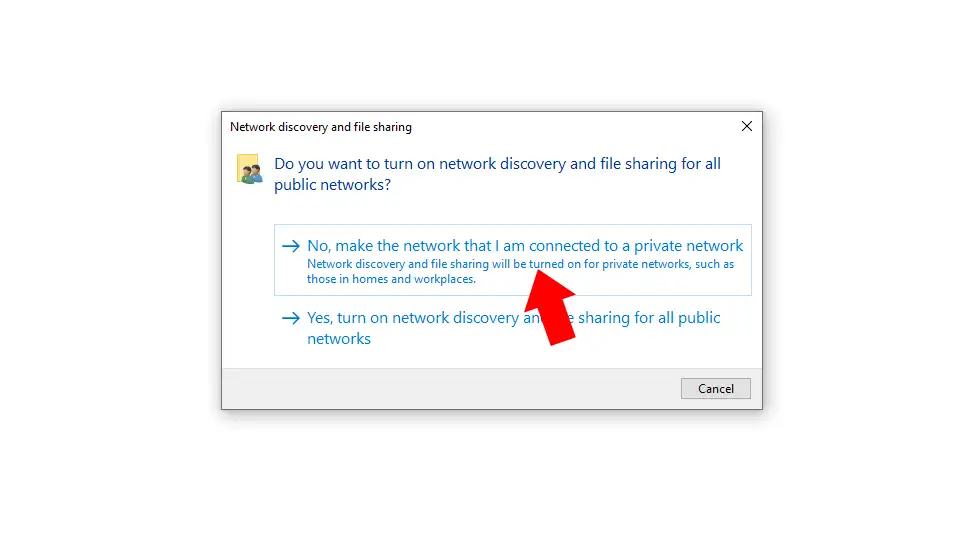
Click “No, make the network that I am connected to a private network”:
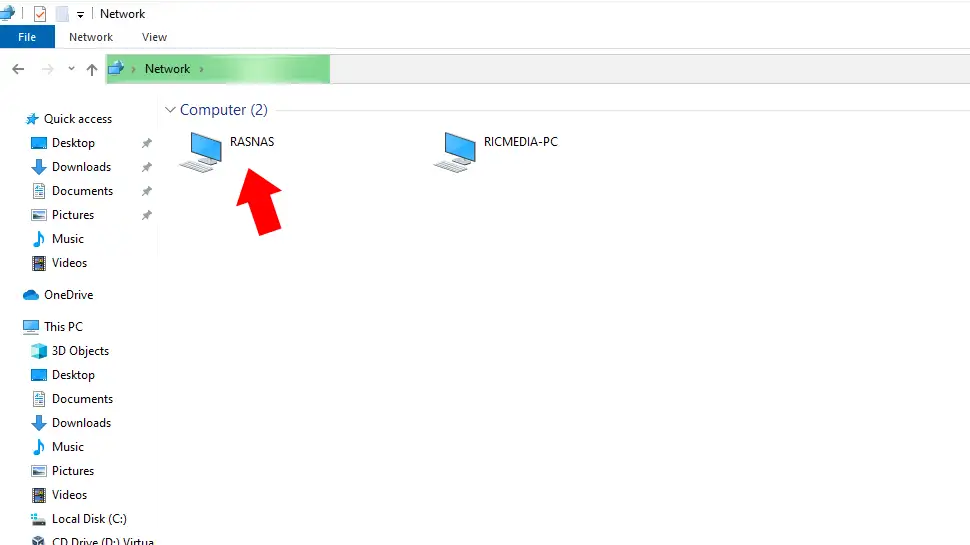
Click on your NAS icon (in my case it’s RASNAS):
Enter username pi and password (the same password we entered earlier) and check the “Remember my credentials” checkbox, then click OK:
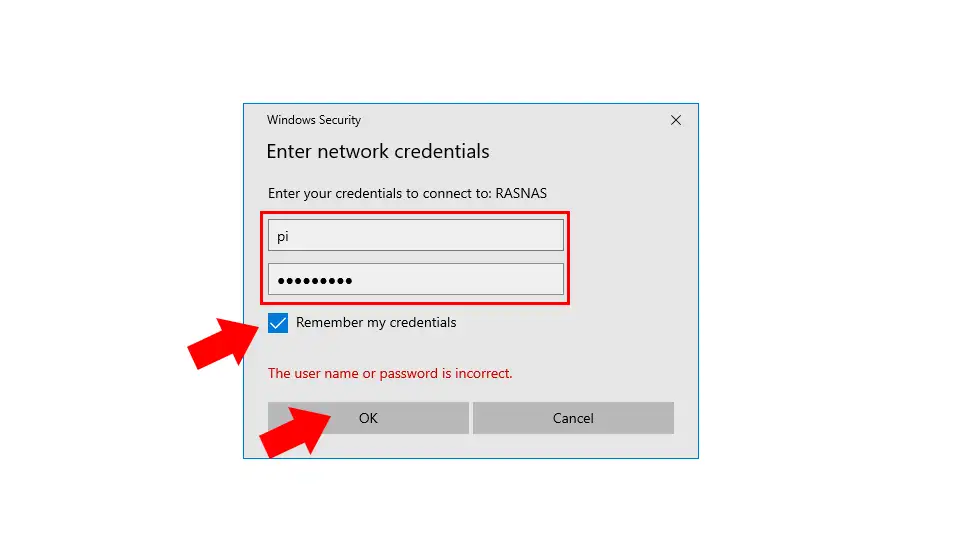
You should be able to enter your new NAS shared folder, congrats!
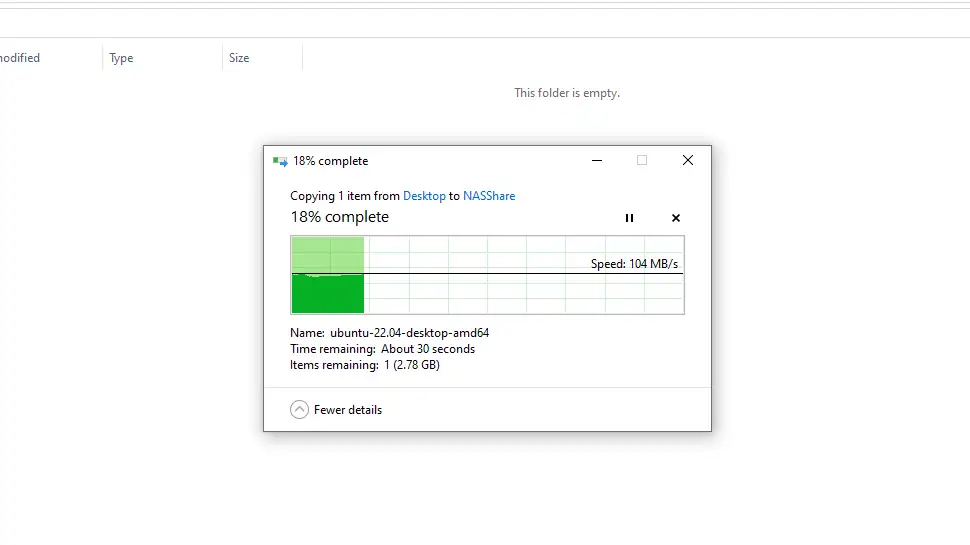
Test Transfer Speed
Now it’s time to test your speed. Find a large file between 1GB and 5GB (perhaps a movie file), copy it, then paste into your NAS shared folder, and see how fast your transfer is. For USB2.0, you should get between 20MB/s and 40MB/s, and for USB3.0, you should get between 100MB/s and 130MB/s.
Conclusion
I hope everything went well for you and you now have a cool Raspberry Pi NAS up and running. If you did have an issue, hit me up in the comments, or socials/email.
ETA: If you had trouble formatting your disk on USB3.0, try setting up everything (the entire guide) on USB2.0 port, then shutdown the system, plug you drive into the USB3.0 port, and boot up again. That’s what I had to do but my RasPi 4 is the very first version and apparently they were buggy with USB3.0.
See Also
- How to Install and Configure Raspberry Pi OS
- Create a Linux RAID Array using mdadm
- Build a Mini-ITX NAS RAID Server with Enterprise SAS Hard Drives
Comments
Dev #
Very elaborate procedure and explained in details. I could make the NAS within 30 min. Requesting author to help with configuring RAID and also how this NAS can be accessed remotely and connected over Wifi
Daniel #
This doesn’t work.
“wget -O – https://github.com/OpenMediaVault-Plugin-Developers/installScript/raw/master/install | sudo bash”
Just says: wget-0 command not found
Retyped it 20 times. Windows 11 4 life
Richard Brereton (Author) #
Hi Daniel, you may not have wget installed, see this post: How to fix “wget: command not found”
Comment