

Today I’ll show you how to set up a LAMP (Linux, Apache, MySQL, PHP) server on your Raspberry Pi. You’ll be able to upload files using FTP, manage databases with phpMyAdmin, and I’ll show you how to optionally install WordPress, just for some fun.
Some more information about each package:
- Linux – In this case we’re using Ubuntu 22.04, but other popular OSes for LAMP stacks are Debian, Fedora and CentOS
- Apache – The most popular web server software in the world. Apache is the engine that serves pages to your web browser
- MySQL – A popular database software distribution for storing almost any kind of data (i.e. WordPress data)
- PHP – A programming language to create dynamic “on the fly” web pages from templates and databases
Contents
- Prerequisites
- Install Apache Web Server
- Install PHP
- Install MySQL Server
- Install phpMyAdmin
- Setup SFTP
- Install WordPress (Optional)
- Conclusion
- See Also
- Further Reading
Prerequisites
- I recommend either a Raspberry Pi 3B+, Raspberry Pi 4, or Raspberry Pi 5 with as much RAM as you can afford (I’m using a RPi 4 with 4GB RAM in this guide). You’ll need a good quality micro-USB power supply (RPi 4 Power Supply, RPi 3 Power Supply, or Raspberry Pi 5 45 watt Power Supply).
- Your Pi must have Raspberry Pi OS installed and configured (See my guide: How to install Raspberry Pi OS)
Install Apache Web Server
Login to your Pi either directly or via SSH, then update your cache and upgrade any packages that need upgrading:
sudo apt update && sudo apt upgrade -yIt’s a good idea to reboot after upgrading any packages:
sudo rebootLet’s install Apache web server:
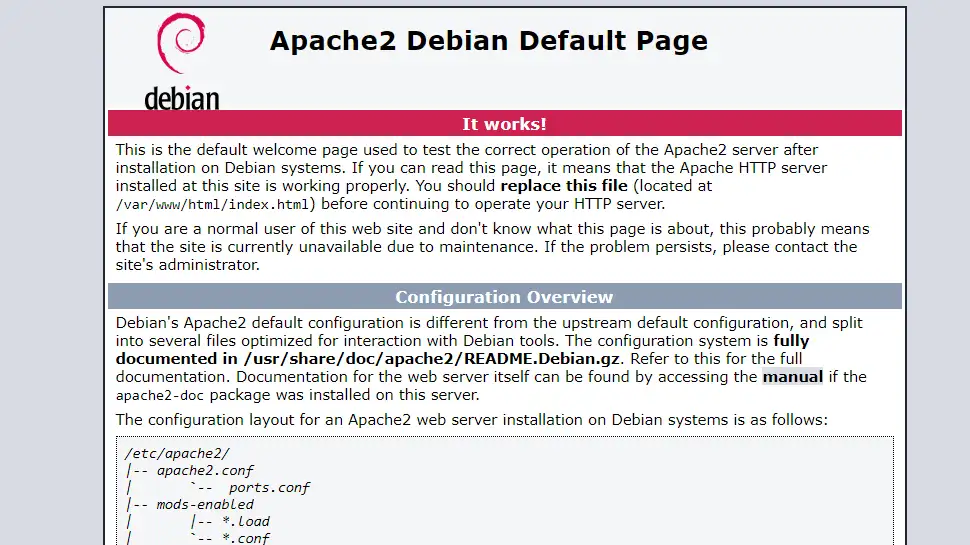
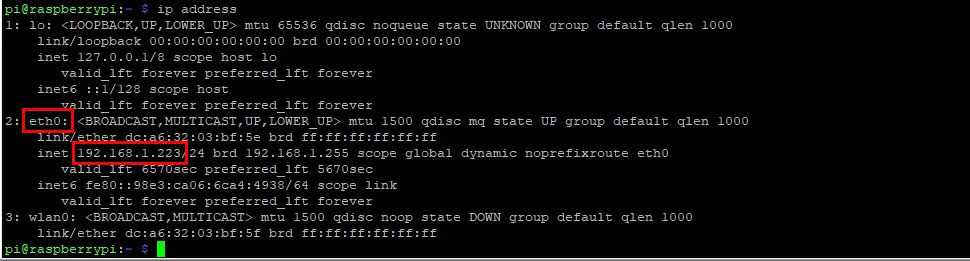
sudo apt-get install apache2 -yIf you know your RPi’s IP address, enter it inside your web browser address bar. You should see the default “It Works!” Apache welcome page. If you don’t know your RPi’s IP address, use the ip address command to see it (it will be inside the eth0 interface section, see further below):
Use the ip address command to find the IP address of you RPi (It will be inside the eth0 section):
Enable mod_rewrite
Most content management systems (like WordPress) need the Apache module mod_rewrite enabled (for things like pretty URLs). Let’s edit the Apache config file:
sudo nano /etc/apache2/apache2.confScroll down to the <Directory /var/www/> section and change AllowOverride None to AllowOverride All:
<Directory /var/www/>
        Options Indexes FollowSymLinks
        AllowOverride All
        Require all granted
</Directory>
Then save ctrl + o, ENTER and exit nano ctrl + x.
Now let’s enable the module and restart Apache:
sudo a2enmod rewritesudo systemctl restart apache2Install PHP
Let’s install the PHP programming language and the Apache PHP module:
sudo apt-get install php libapache2-mod-php -yLet’s make sure PHP is working by creating a special file called info.php with some code inside to tell us what extensions are enabled by default in PHP:
sudo nano /var/www/html/info.phpCope and paste the following code inside your new document:
<?php
        phpinfo();
?>
Then save ctrl + o, ENTER and exit nano ctrl + x.
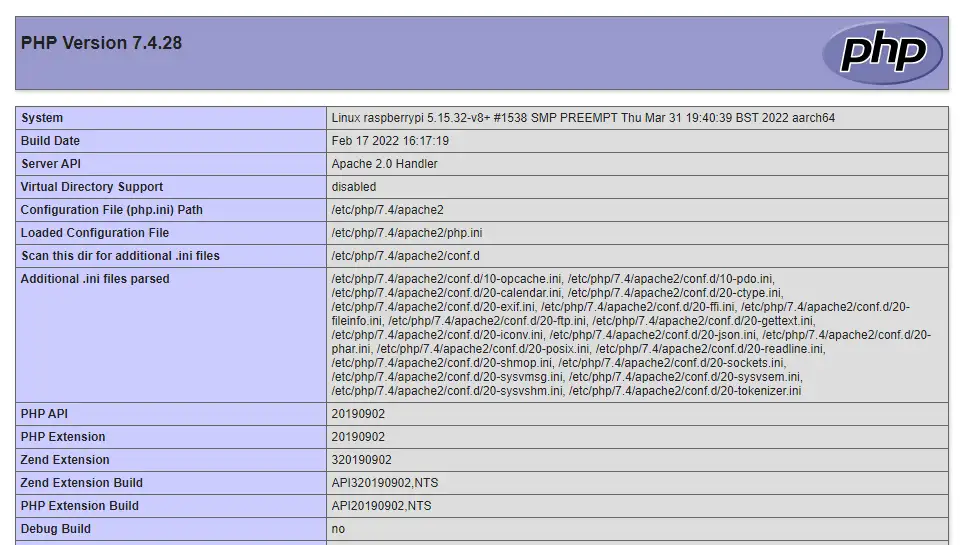
Enter the IP address of your Pi into your web browser and append it with /info.php:
192.168.1.223/info.phpYou should see the PHP information page that shows the details of your PHP installation. It also indicates that PHP is functioning:
After you’ve finished with the info.php page, make sure to delete it so that nobody can see your servers sensitive information:
sudo rm -rf /var/www/html/info.phpInstall MySQL Server
Let’s install the MySQL server database software package:
sudo apt-get install mariadb-server mariadb-client php-mysql -yNow we run the mysql_secure_installation security script to harden MySQL:
sudo mysql_secure_installationI will now suggest answers to each question the script will ask you:
- Enter current password for root (enter for none): – ENTER
- Switch to unix_socket authentication [Y/n] – N
- Change the root password? [Y/n] – N
- Remove anonymous users? [Y/n] – Y
- Disallow root login remotely? [Y/n] – Y
- Remove test database and access to it? [Y/n] – Y
- Reload privilege tables now? [Y/n] – Y
Install phpMyAdmin
Let’s install the phpMyAdmin package so you can easily manage your MySQL databases:
sudo apt-get install phpmyadmin -yphpMyAdmin will ask several questions during installation. Answer them as follows:
- Web server to reconfigure automatically: –
apache2(use SPACE BAR to select, TAB, then ENTER) - Configure database for phpmyadmin with dbconfig-common? – Yes (ENTER)
- MySQL application password for phpmyadmin: – Enter a strong password, then TAB and ENTER, then confirm password
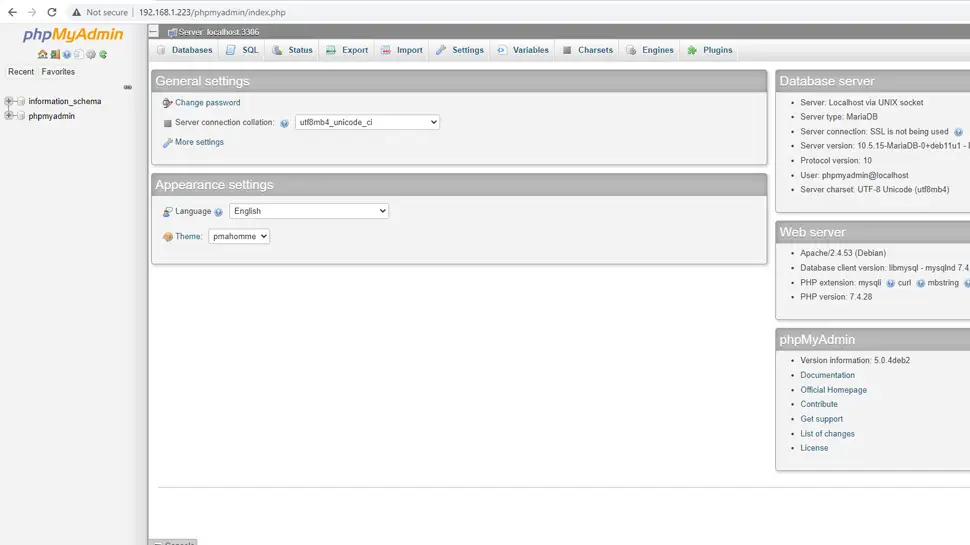
Enter your Pi’s IP address into your web browser address bar and append it with phpmyadmin then ENTER. You should arrive at the phpMyAdmin login page. Enter username: phpmyadmin and the password that you used during the installation of phpMyAdmin:
192.168.1.223/phpmyadmin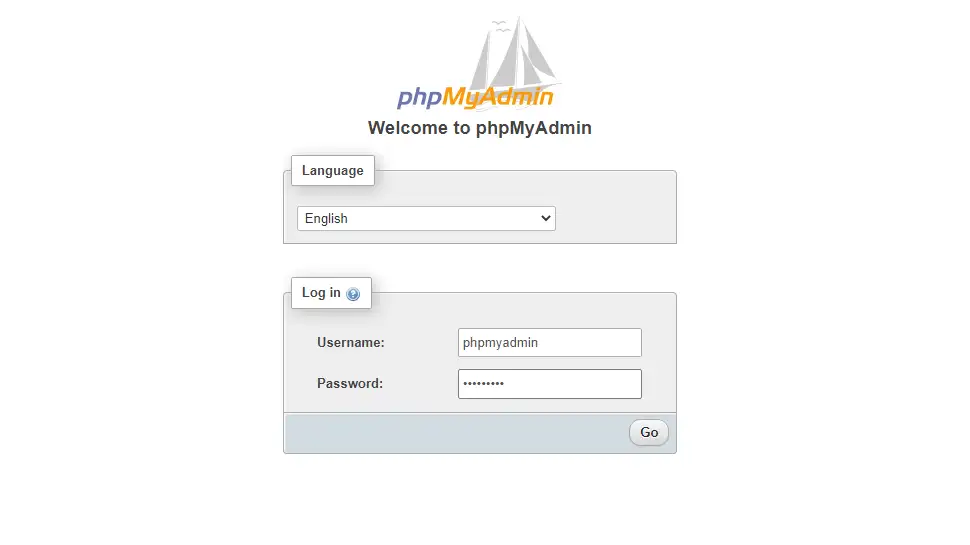
Setup SFTP
By default, the /var/www/ folder is owned by www-data and part of the www-data group, and user pi doesn’t belong to that group, so we need to add pi to the www-data group, then change user/group ownership of the /var/www/html folder recursively:
sudo usermod -a -G www-data pisudo chown -R www-data:www-data /var/wwwThen we change some default permissions:
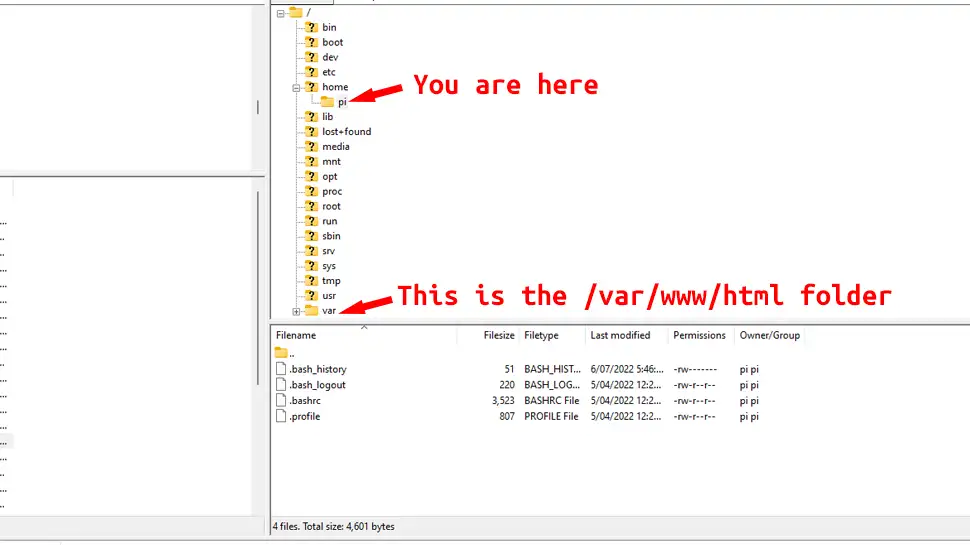
sudo find /var/www/ -type d -exec chmod 775 {} \;sudo find /var/www/ -type f -exec chmod 664 {} \;Open your preferred FTP client (i.e. FileZilla) and enter the IP address of your Pi into the Host section, then username and password. You’ll get a warning about a security certificate, click Accept. Note that when you connect, you’ll be taken to user:pi home directory, so you’ll need to navigate to the /var/www/html/ directory (see image below using FileZilla).
Install WordPress (Optional)
Before we install WordPress, let’s install some PHP extensions that WordPress requires:
sudo apt install php-curl php-gd php-xml php-xmlrpc php-mbstring php-soap php-intl php-zip -yLet’s install WordPress. Download the latest package to the /tmp/ directory:
cd /tmpcurl -O https://wordpress.org/latest.tar.gzThen extract the archive file:
tar xzvf latest.tar.gzCreate a blank .htaccess file inside the new WordPress directory:
touch /tmp/wordpress/.htaccessCreate an upgrade folder so WordPress doesn’t run into any permission errors later:
mkdir /tmp/wordpress/wp-content/upgradeCreate the configuration file by copying the sample config file:
cp /tmp/wordpress/wp-config-sample.php /tmp/wordpress/wp-config.phpThen copy the WordPress folder into your website root folder:
sudo cp -a /tmp/wordpress/. /var/www/htmlCreate a WordPress Database
Let’s login to MySQL (use your Pi password):
sudo mysql -uroot -pCreate a new user for our WordPress installation (replace MyPassword with a strong password):
CREATE USER 'wpuser'@'localhost' IDENTIFIED BY 'MyPassword';Create a database for WordPress:
CREATE DATABASE wordpress DEFAULT CHARACTER SET utf8 COLLATE utf8_unicode_ci;GRANT ALL PRIVILEGES ON wordpress.* TO 'wpuser'@'localhost';FLUSH PRIVILEGES; EXIT;Remove the default index.html page from our Apache installation:
sudo rm -rf /var/www/html/index.htmlObtain new salt codes (copy/paste them into a temporary .txt file as you’ll need them later) OR you can visit the link in your web browser then copy/paste that way:
curl -s https://api.wordpress.org/secret-key/1.1/salt/OR visit: api.wordpress.org/secret-key/1.1/salt/

Open the WordPress configuration file and enter your database name, user and password:
sudo nano /var/www/html/wp-config.php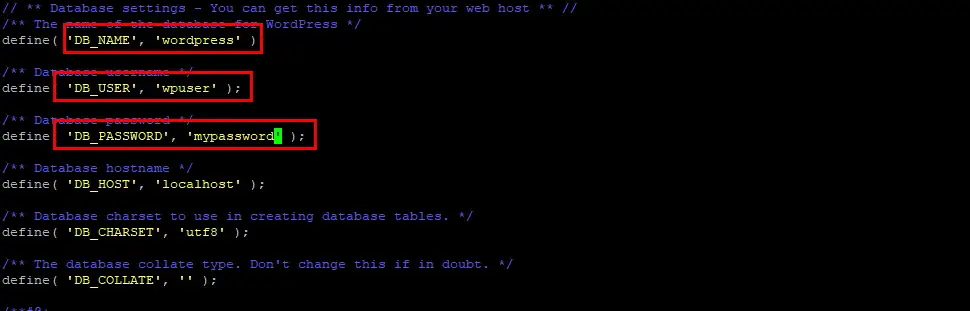
Using your arrow keys, scroll down to the “Authentication and salt keys” section, and copy and paste the generated values to the corresponding lines inside the ‘put your unique phrase here’ brackets (i.e. “AUTH_KEY” value to “AUTH_KEY” line). You can also just delete the entire section and copy/past the new codes in:
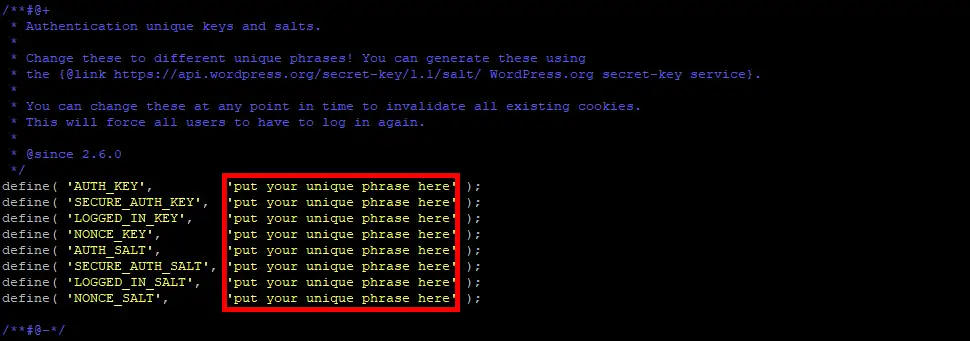
It should look like this but with different codes:

Then save ctrl + o, ENTER and exit nano ctrl + x.
Let’s change ownership
sudo chown -R www-data:www-data /var/wwwThen we change some default permissions:
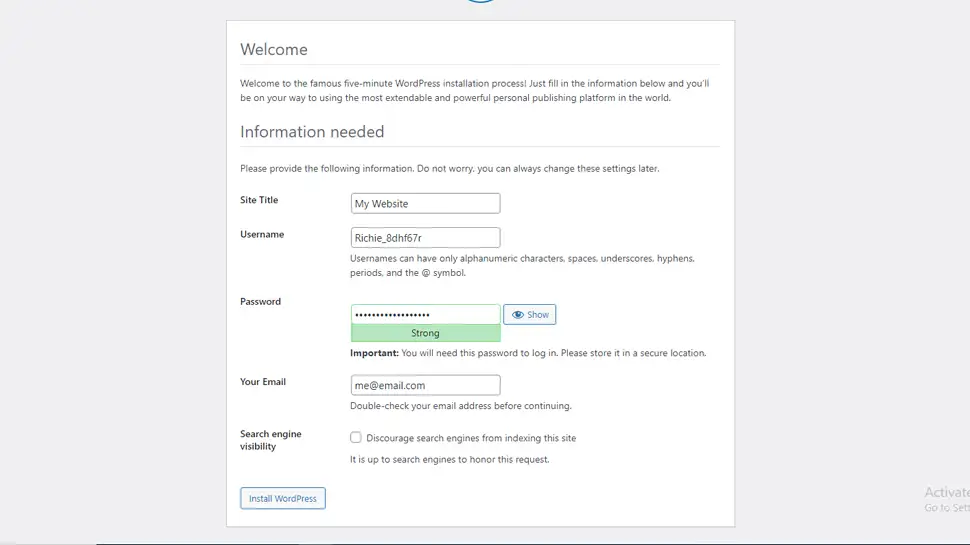
sudo find /var/www/ -type d -exec chmod 775 {} \;sudo find /var/www/ -type f -exec chmod 664 {} \;Open a browser tab and enter your Pi’s IP address. You should be served the WordPress website setup page. Enter a unique username and strong password:
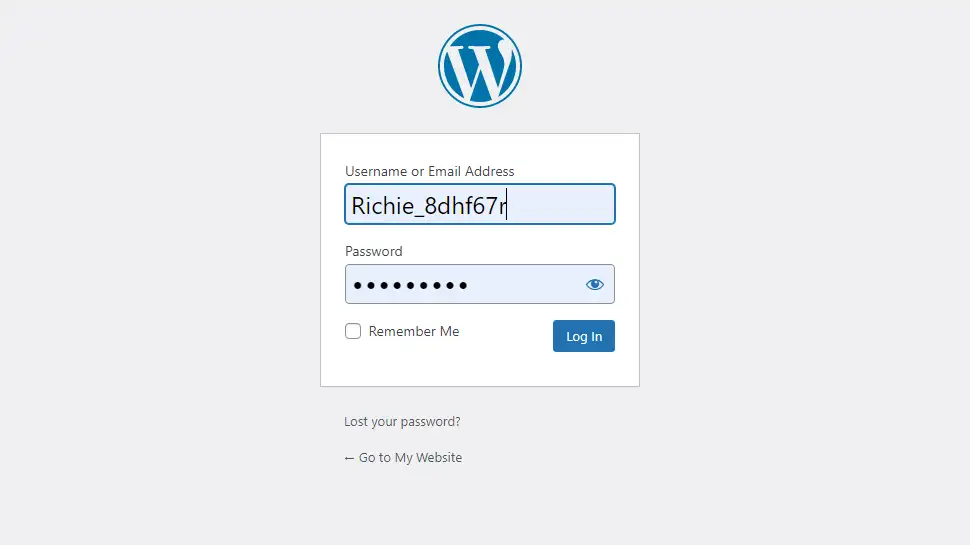
You can now login to your new WordPress website!
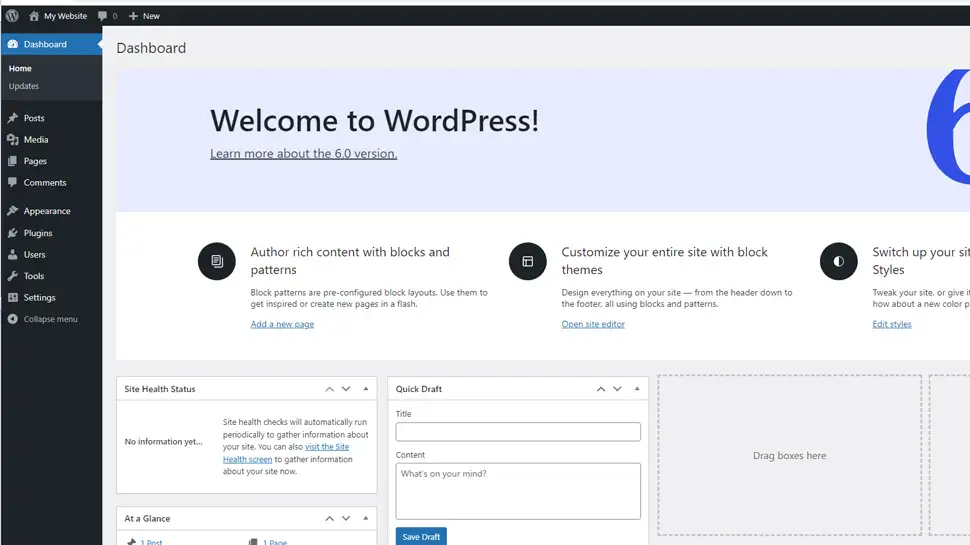
The WordPress dashboard:
Conclusion
Well I hope everything went smoothly for you and you have a ripper little Raspberry Pi LAMP server! If you had any issues or just want to share your experience, hit me up in the comments or socials/email.
See Also
- How to Install and Configure Raspberry Pi OS
- Build a Raspberry Pi NAS Server
- How to configure Apache Virtual Hosts on Ubuntu 22.04
- How to secure an Ubuntu 22.04 LAMP Stack
Comments
Emanuele #
Thank you for this great tutorial. But, after installing Wordpress on localhost, how could I pass to https? Following your tutorial “Host a website on a Raspberry Pi” ? Using Certbot inside Apache2 is enough? I use Duckdns for my DDNS. Thank you in advance!
Andy F #
This was a great walk through. I had failed several time’s following other guides due to problems with permissions (I think).
This guide was perfect.
The only brief stumbling block for me was that I couldn’t access myphpadmin until I had created the new user in mysql. Didn’t make any difference but it threw me off a bit.
Thank you
Comment