
Today I’ll show you how to connect your Windows 11 PC/laptop to any VPN service that’s using the PPTP protocol. The Point to Point Tunneling Protocol is a fast and secure protocol and most VPN service providers and workplaces will support it, including IPVanish VPN.
Contents
- Recommended Books
- Prerequisites
- Connect VPN using PPTP on Windows 11
- Video Guide
- Conclusion
- See Also
- Further Reading
Recommended Books
I can highly recommend these books to help you learn more about Windows 10/11.
Prerequisites
- You’ll need a VPN service that supports the PPTP Protocol like IPVanish VPN
- You’ll also need to login to your VPN service provider and find your PPTP credentials (username and password)
- The server name or IP address (ie.
contoso.comor102.562.243.12)
Connect VPN using PPTP on Windows 11
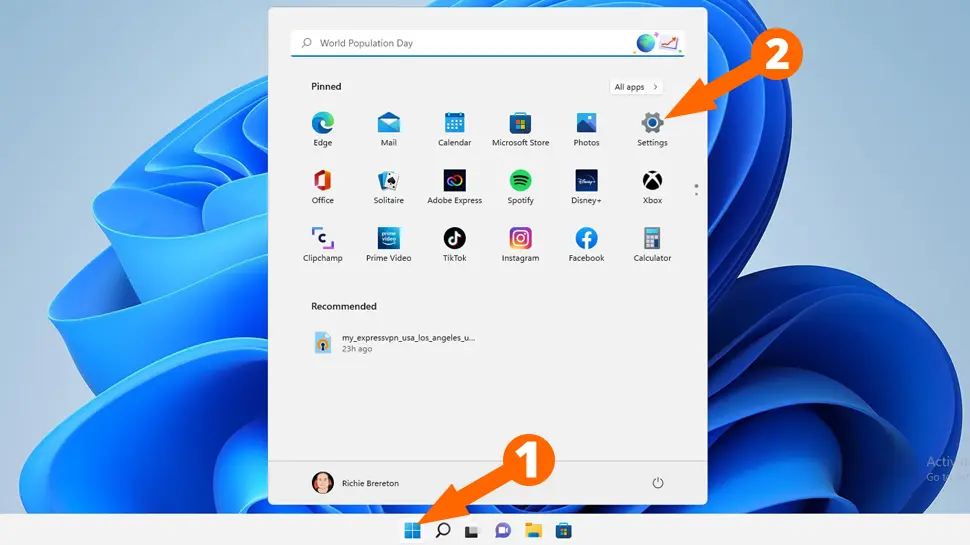
- Click Start, then Settings
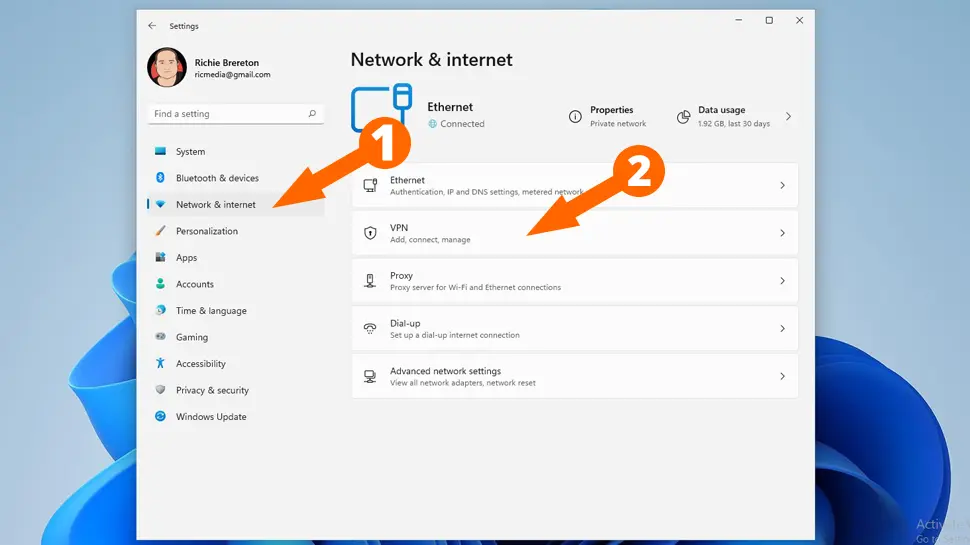
- Click Network & Internet, then VPN
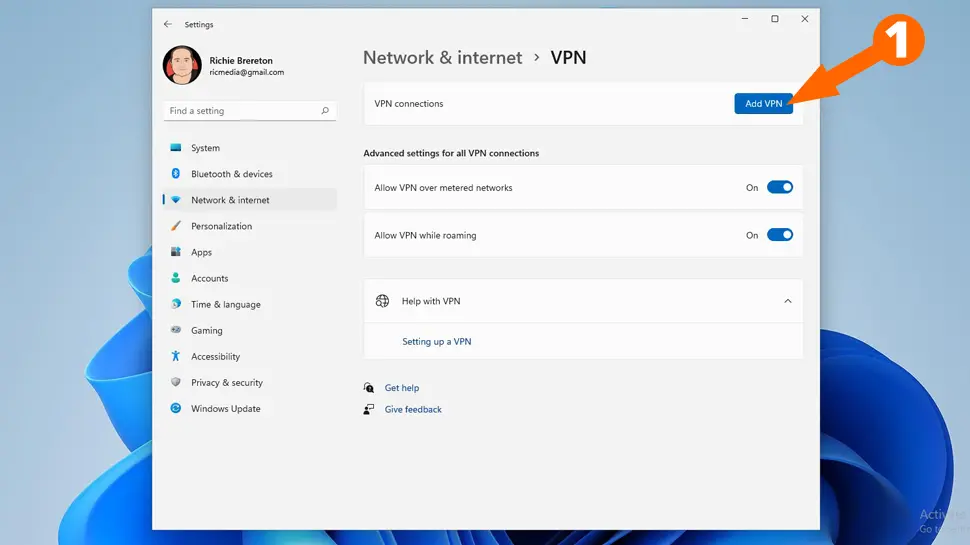
- Click Add VPN
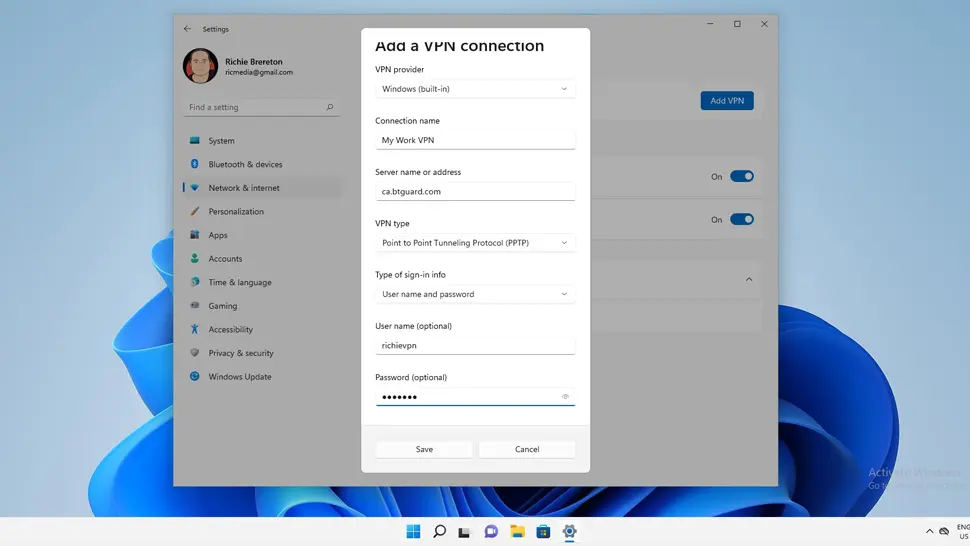
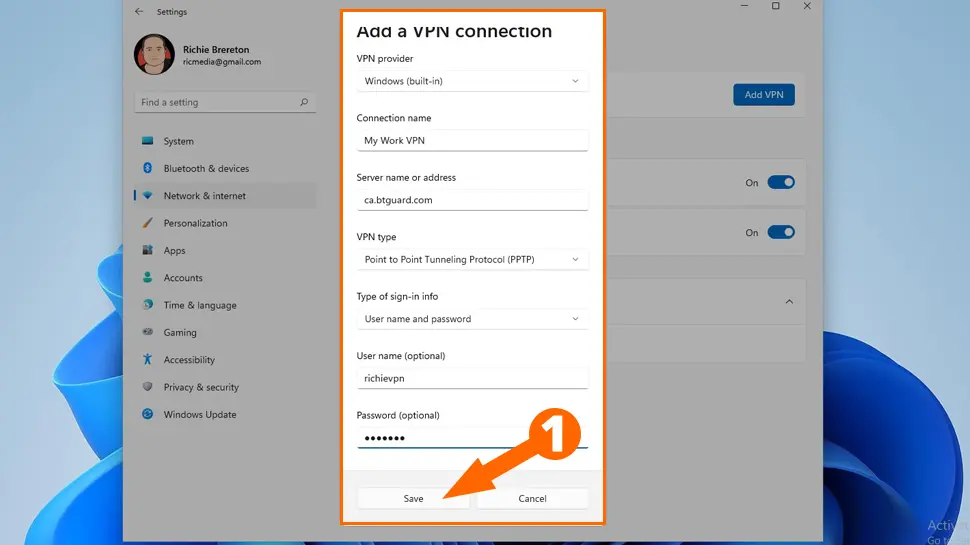
- Enter the following details:
- VPN Provider – Windows (built-in)
- Connection name – (enter a descriptive name, i.e My Work VPN)
- Server name or address – Enter a server name i.e sp.btguard.com or IP address 123.456.789.22
- VPN type – Point to Point Tunneling Protocol (PPTP)
- Type of sign-in info – User name and password
- User name – Enter your VPN user name
- Password – Enter your VPN password
- Click Save
- Under Network & Internet click Connect to connect to your VPN network
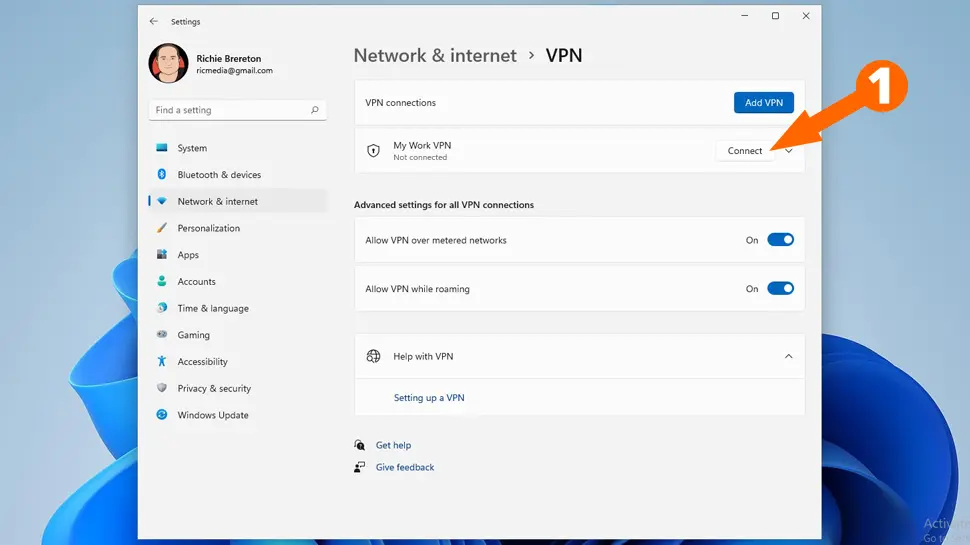
- You should now be connected to your VPN network using the PPTP protocol
Video Guide
Conclusion
Hopefully everything went well and you’re now connected to your VPN network using PPTP. If you had any issues, hit me up in the comments or socials/email.
See Also
- Connect VPN using L2TP/IPsec on Windows 11
- Connect VPN using SSTP on Windows 11
- Set up OpenVPN on Windows 11 with ExpressVPN
Comments
There are currently no comments on this article.
Comment