

In this tutorial I’ll show you how to setup auto-connect and login for OpenVPN on Windows. Making OpenVPN automatically connect on Windows startup means you’ll always be connected to a VPN, without the hassle of entering username and password.
Contents
- Prerequisites
- Install/Reinstall OpenVPN as a Service
- Configure Auto-Connect
- Reboot & Test Auto-Connect
- Troubleshooting
- Conclusion
- See Also
- Further Reading
Prerequisites
- You’ll need a VPN service that supports the OpenVPN Protocol like NordVPN, ExpressVPN or IPVanish VPN
- You’ll also need to login to your VPN service provider and find your OpenVPN credentials (username and password)
Install/Reinstall OpenVPN as a Service
You need to install OpenVPN as a service, which means if you already have it installed, you’ll need to uninstall it first (search for Control Panel, then click Uninstall a program under the Programs heading). Once you’ve done that, download the latest version and follow these steps:
- Click the
OpenVPN-2.5.7-I602-XXX.msiinstaller, then click Yes to the UAC prompt - Click the Customize button
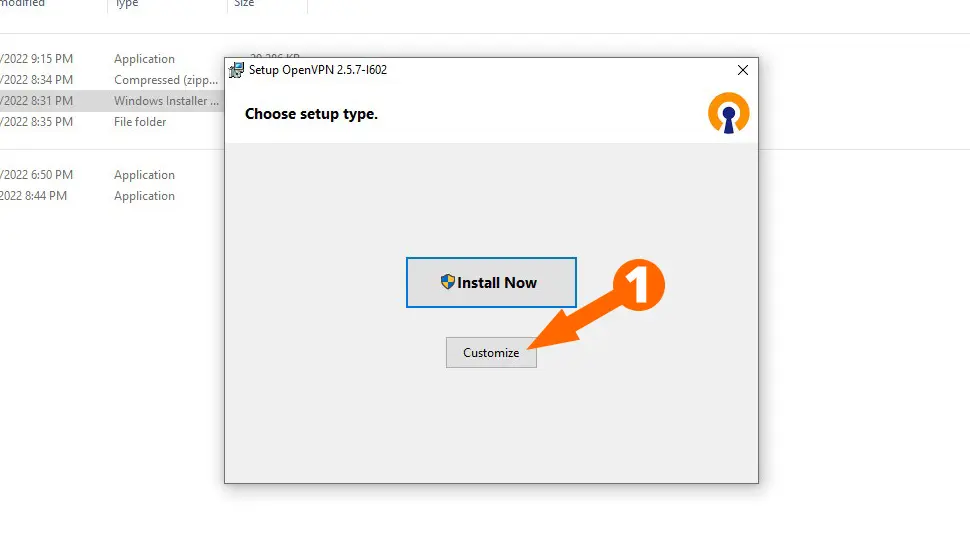
- Look for the OpenVPN Service option and select it
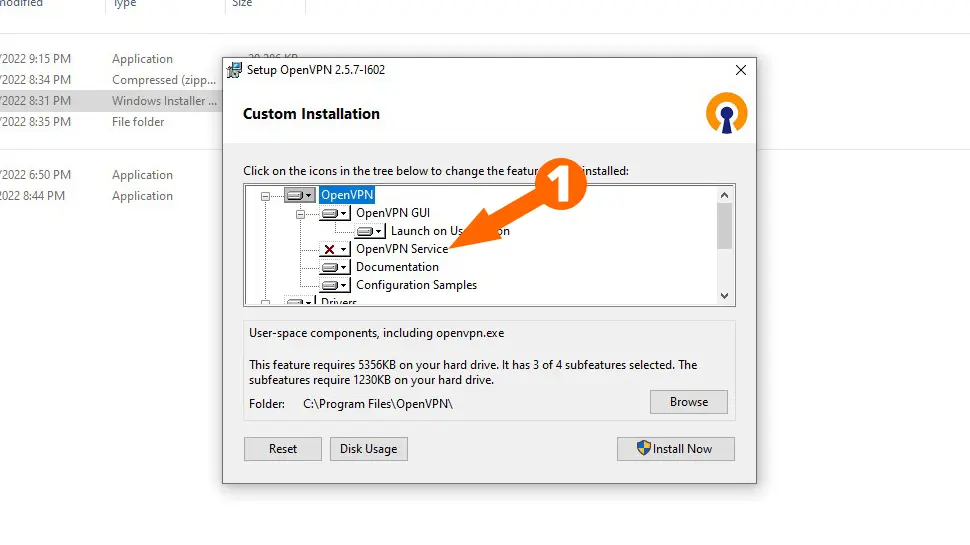
- Select the Entire feature will be installed on local hard drive option, then click the Install Now button

- Once the installer has finished, click Close
Configure Auto-Connect
You’ll need to download your VPN service providers .ovpn configuration files, and choose one as your default connection. For this tutorial, I am using BTGuard Singapore server.
Open the .ovpn configuration file with Notepad or other text editor, and add the following line at the bottom of options, but before the CA certificate:
auth-user-pass login.conf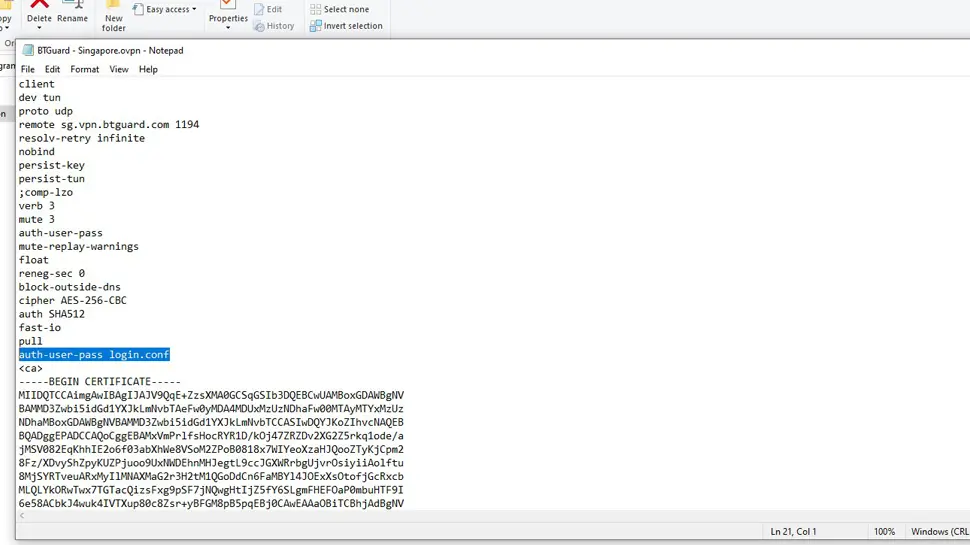
Save and close the file. Open File Explorer and navigate to the OpenVPN program directory (see below), then open the config-auto folder:
- For 32-Bit
C:\Program Files (x86)\OpenVPN\config-auto - For 64-Bit
C:\Program Files\OpenVPN\config-auto
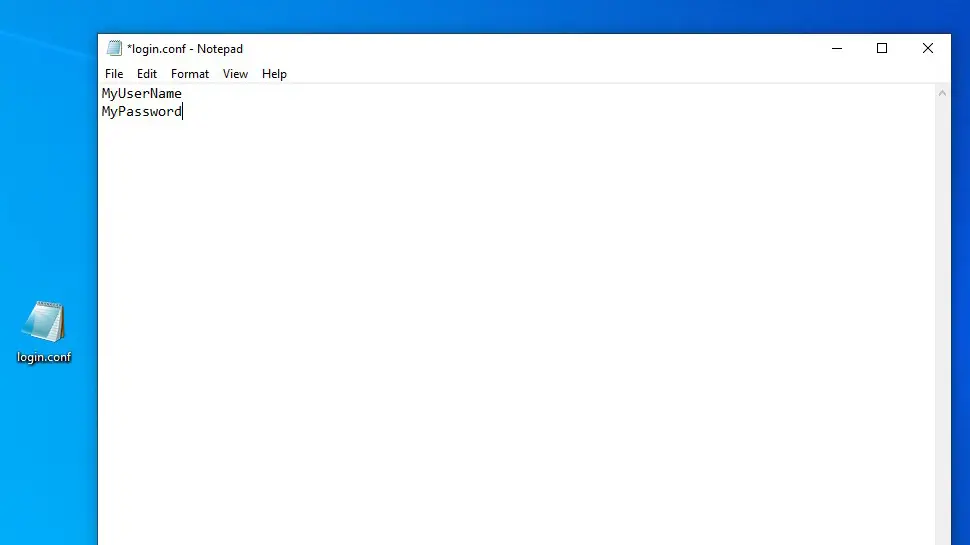
Copy and paste the .ovpn configuration file we just edited into the config-auto folder. Navigate to your Desktop, right-click and choose New -> Text Document and rename it login.conf by removing the .txt file extension (You may need to change your folder view settings to display file extensions of known file types).
Inside the text file, enter your VPN username on the first line, then your VPN password on the second line, save and close.
Copy and paste login.conf into the config-auto folder like we did previously with the .ovpn config file.
Reboot & Test Auto-Connect
Unfortunately, the OpenVPN GUI will not display the little green computer to show you’re connected because we are connecting using a hidden OpenVPN service that’s not associated with the GUI. This means the only way we can check if your connected is by checking your IP address.
So before you reboot, let’s record your real IP address by opening this page on my website: Check IP Address and write down your IP address.
Now you can reboot your PC and test the connection by checking your IP address again: Check IP Address
Troubleshooting
The best way to troubleshoot is by reading the .log file which will show you what the issue is. Log files can be located in the following locations:
- 32-bit
C:\Program Files (x86)\OpenVPN\log - 64-bit
C:\Program Files\OpenVPN\log
Conclusion
You should now have OpenVPN installed as a service that automatically connects on Windows boot. If you have any issues, see the troubleshooting section, leave a comments, or contact me on socials/email.
See Also
- IP Address Checker
- What is an IP address?
- Show hidden files & folders on Windows 11
- Set up OpenVPN on Windows 11 with ExpressVPN
Comments
There are currently no comments on this article.
Comment