
Securing your server with a free Let’s Encrypt SSL certificate will give your users a sense of security and safety, as all data to and from your website will be fully encrypted. It will also stop browser warnings like “Your connection to this site is not secure“ which is a big turn off for users. We’ll install certbot app so the certificate will automatically be updated before it expires.
This article is part of my series The Ultimate Web Server.
Contents
- Prerequisites
- Installing Certbot Package
- Allow HTTPS Through the Firewall
- Installing an SSL Certificate
- Verify Certbot is on Autorenewal
- Conclusion
- See Also
- Further Reading
Prerequisites
- An Ubuntu 22.04 cloud server setup with a non-root user and firewall with
sudoprivileges. You can set up a cloud server from DigitalOcean, Vultr or DreamHost - A LAMP package installed and setup, see my guide Installing a LAMP stack on Ubuntu 22.04
- DNS and Virtual Host setup for a registered domain name (Buy one for $0.99 cents from Namecheap), see my guide Create an Apache Virtual Host on Ubuntu 22.02
Installing Certbot Package
Certbot is a Let’s Encrypt package that will automatically update and install valid, in-date SSL certificates for your website. Let’s update the package cache first:
sudo apt updateNow let’s install Cerbot and a Python package that enables Certbot to configure Apache directives:
sudo apt install certbot python3-certbot-apacheAllow HTTPS Through the Firewall
If you followed my guide on How to install a LAMP stack on Ubuntu 22.04 I did recommend you open both ports 80 (HTTP non-secure) and port 443 (HTTPS secure). If you chose to only open port 80, you will need to also allow port 443. Lets check the options UFW firewall has:
sudo ufw status
You should see “Apache Full” and “Apache Full (v6)”. If you have only “Apache” and “Apache (v6)” then enter the following code to allow both ports 80 and 443 through the firewall:
sudo ufw allow 'Apache Full'Then delete the older rule:
sudo ufw delete allow 'Apache'If you’re following this guide as a stand alone (without the initial server setup) then you’ll need to also enable OpenSSH through the firewall and then enable it:
sudo ufw allow OpenSSHsudo ufw enableRun the Status command again:
sudo ufw statusAnd you should see this:
Installing an SSL Certificate
Now let’s install a fresh SSL certificate for your website. Initiate the Certbot package as follows:
sudo certbot --apacheCerbot will then ask you a series of questions as follows (replace my info for your own):
- Enter email address (used for urgent renewal and security notices) – me@mywebsite.com
- Please read the Terms of Service – Y
- Will you share your email address? – Y or N
- Which names would you like to activate HTTPS for? – ENTER for all
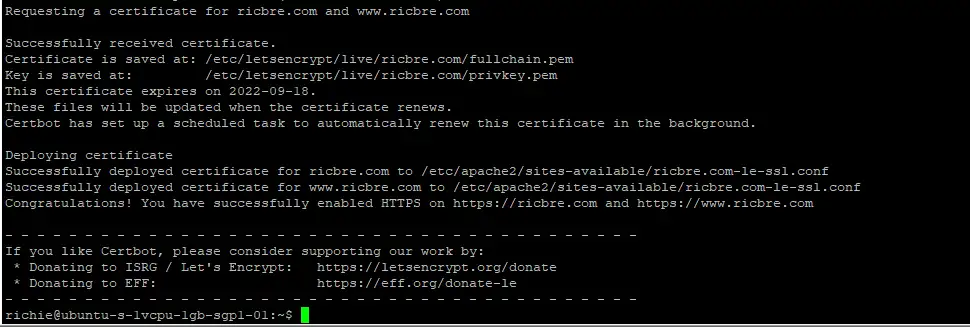
Certbot will then request SSL certificates for your domain name(s) listed. You should receive confirmation as follows (my domains is ricbre.com and www.ricbre.com):
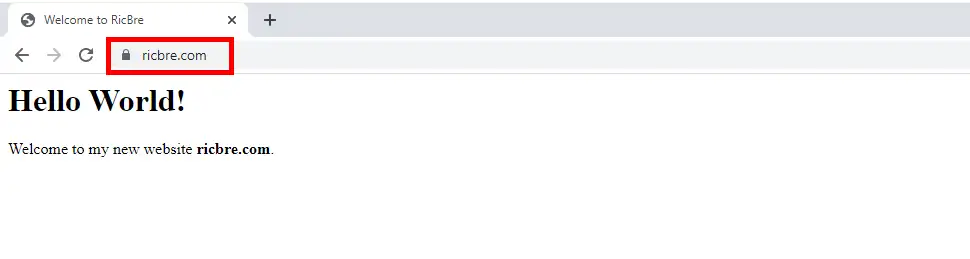
Open a new tab in your web browser and enter your domain name (in my case it’s ricbre.com). You should now see your website as HTTPS with the secure lock:
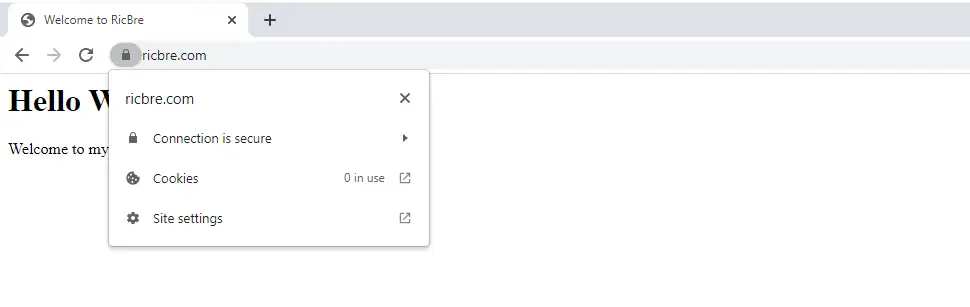
Click on the lock to see security status:
Verify Certbot is on Autorenewal
We need to make sure Certbot will auto-renew your SSL certificates every 90 days. For this we use the certbot.timer to check:
sudo systemctl status certbot.timerYou should see something similar to the following:

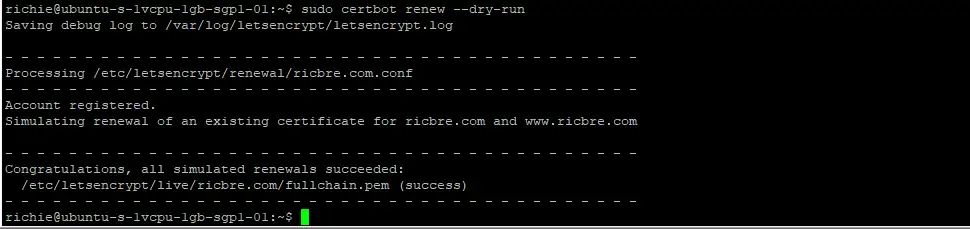
We can test the autorenewal process but doing a dry run:
sudo certbot renew --dry-runThe result should be as follows (replace domain names with your domain names):
Conclusion
I hope everything went smoothly. If not, I have included troubleshooting links below. If you’ve followed my guides for initial server setup, installing LAMP and creating a Virtual Host, then you should now have a fully fledged, secure web server. See my other guides: How to install phpMyAdmin for easy administration of MySQL databases, and how to install WordPress on your Apache web server.
See Also
- Initial server set up on Ubuntu 22.04 cloud instance
- How to install LAMP stack on Ubuntu 22.04
- How to configure Apache Virtual Hosts on Ubuntu 22.04
- How to enable HTTP/2 on Ubuntu 22.04 LAMP stack
- How to install phpMyAdmin on Ubuntu 22.04 LAMP stack
- How to secure an Ubuntu 22.04 LAMP Stack
- How to install WordPress on Ubuntu 22.04 LAMP stack
Comments
There are currently no comments on this article.
Comment