
Today I’ll show you how to install a “LAMP” stack on Ubuntu 22.04 server. LAMP is an acronym for Linux, Apache, MySQL, and PHP, which are a set of open-source software for hosting websites written in HTML, SHTML and PHP. LAMP stacks are the most common software combination for hosting websites. There are alternatives like LEMP, which replaces Apache with Ngnix web server.
Some more information about each package:
- Linux – In this case we’re using Ubuntu 22.04, but other popular OSes for LAMP stacks are Debian, Fedora and CentOS
- Apache – The most popular web server software in the world. Apache is the engine that serves pages to your web browser
- MySQL – A popular database software distribution for storing almost any kind of data (i.e. WordPress data)
- PHP – A programming language to create dynamic “on the fly” web pages from templates and databases
This article is part of my series The Ultimate Web Server.
Contents
- Prerequisites
- Installing Apache and Configuring the Firewall
- Install MySQL
- Install PHP
- Conclusion
- See Also
- Further Reading
Prerequisites
You will need a cloud server (DigitalOcean, Vultr or DreamHost) with a non-root user and firewall configured. See my guide on Initial server set up.
Installing Apache and Configuring the Firewall
Before we install Apache web server, we need to make sure Ubuntu is up-to-date. Let’s run apt to update the cache and upgrade any packages:
sudo apt update && sudo apt upgrade -yThen reboot:
sudo rebootOnce your server reboots, log in as your non-root user and install the Apache web server software using the apt package manager:
sudo apt install apache2 -yBefore we configure the firewall, let’s disable it:
sudo ufw disableThen allow Apache through the UFW firewall (Ports 80 and 443). Let’s see what options we have:
sudo ufw app list
Each profile/option has a different meaning:
- To allow only port 80 (unsecure) use “Apache”.
- To allow only port 443 (secure SSL/HTTPS) use “Apache Secure”.
- To allow both port 80 and port 443 use “Apache Full” which is the option we will use (recommended):
sudo ufw allow in "Apache Full"Then enable the UFW firewall:
sudo ufw enableAnd verify the changes:
sudo ufw status
We need to find your servers IP address (if you already know it, skip this section). To find your servers IP we use the ip command:
ip address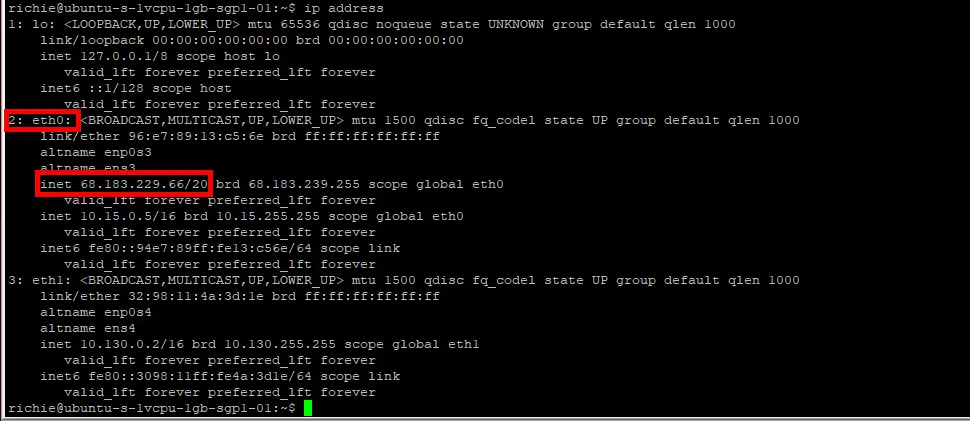
Usually your IP address will be under the eth0 interface as highlighted in red. In my case it’s 68.183.229.66.
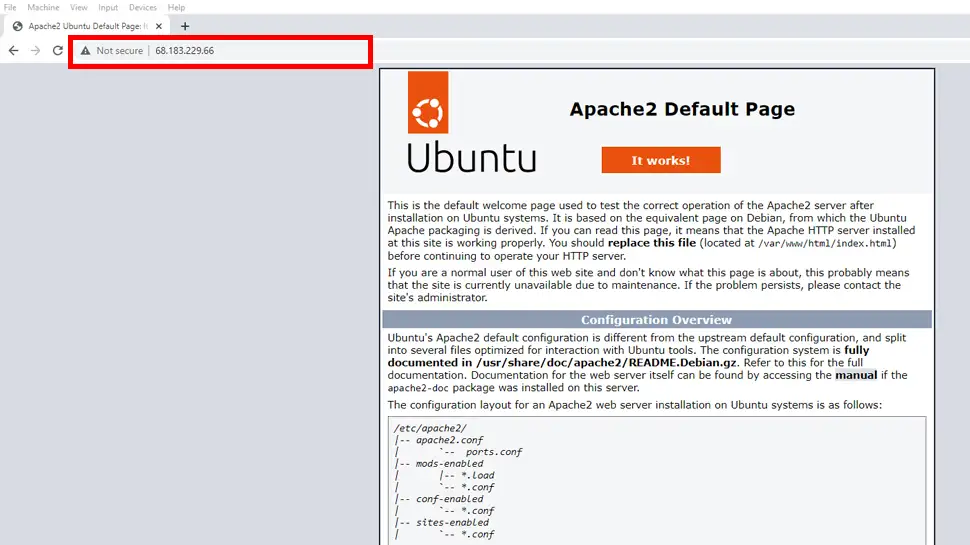
To check everything went well, enter the IP address of your server into your web browser address bar. You should see the default Apache “It Works!” page:
Install MySQL
Now let’s install MySQL database software. We use the apt package manager to do this:
sudo apt install mysql-server -yAfter MySQL has finished installing, we need to set the root password to avoid the following error during the mysql_secure_installation script:
Failed! Error: SET PASSWORD has no significance for user ‘root’@‘localhost’ as the authentication
method used doesn’t store authentication data in the MySQL server. Please consider using
ALTER USER instead if you want to change authentication parameters.
login to MySQL and use your Ubuntu sudo root password:
sudo mysql -uroot -pThen we set the MySQL root password (replace mynewpassword with your chosen password):
ALTER USER 'root'@'localhost' IDENTIFIED WITH mysql_native_password by 'mynewpassword';Then exit MySQL:
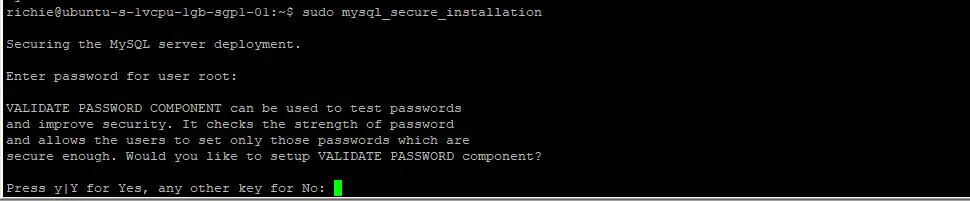
exit;Now we can run the installation security script to secure MySQL with this command:
sudo mysql_secure_installationYou will presented with the Validate Password Component first. This component can enforce strong passwords for all MySQL users. I usually choose to disable this in testing mode, but if you’re planning on using your server for a production environment, definitely enable it. If you do enable it, you’ll need to choose from three different levels of password complexity: low, medium and strong.
I suggest answering the questions as follows:
- VALIDATE PASSWORD COMPONENT – N or Y
- Change the password for root ? – N
- Remove anonymous users? – Y
- Disallow root login remotely? – Y
- Remove test database and access to it? – Y
- Reload privilege tables now? – Y
Install PHP
Now let’s install the PHP package with only the required modules (I will give you some options for common packages further below). We install PHP using the apt package manager again:
sudo apt install php libapache2-mod-php php-mysql -yLet’s make sure PHP was installed:
php -vYou should see something similar to this:

Optional PHP Packages
There a hundreds of PHP packages available. These are packages I recommend you install:
sudo apt install -y php-{common,mail,mysql,xml,xmlrpc,curl,gd,imagick,cli,dev,imap,mbstring,opcache,soap,zip,intl}Check PHP Modules (Optional)
If you want to see what PHP modules and extensions are installed or enabled on your server, we use the phpinfo(); code inside a regular PHP page.
sudo nano /var/www/html/info.phpThen copy and paste this code inside the new PHP page:
<?php

phpinfo();

?>
Then save ctrl + o, ENTER and exit nano ctrl + x.
Now we need to change ownership of the new file:
sudo chown -R www-data:www-data /var/www/htmlEnter the IP address of your server in your web browser address bar with the new page (info.php) appended to it (in my case it’s: 68.183.229.66/info.php) and you should see the automatically generated PHP information page:
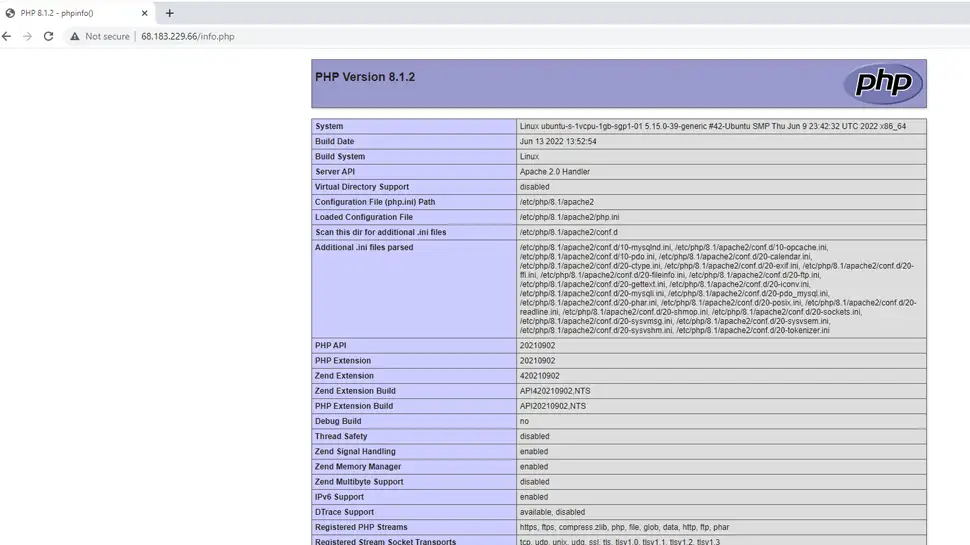
Make sure you delete the info.php file so nobody can see your servers sensitive information:
sudo rm -rf /var/www/html/info.phpConclusion
Now you have a full LAMP stack server. See my other guides on installing a Let’s Encrypt SSL certificate, creating an Apache Virtual Host environment, installing WordPress, or installing phpMyAdmin. If you have any questions, hit me up on socials/email or comments.
See Also
- Initial server set up on Ubuntu 22.04 cloud instance
- How to configure Apache Virtual Hosts on Ubuntu 22.04
- How to install a free Let’s Encrypt SSL certificate on Ubuntu 22.04 LAMP stack
- How to enable HTTP/2 on Ubuntu 22.04 LAMP stack
- How to install phpMyAdmin on Ubuntu 22.04 LAMP stack
- How to secure an Ubuntu 22.04 LAMP Stack
- How to install WordPress on Ubuntu 22.04 LAMP stack
Comments
There are currently no comments on this article.
Comment