
Today I’ll show you how to set custom DNS servers on macOS, which can improve network performance, increase security, and even thwart some websites using Geo-blocking.
Contents
- Free DNS Providers
- Set Custom DNS Servers on macOS
- Video: Set custom DNS servers on macOS
- Conclusion
- See Also
- Further Reading
Free DNS Providers
Before changing DNS servers you’ll need to find a third-party DNS provider, there are plenty of good (and free) services available too. I recommend Google DNS which is what I use and have never had an issue. I will list here the most popular DNS providers:
- Primary IPv4: 8.8.8.8
- Secondary IPv4: 8.8.4.4
- Preferred IPv6: 2001:4860:4860::8888
- Alternate IPv6: 2001:4860:4860::8844
OPENDNS
- Primary: 208.67.222.222
- Secondary: 208.67.220.220
- Preferred IPv6: 2620:0:ccc::2
- Alternate IPv6: 2620:0:ccd::2
DNS.WATCH
- Primary: 84.200.69.80
- Secondary: 84.200.70.40
LEVEL3
- Primary: 209.244.0.3
- Secondary: 209.244.0.4
NORTON
- Primary: 199.85.126.10
- Secondary: 199.85.127.10
COMMODO
- Primary: 8.26.56.26
- Secondary: 8.20.247.20
VERISIGN
- Primary: 64.6.64.6
- Secondary: 64.6.65.6
MORE SERVERS
Set Custom DNS Servers on macOS
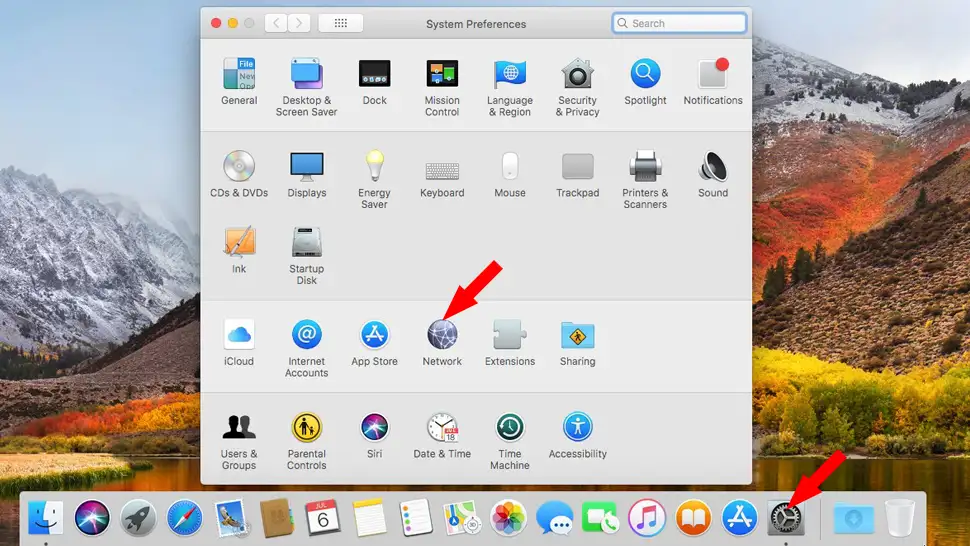
- Click System Preferences, then Network
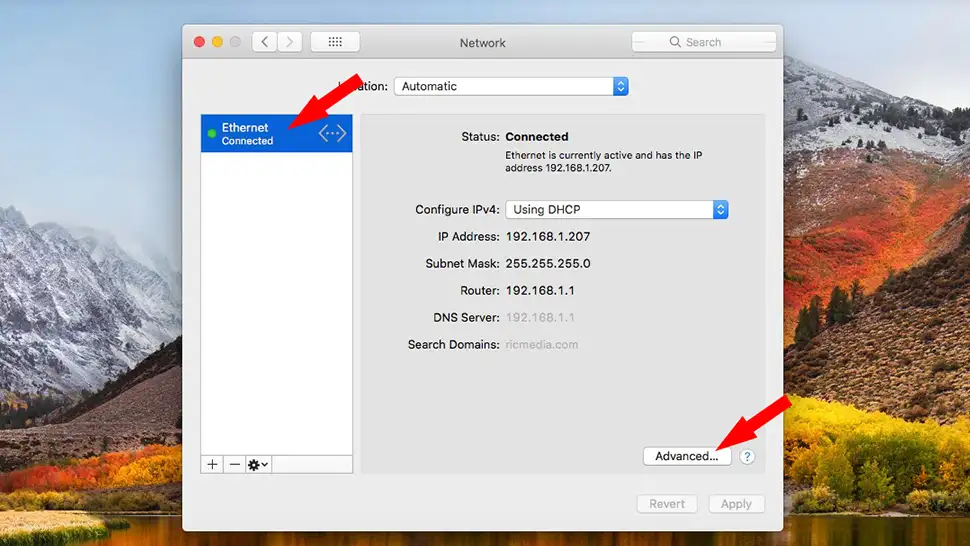
- Select your connection (wired or wireless) then click the Advanced… button
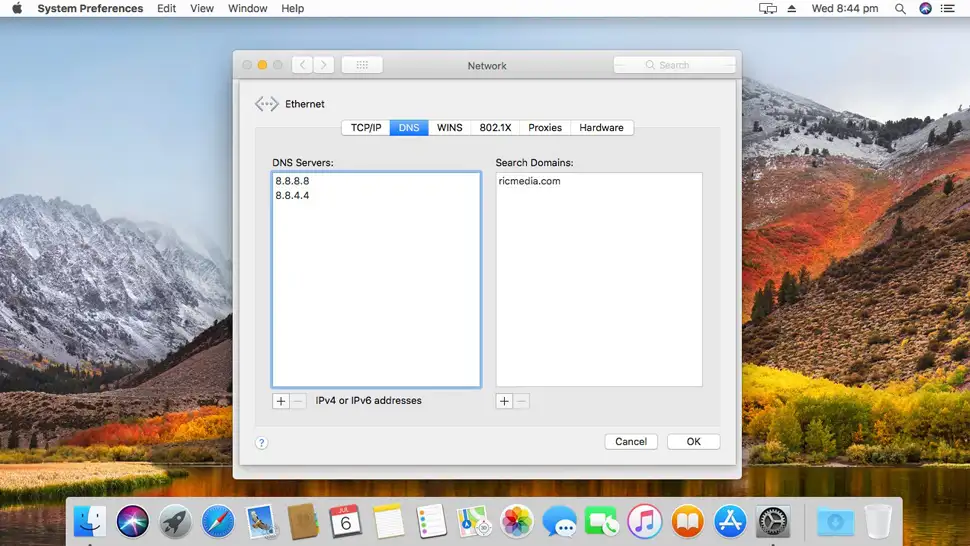
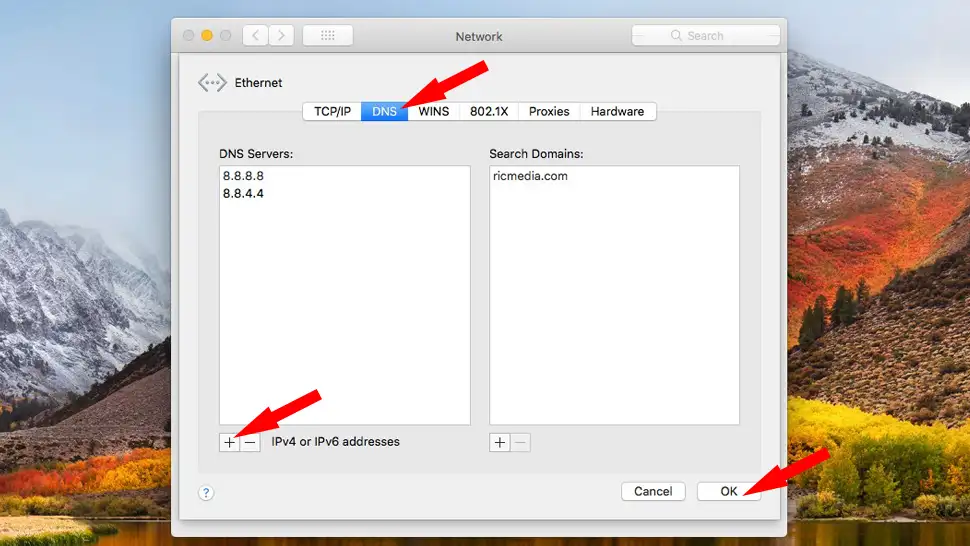
- Click the DNS tab, then click the plus icon + to add a DNS server, enter the Primary DNS IP address, then Secondary DNS IP address, then click OK to close, then click Apply
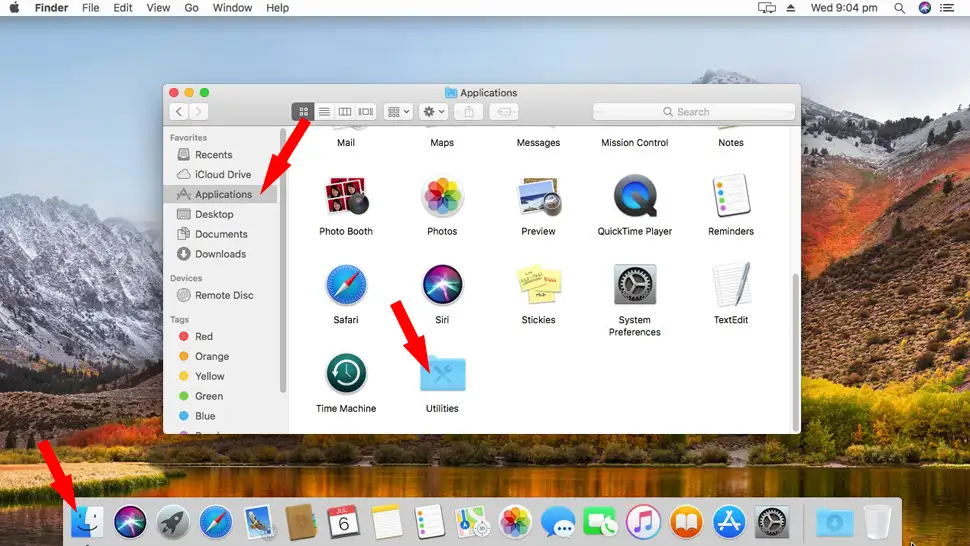
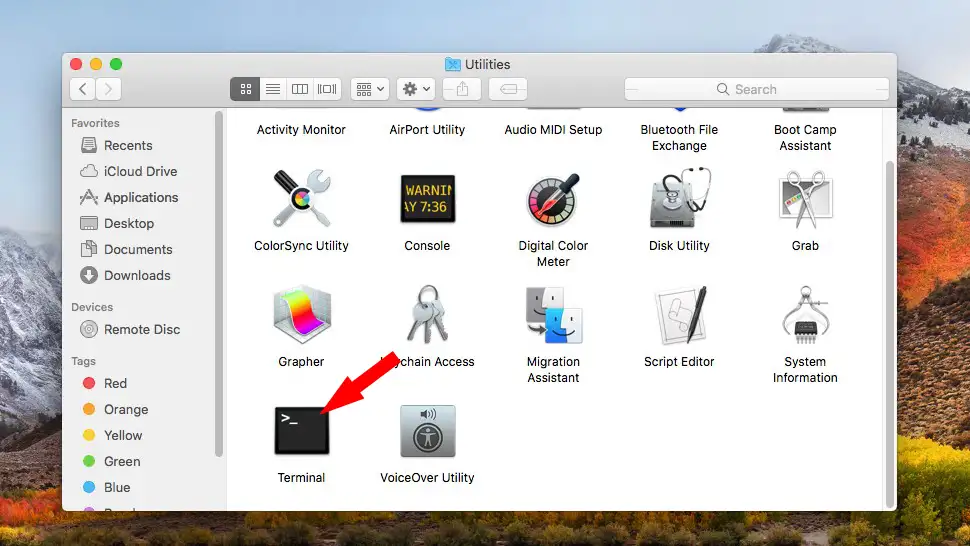
- Open Finder and click Applications, then Utilities
- Click the Terminal application icon
- Enter the following code, one line at a time:
sudo dscacheutil -flushcache;
sudo killall -HUP mDNSResponder; say Success
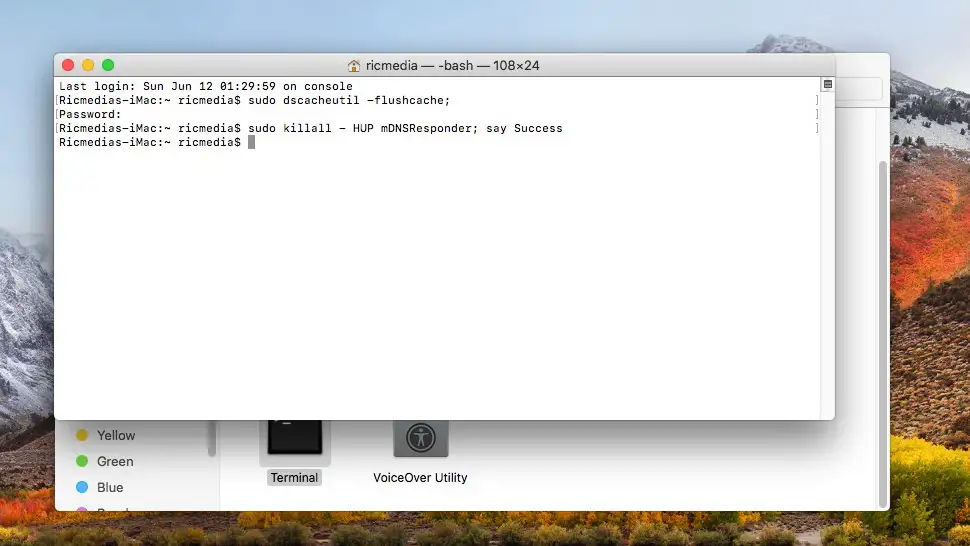
- Close the Terminal application and you’re all done.
Video: Set custom DNS servers on macOS
Conclusion
I hope everything went smoothly for you and you now have custom DNS servers on your Mac. If you did have any trouble, hit me up in the comments or socials/email.
Comments
There are currently no comments on this article.
Comment