
Today I’ll show you how to set custom DNS servers on Windows 11 and enable DNS encryption (DNS over HTTPS or DoH) if your provider supports it, to increase security and privacy. Let’s get started.
Contents
- Recommended Books
- Free DNS Providers
- Set custom DNS servers on Windows 11
- Video Guide
- Conclusion
- See Also
- Further Reading
Recommended Books
I can highly recommend these books to help you learn more about Windows 10/11.
Free DNS Providers
Before changing DNS servers, you’ll need to find a third-party DNS provider. There are plenty of good (and free) services available, and I recommend Google DNS which is what I use and have never had an issue. I will list here the most popular DNS providers:
GOOGLE (Supports DoH encryption)
- Primary IPv4: 8.8.8.8
- Secondary IPv4: 8.8.4.4
- Preferred IPv6: 2001:4860:4860::8888
- Alternate IPv6: 2001:4860:4860::8844
OPENDNS (Supports DoH encryption)
- Primary: 208.67.222.222
- Secondary: 208.67.220.220
- Preferred IPv6: 2620:0:ccc::2
- Alternate IPv6: 2620:0:ccd::2
DNS.WATCH
- Primary: 84.200.69.80
- Secondary: 84.200.70.40
COMODO (Supports DoH encryption as a paid service)
- Primary: 8.26.56.26
- Secondary: 8.20.247.20
VERISIGN (Supports DoH encryption)
- Primary: 64.6.64.6
- Secondary: 64.6.65.6
MORE SERVERS
Set custom DNS servers on Windows 11
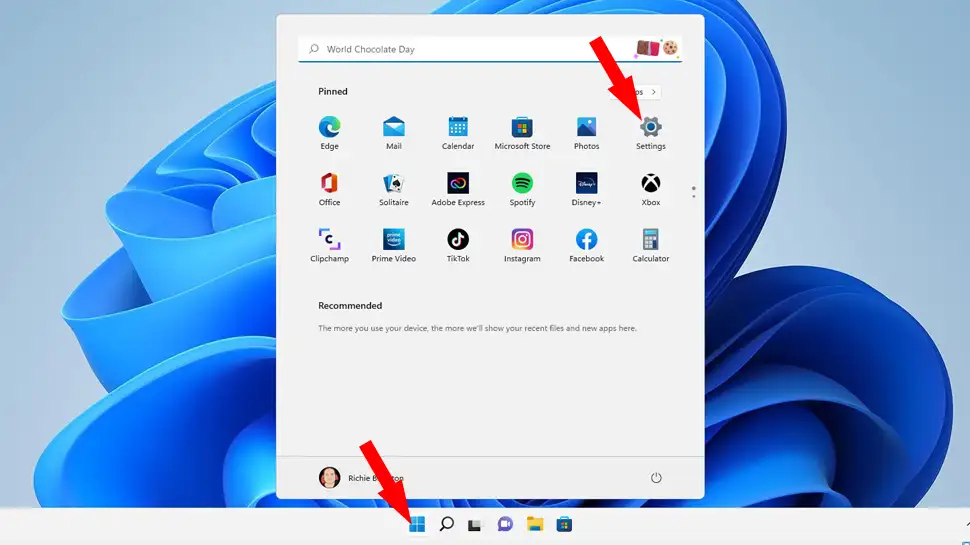
- Click Start , then Settings
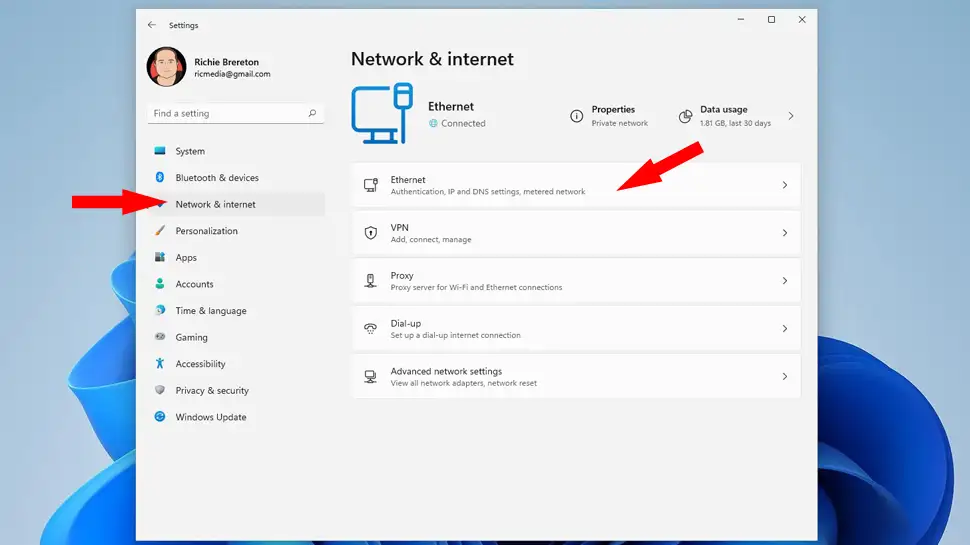
- Select Network & Internet from side-menu, then click either Ethernet or Wireless depending on how your computer connects to the Internet (if you use both, you will need to repeat this entire process for each connection)
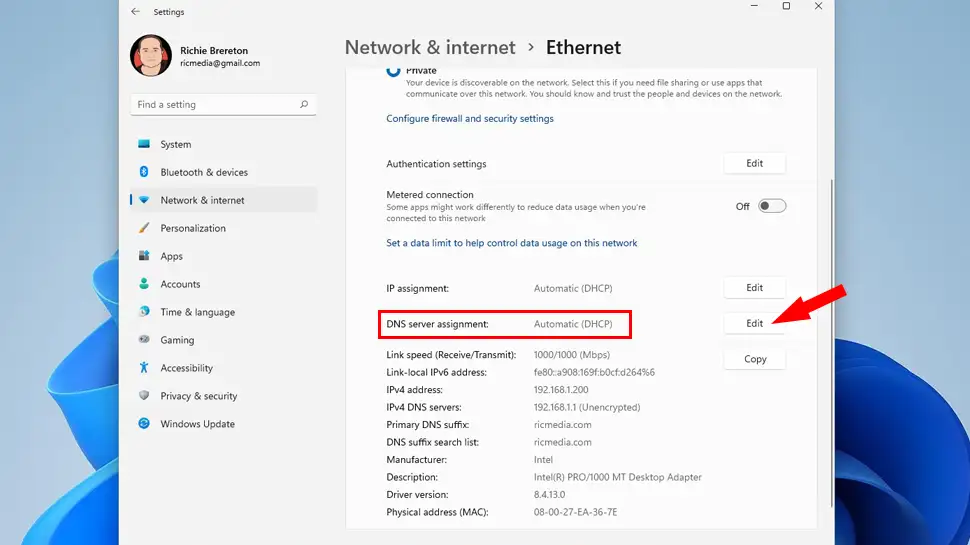
- Under DNS server assignment click the Edit button
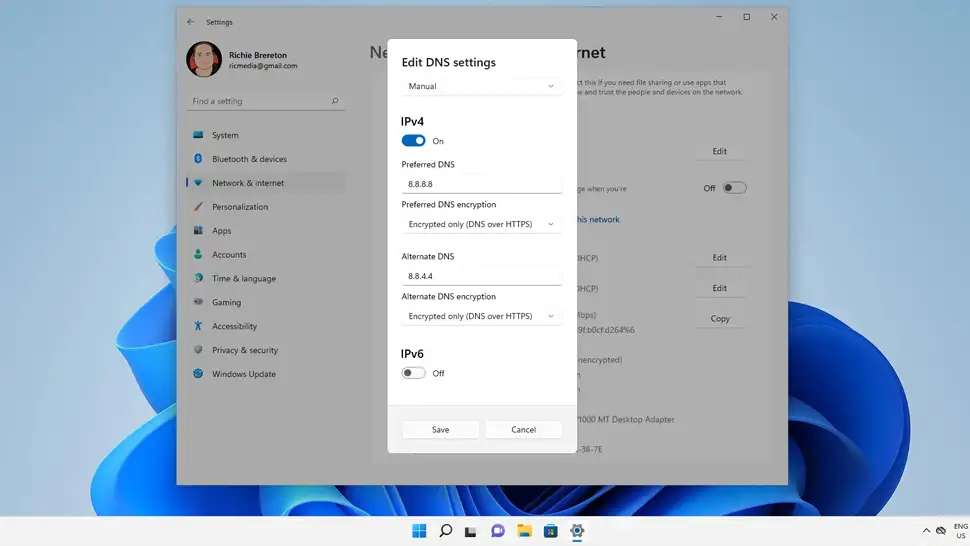
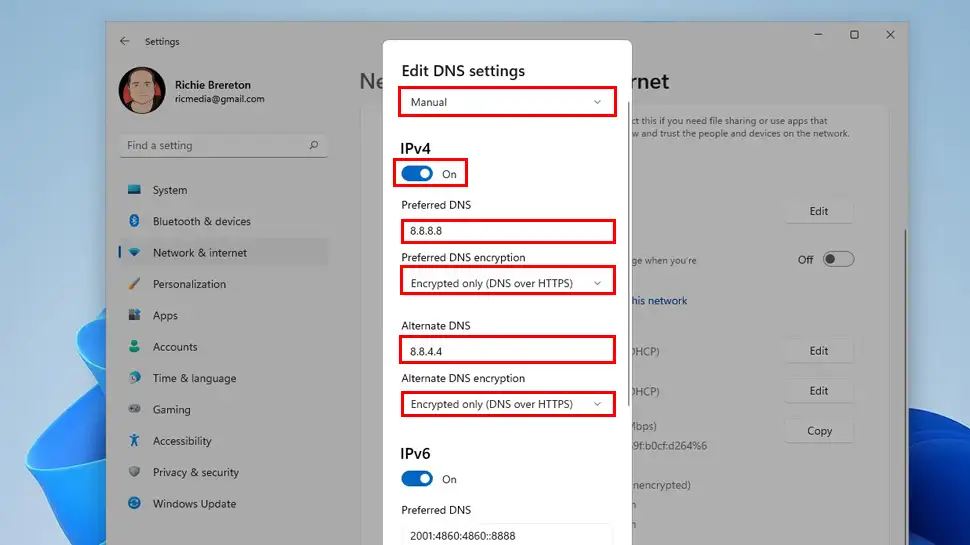
- Change Automatic (DHCP) to Manual, toggle IPv4 to on, then enter IPv4 IP address (i.e. 8.8.8.8). Choose Encrypted only (DNS over HTTPS) if your provider supports it. Repeat this process for Alternate DNS
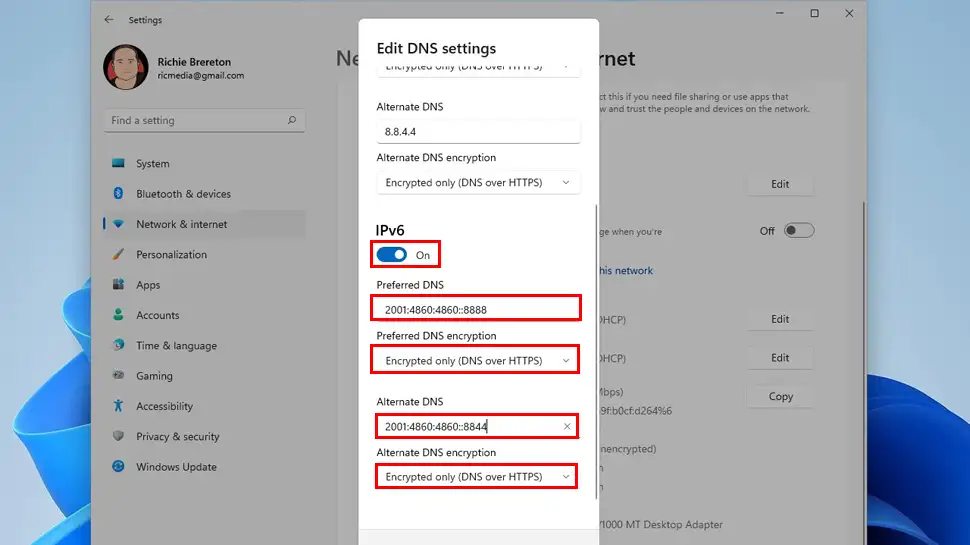
- Toggle IPv6 to on, then enter an IPv6 IP address (i.e. 2001:4860:4860::8888). Choose Encrypted only (DNS over HTTPS) if your provider supports it. Repeat this process for Alternate DNS, and click Save
- After clicking Save, confirm the changes by viewing the new settings.
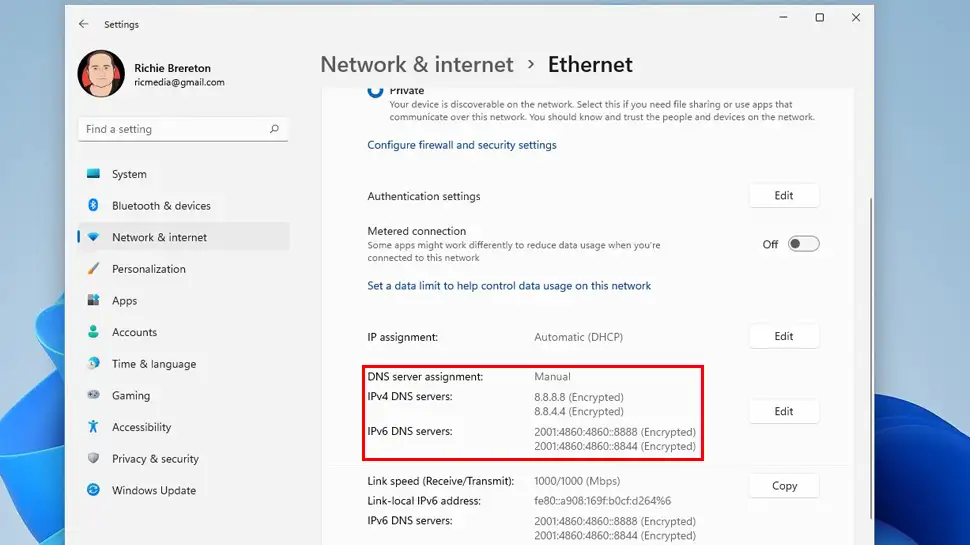
- Your Internet connection will now use your chosen DNS IP addresses.
Video Guide
Conclusion
Hopefully everything went smoothly for you and you’re now using safe and secure DNS. If you had any issues, hit me up in the comments or socials/email.
Comments
There are currently no comments on this article.
Comment