
Today I’ll show you how to connect a Windows 11 PC to a VPN using the L2TP/IPsec protocol (Layer-2 Tunneling Protocol). Most VPN service providers like ExpressVPN support L2TP/IPsec.
Contents
- Recommended Books
- Prerequisites
- Connect VPN using L2TP/IPsec
- Video Guide
- Conclusion
- See Also
- Further Reading
Recommended Books
I can highly recommend these books to help you learn more about Windows 10/11.
Prerequisites
You will need the following information from your VPN service provider, or network administrator:
- Your VPN username
- Your VPN password
- The server name or IP address (i.e. contoso.com or 102.562.243.12)
- The pre-shared key PSK (PSK will be a series of characters like a password)
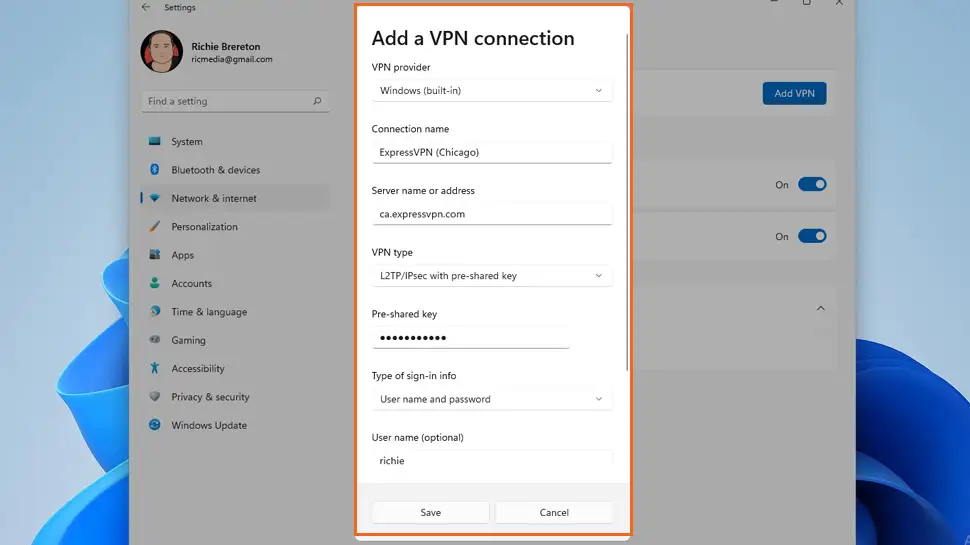
Connect VPN using L2TP/IPsec
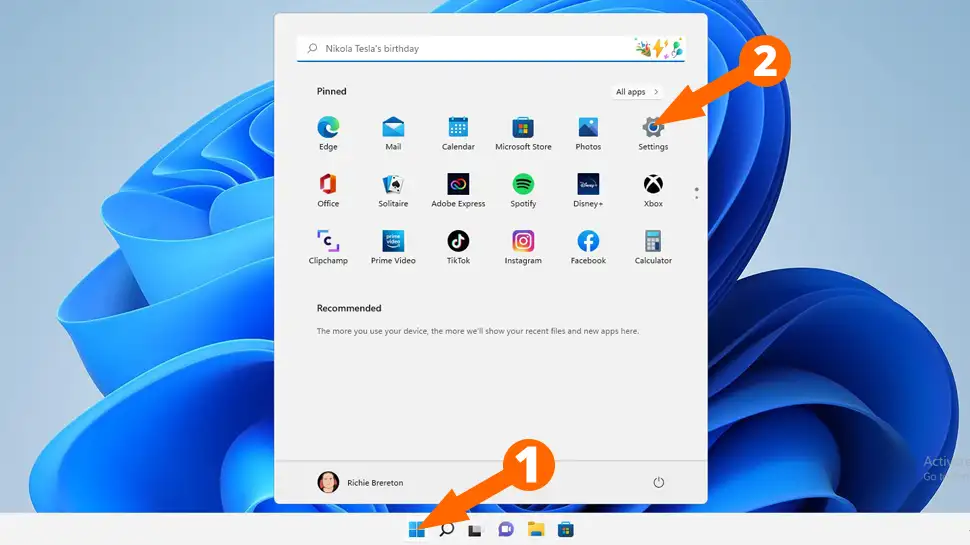
- Click Start, then Settings
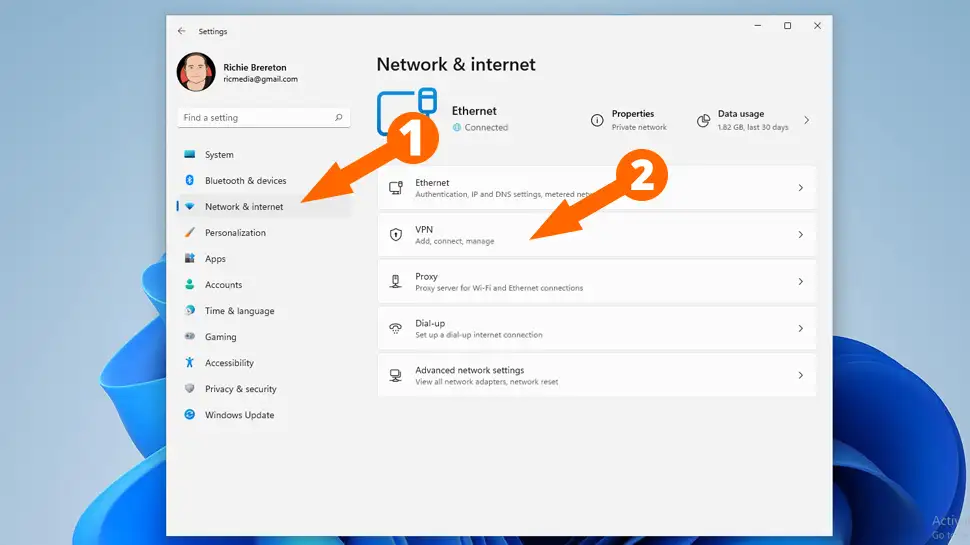
- Click Network & Internet, then VPN
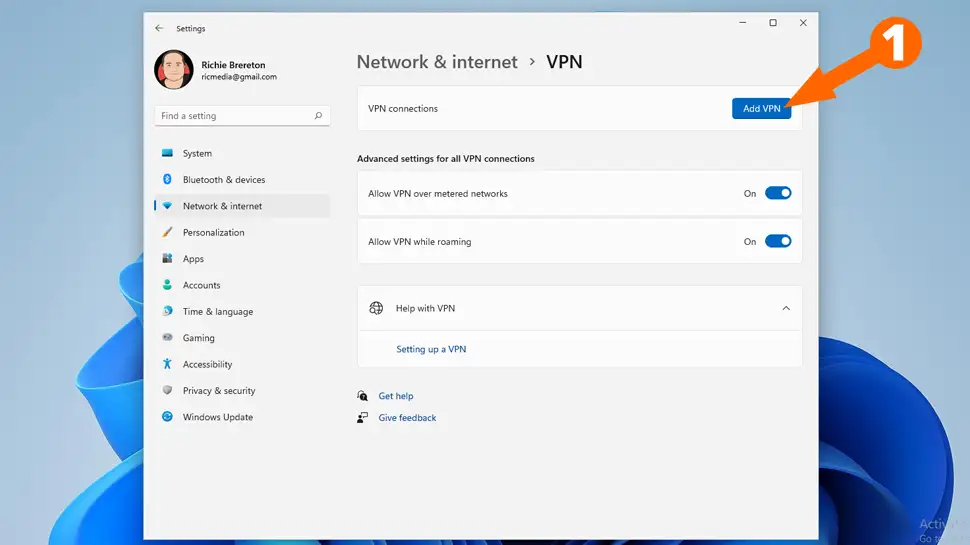
- Click Add VPN
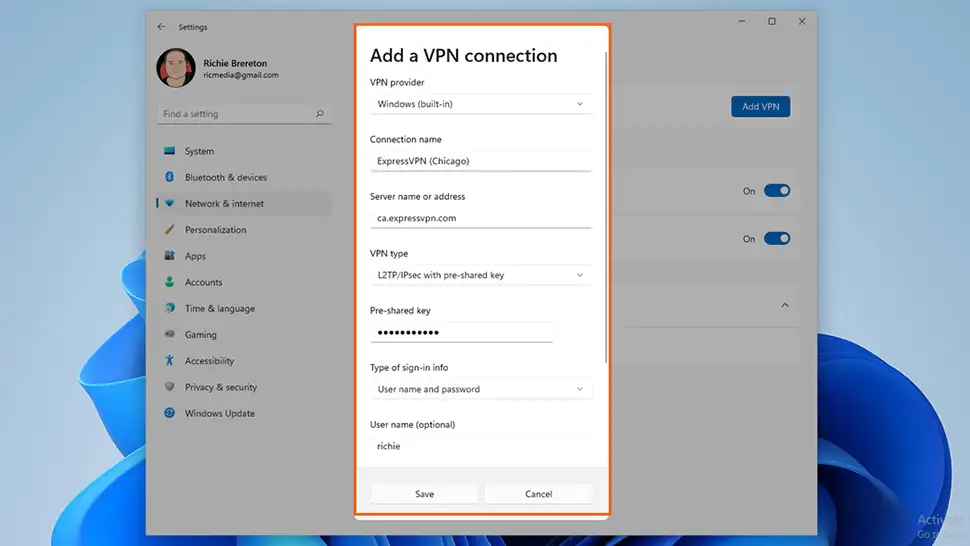
- Enter your details as follows:
- VPN Provider – Windows built-in
- Connection name – e.g. ExpressVPN (Chicago)
- Server name or address – name: ca.expressvpn.com OR ip address: 123.456.678.9
- VPN Type – L2TP/IPsec with pre-shared key
- Pre-shared key – [enter your PSK]
- Type of sign-in info – User name and password
- User name – [enter username]
- Password – [enter password]
- Remember my sign in info? [check yes]
- Click Network & Internet -> VPN -> Connect
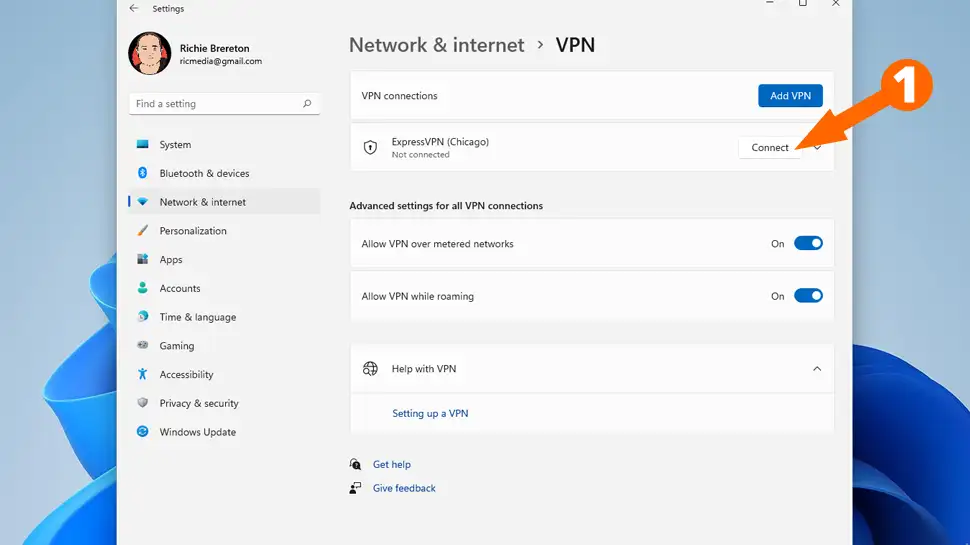
- You should now be connected to your VPN network.
Video Guide
Conclusion
Hopefully you now have an L2TP/IPsec all set up to secure your network. Remember, ExpressVPN supports L2TP/IPsec and they’re very affordable too.
See Also
- Set up OpenVPN on Windows 11 with ExpressVPN
- Connect VPN using SSTP on Windows 11
- Connect VPN using PPTP on Windows 11
Comments
There are currently no comments on this article.
Comment