

In this tutorial I’ll show you how to separate Windows system files from personal data. I am a big advocate of separating personal data from system files as it’s almost always your system drive that will die from a virus, malware, or simply failing due to age or usage.
What I’ll show you in this guide is how to move the default location of your personal folders (Documents, Pictures, Video, etc.) so that the Windows system will automatically save files on your data drive, rather than your system drive. I’ll also show you how to move your Dropbox default location too.
Contents
- Recommended Books
- Prerequisites
- Move Windows Personal Folders Default Location
- Move Dropbox Default Location
- Conclusion
- See Also
- Further Reading
Recommended Books
I can highly recommend these books to help you learn more about Windows 10/11.
- Windows 11 For Dummies
- Windows 10 For Dummies
- Windows 11 Bible
- Teach Yourself VISUALLY Windows 10
- The Windows Command Line Beginner’s Guide – Second Edition
Prerequisites
You’ll need either an additional hard drive (data drive) installed and formatted, or a separate partition on your Windows system drive
Move Windows Personal Folders Default Location
- Open File Explorer and copy/paste this code:
%USERPROFILE%into the location bar and hit ENTER

- Open another File Explorer window by right-clicking on the Folder taskbar icon, then choose File Explorer
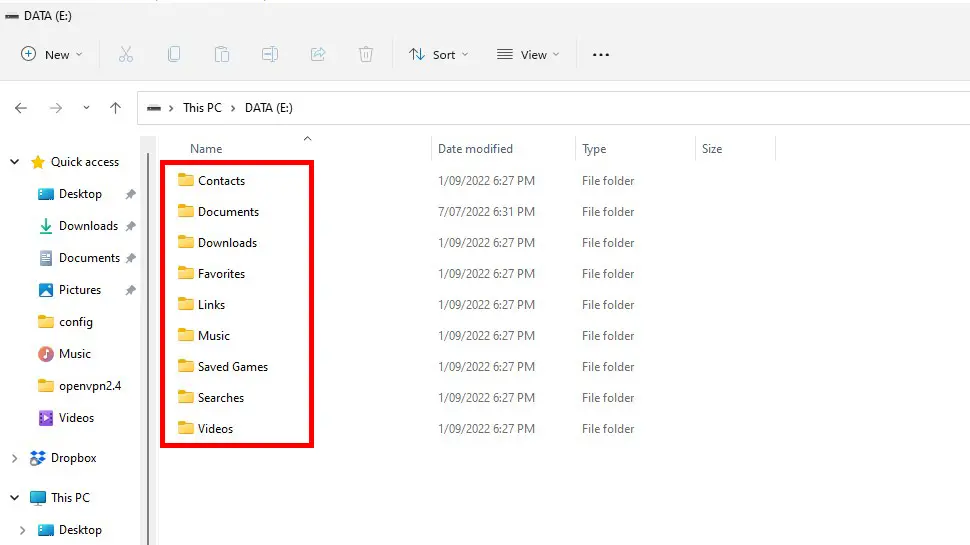
- Click on your DATA drive or partition, then create the following folders:
- Contacts, Documents, Downloads, Favorites, Links, Music, Saved Games, Searches, Videos
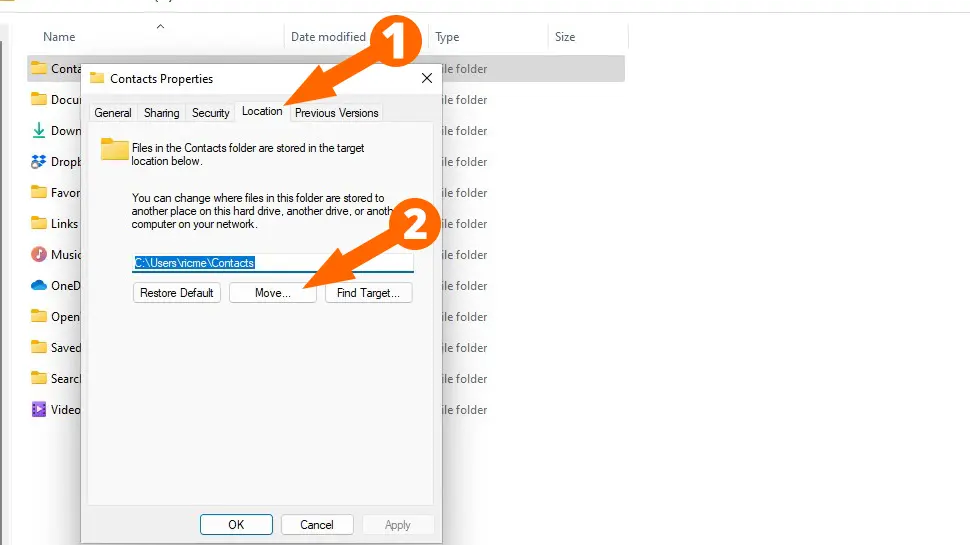
- Go back to your
%USERPROFILE%window we setup earlier - Right-click on the Contacts folder, choose Properties, select the Location tab, then click the Move button
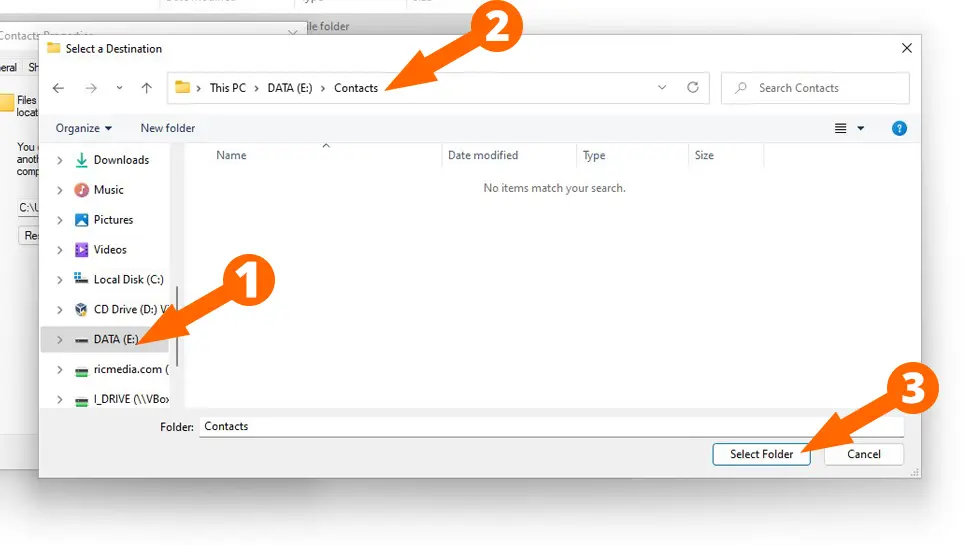
- Navigate to your DATA drive, then enter your new Contacts folder and click Select
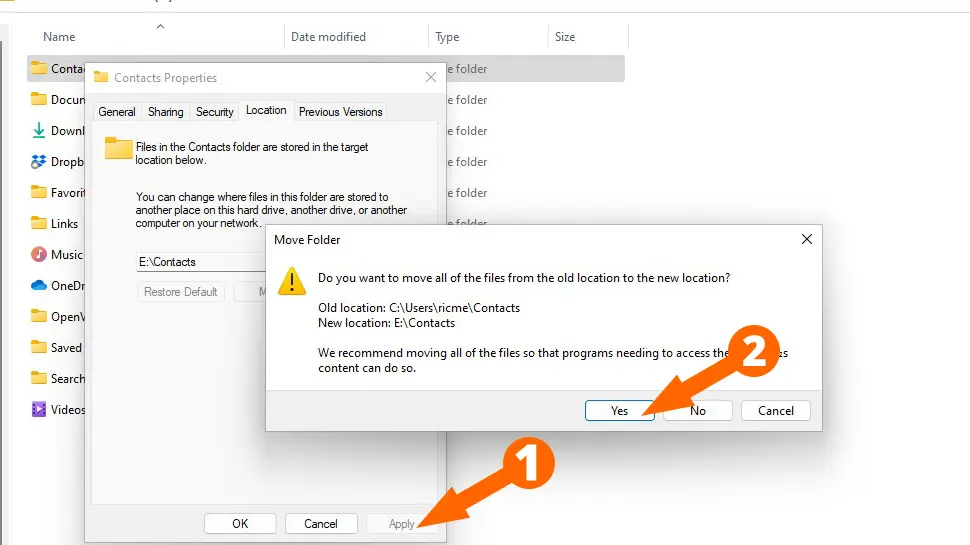
- Click Apply then Yes to the Windows alert box to move your existing files and folders to the new location
- Repeat this process for all the folders on the list
Move Dropbox Default Location
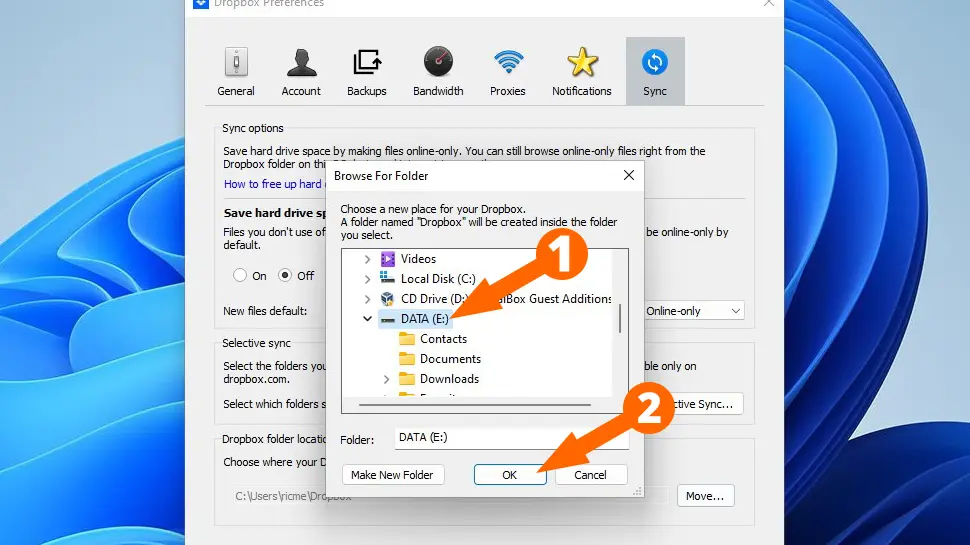
Dropbox can easily fill up your system drive so it’s a good idea to move it too. Just a tip: do not create a new Dropbox folder on your DATA drive, Dropbox will automatically create it for you when you select your DATA drive.
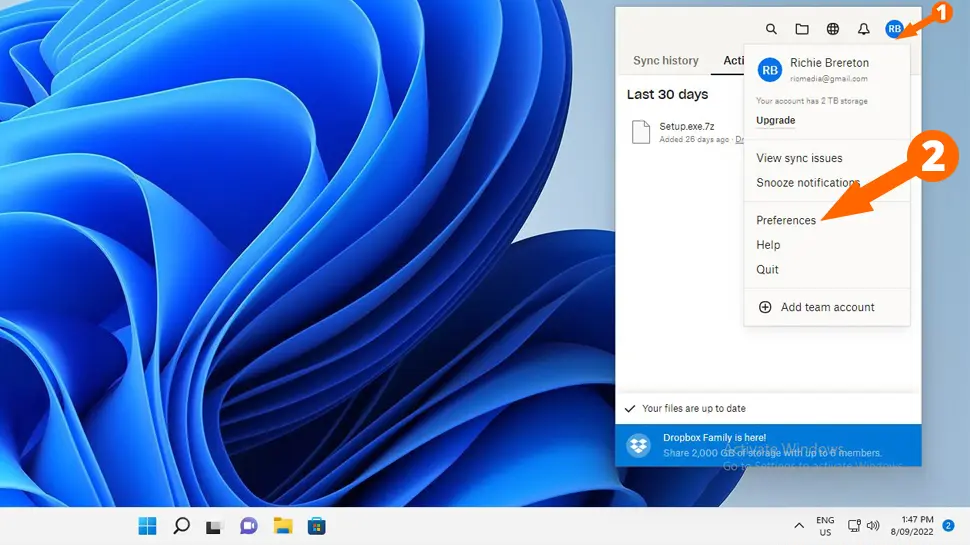
- Open Dropbox preferences by right-clicking on the notification icon bottom-right of your screen (you may need to click the small arrow icon to reveal it)
- Click on your initials (in my case it’s RB), then click Preferences
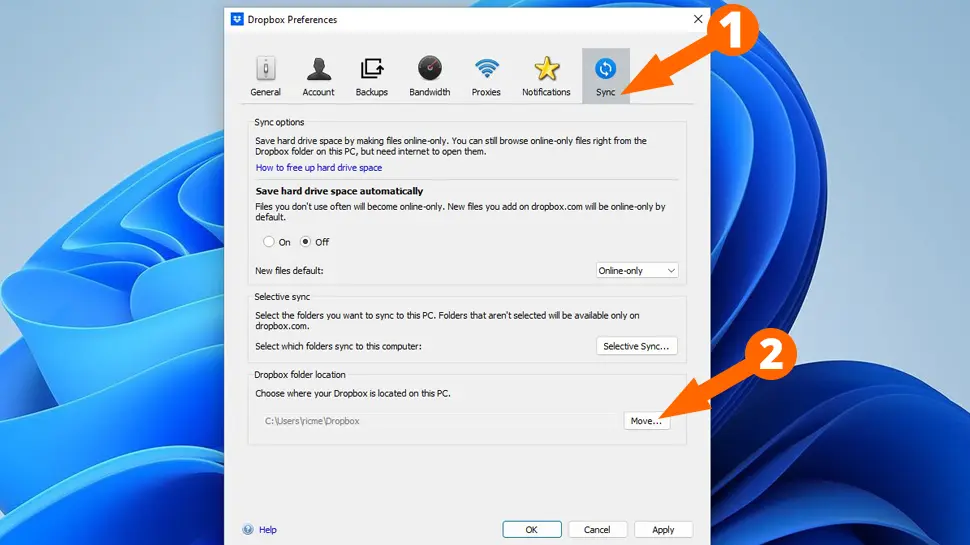
- Click the Sync icon, then click the Move button under the Dropbox folder location heading
- Navigate to your DATA drive and select it (do not create a new folder), then click OK
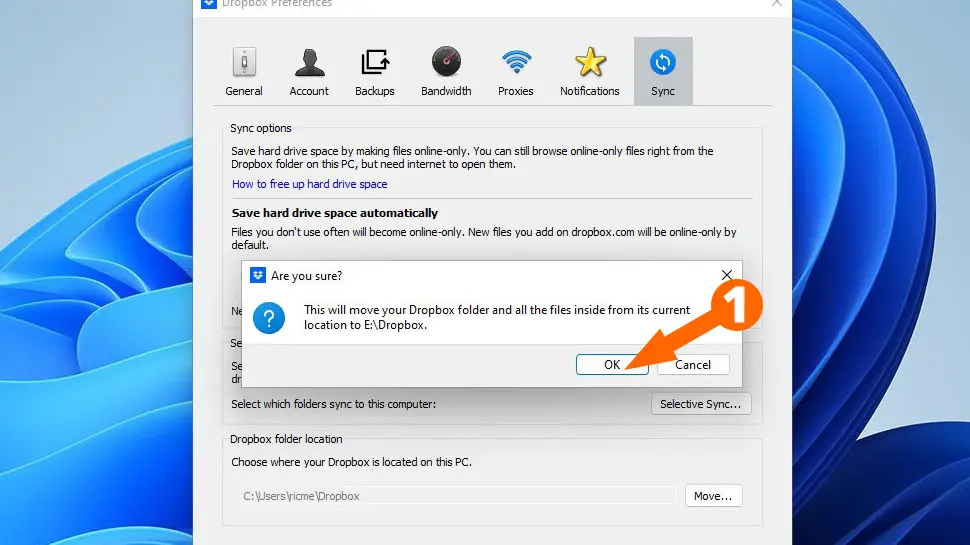
- Click OK to the alert box and move your existing files and folders to the new location
Conclusion
You should now have separate Windows system files from personal data which gives your far more data security in the event of a system failure. Even if you couldn’t use an additional hard drive, a separate partition is better than nothing. If you had any issues or need to ask a question, leave a comment below or contact me via socials/email.
See Also
- How to Service a Windows PC like a Pro
- Show hidden files & folders on Windows 11
- How to defragment hard drive on Windows 11
- How to change your default web browser in Windows 11
Comments
There are currently no comments on this article.
Comment